 1
1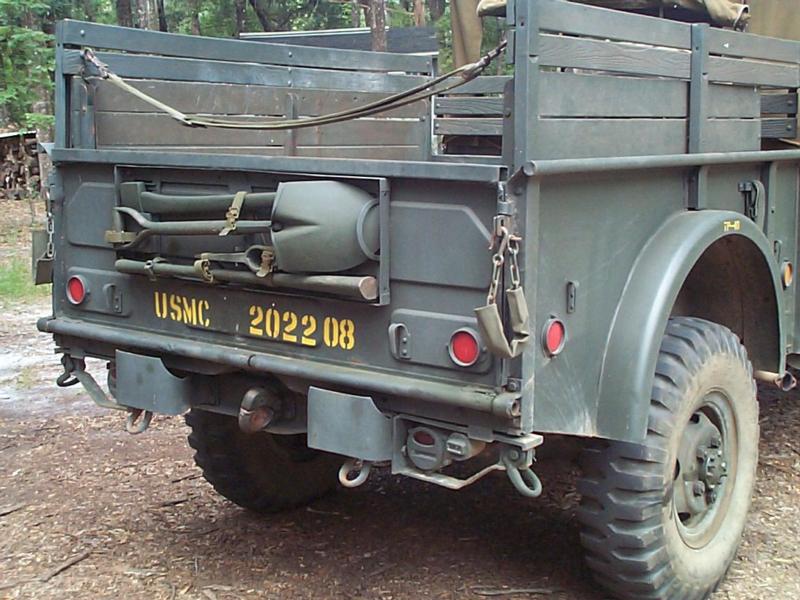 2
2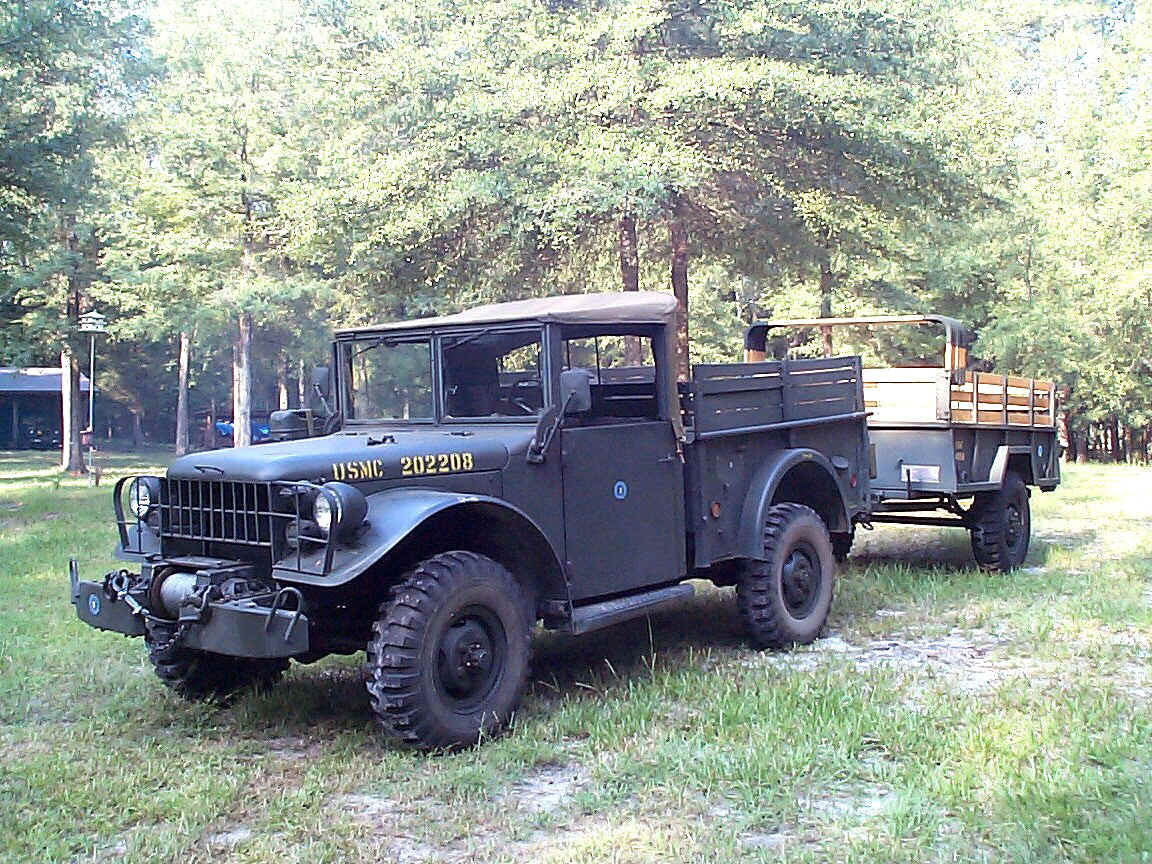 3
3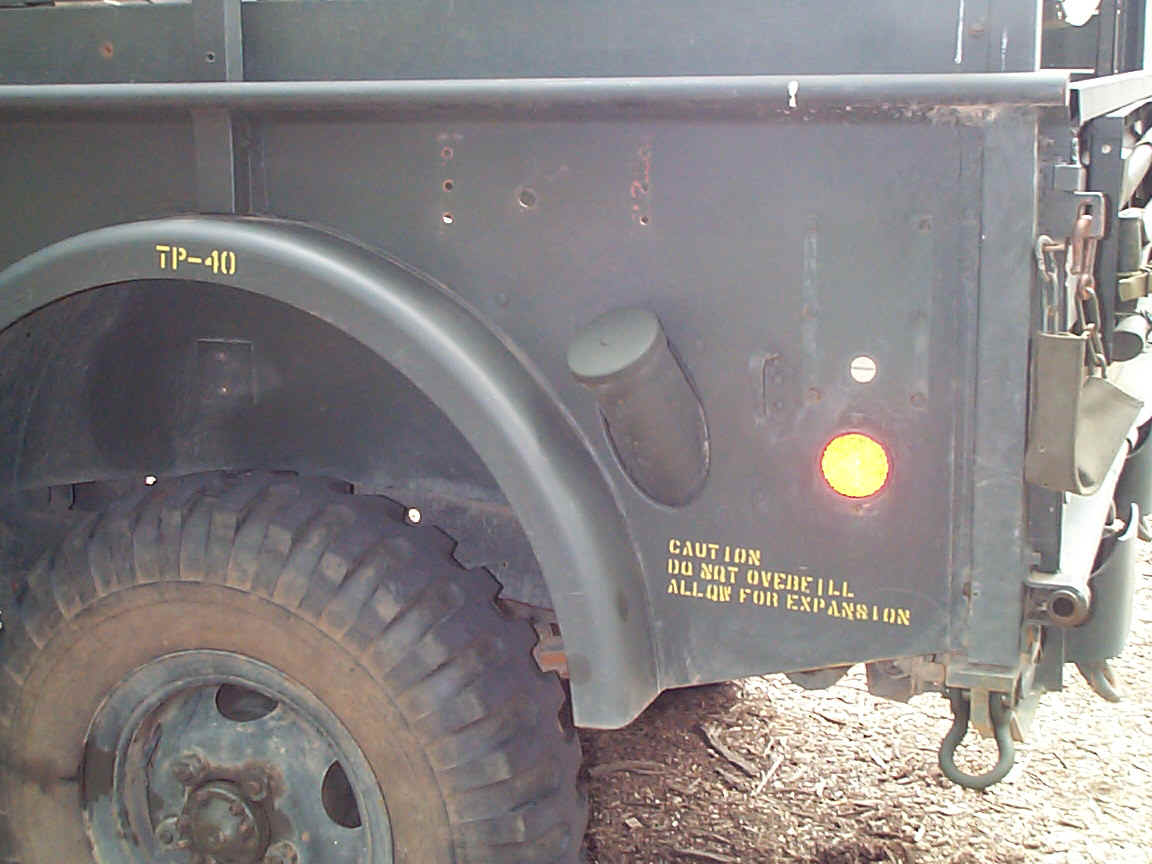 4
4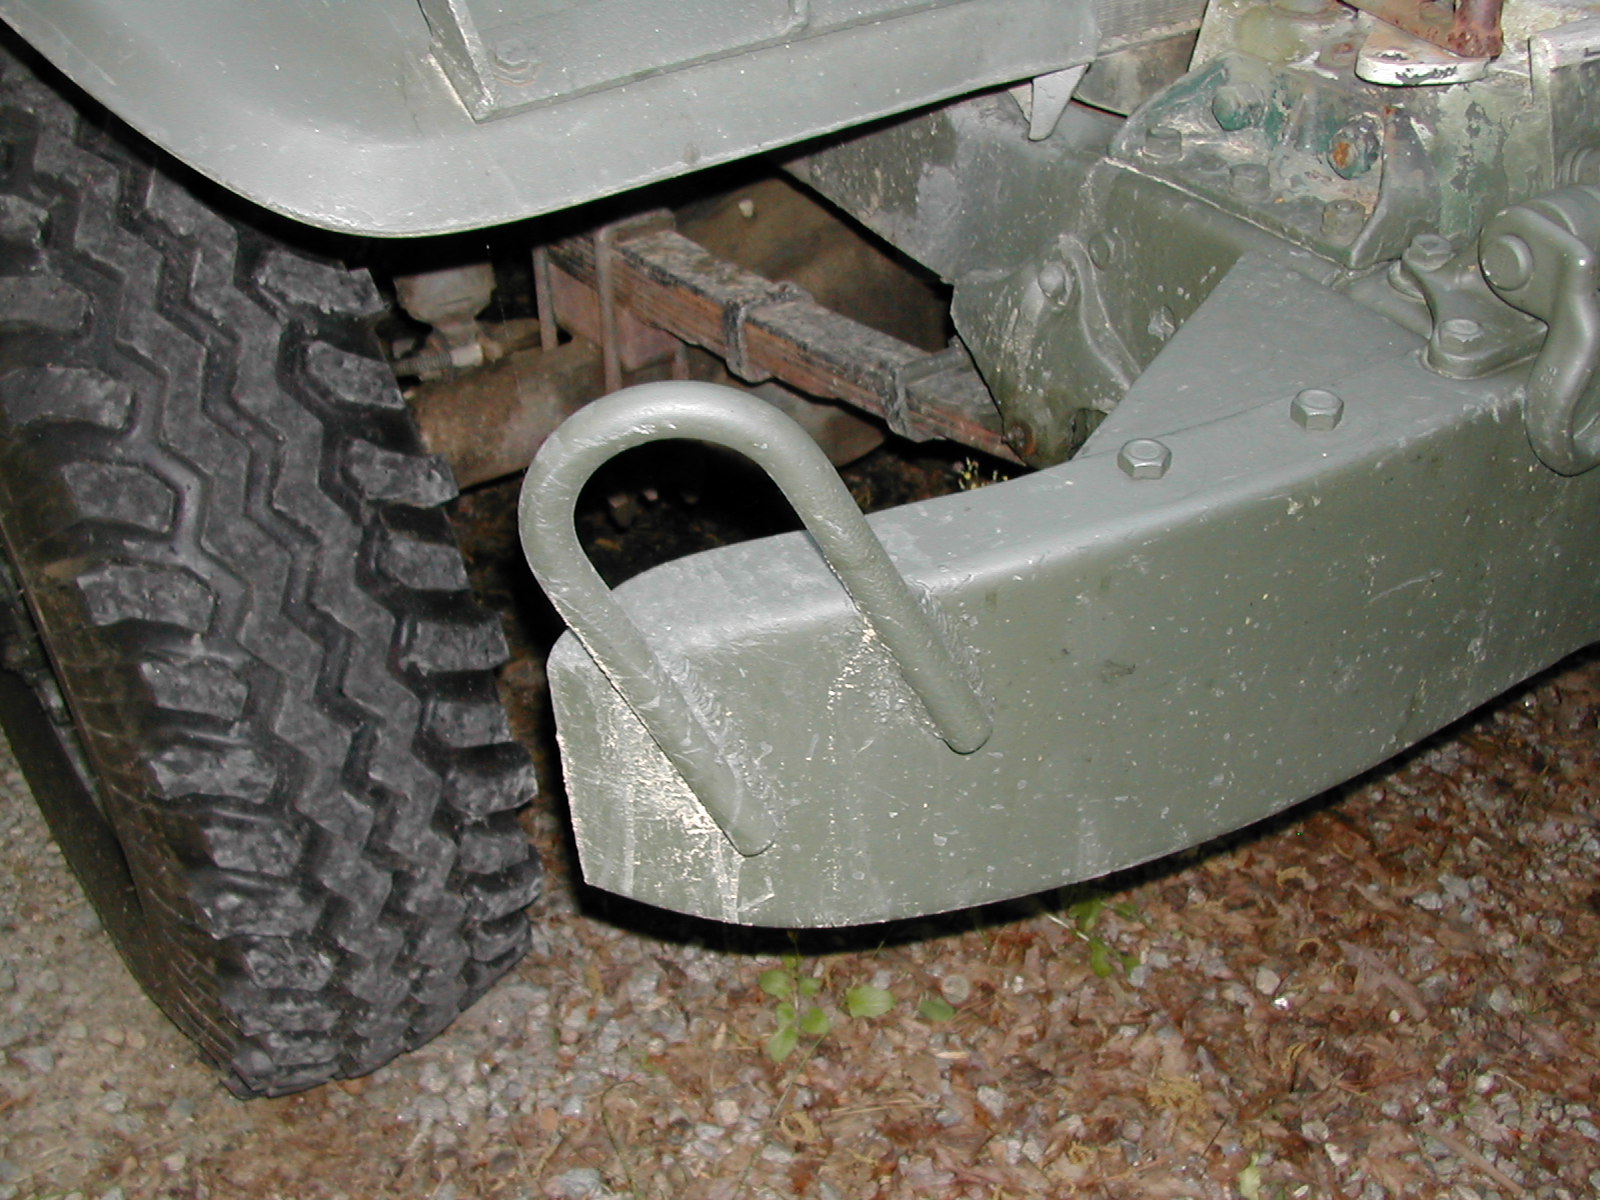 5
5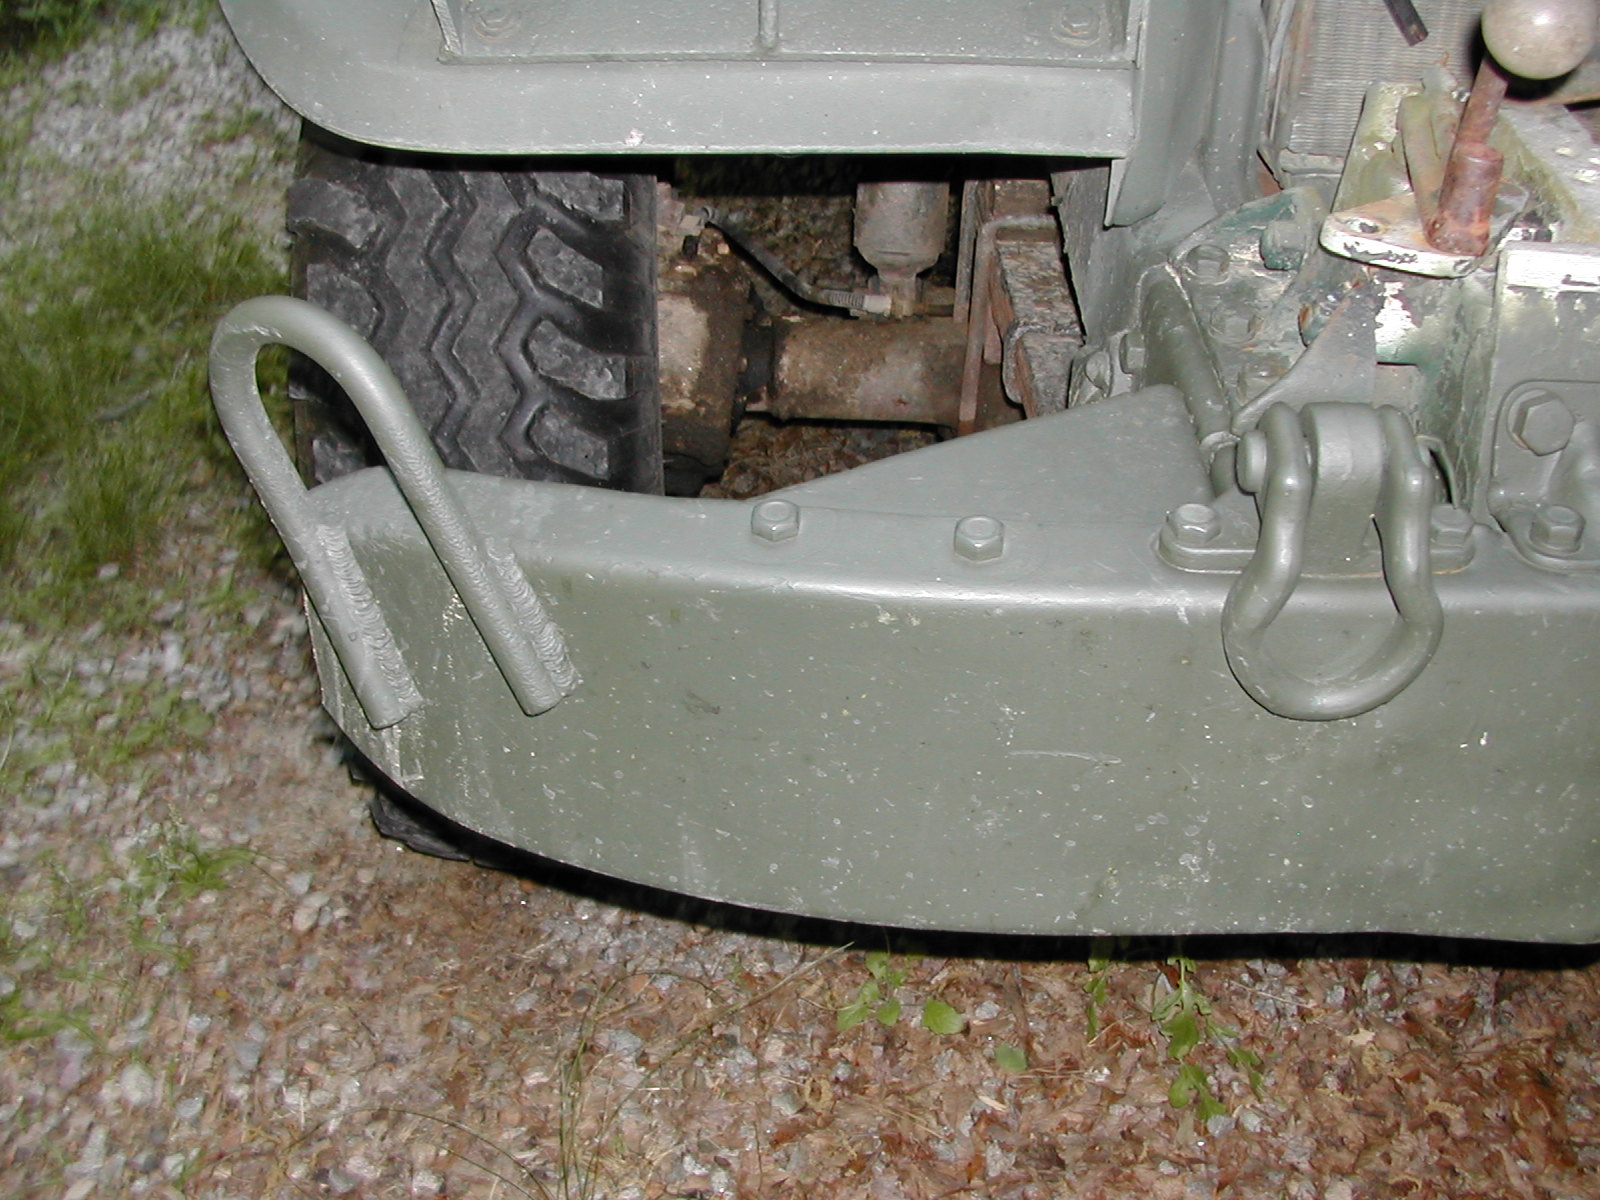 6
6 7
7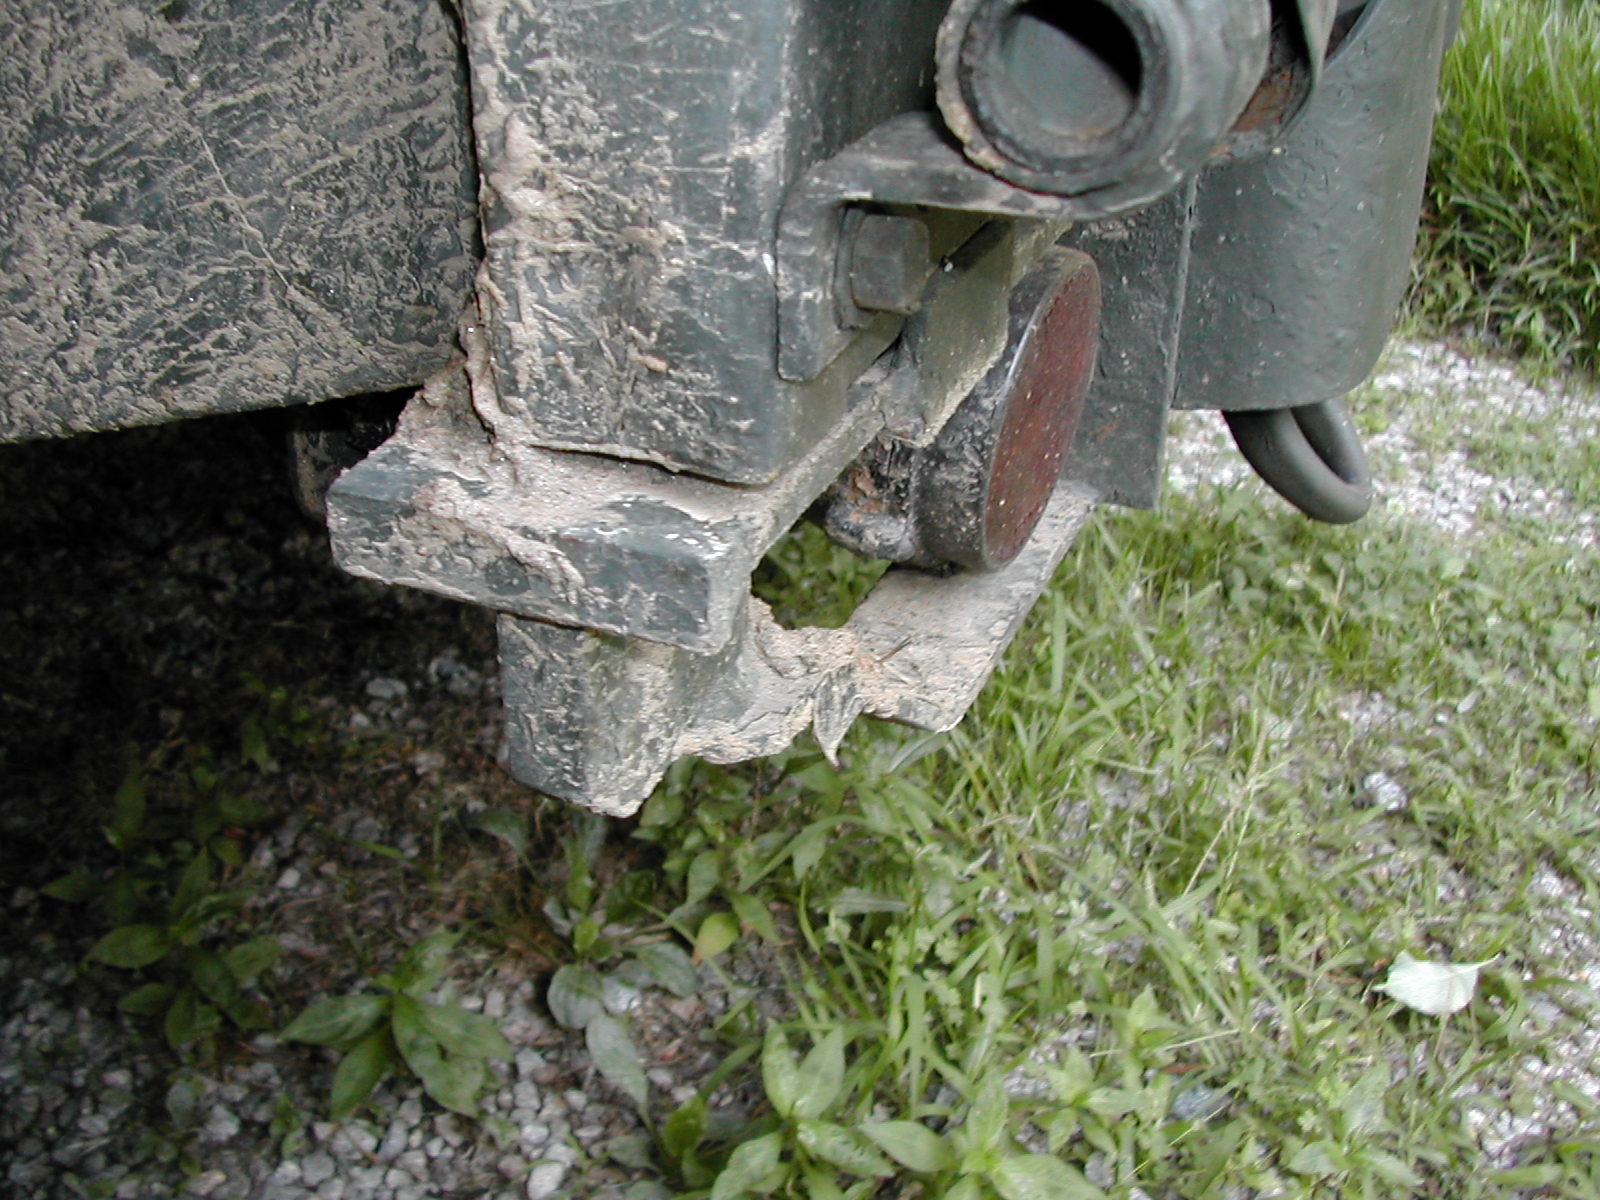 8
8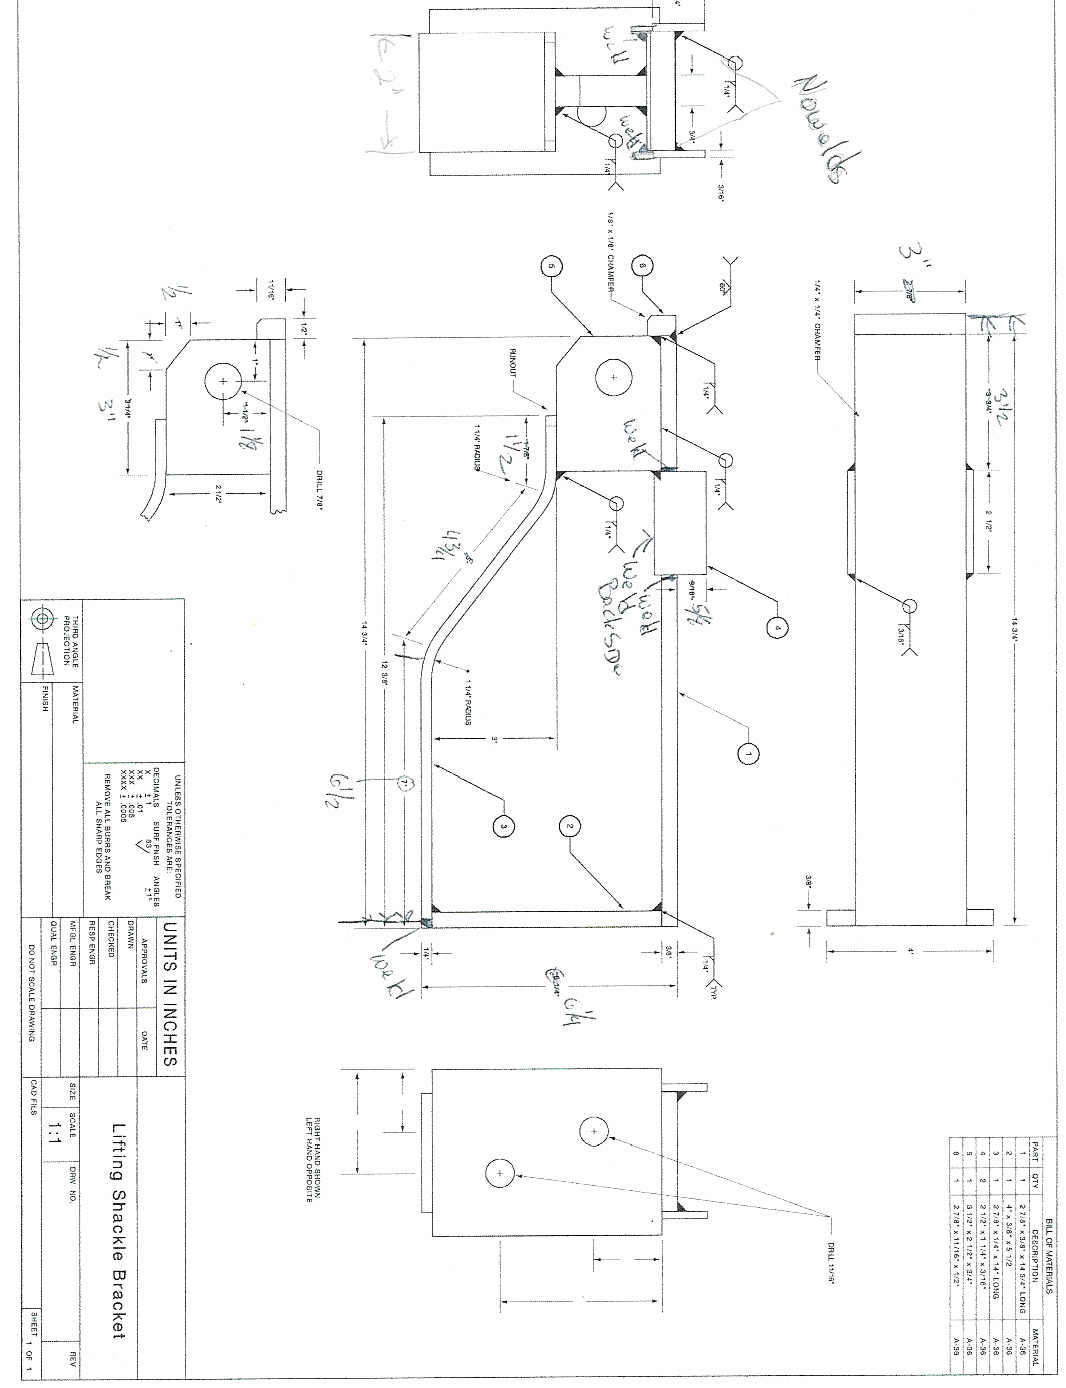 9
9USMC Modifications
Very soon after I got my truck, I found out that it was
actually a USMC truck and not a US Army truck. The most obvious indicator that it
was a Marine truck were the loops welded to the ends if the front bumpers and brackets
bolted onto the rear of the truck that looked like rear light guards that are used to
relocate the lifting shackles to the outside edges of the truck
Below are photos that show some of the modifications and markings used by the USMC.
| 1 |
2 |
3 |
4 |
| 5 |
6 |
7 |
8 |
|
9 |
| Photo | Description |
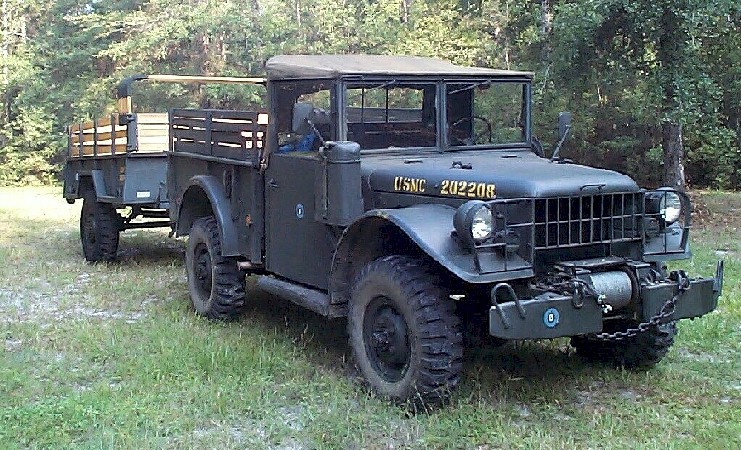
| 1 | Bill Lammers' truck from the front showing hood numbers and logo on door and bumper that may be a unit designation. Can also make out the tire pressure stencils on the fenders. The "paperclips" on the end of the front bumpers used to help tie down the truck when on board seaborne transport may also be seen. |
| 2 | Bill's truck from the rear showing the same number on tailgate as that placed on the hood. Can also see the tire pressure stencil on the rear fender. The rear shackle relocation bracket may also be seen around the tail lights. Note the addition of the separate black out light on the passenger side of the truck. |
| 3 | Bill's truck with M101 trailer in tow. Note the hood side numbers. Also seen in this shot are the "paperclips" on the front bumpers and similar loops added to the trailer sides at the front and rear corners of the bed. |
| 4 | Fuel caution and tire pressure stencils on Bill's truck. |
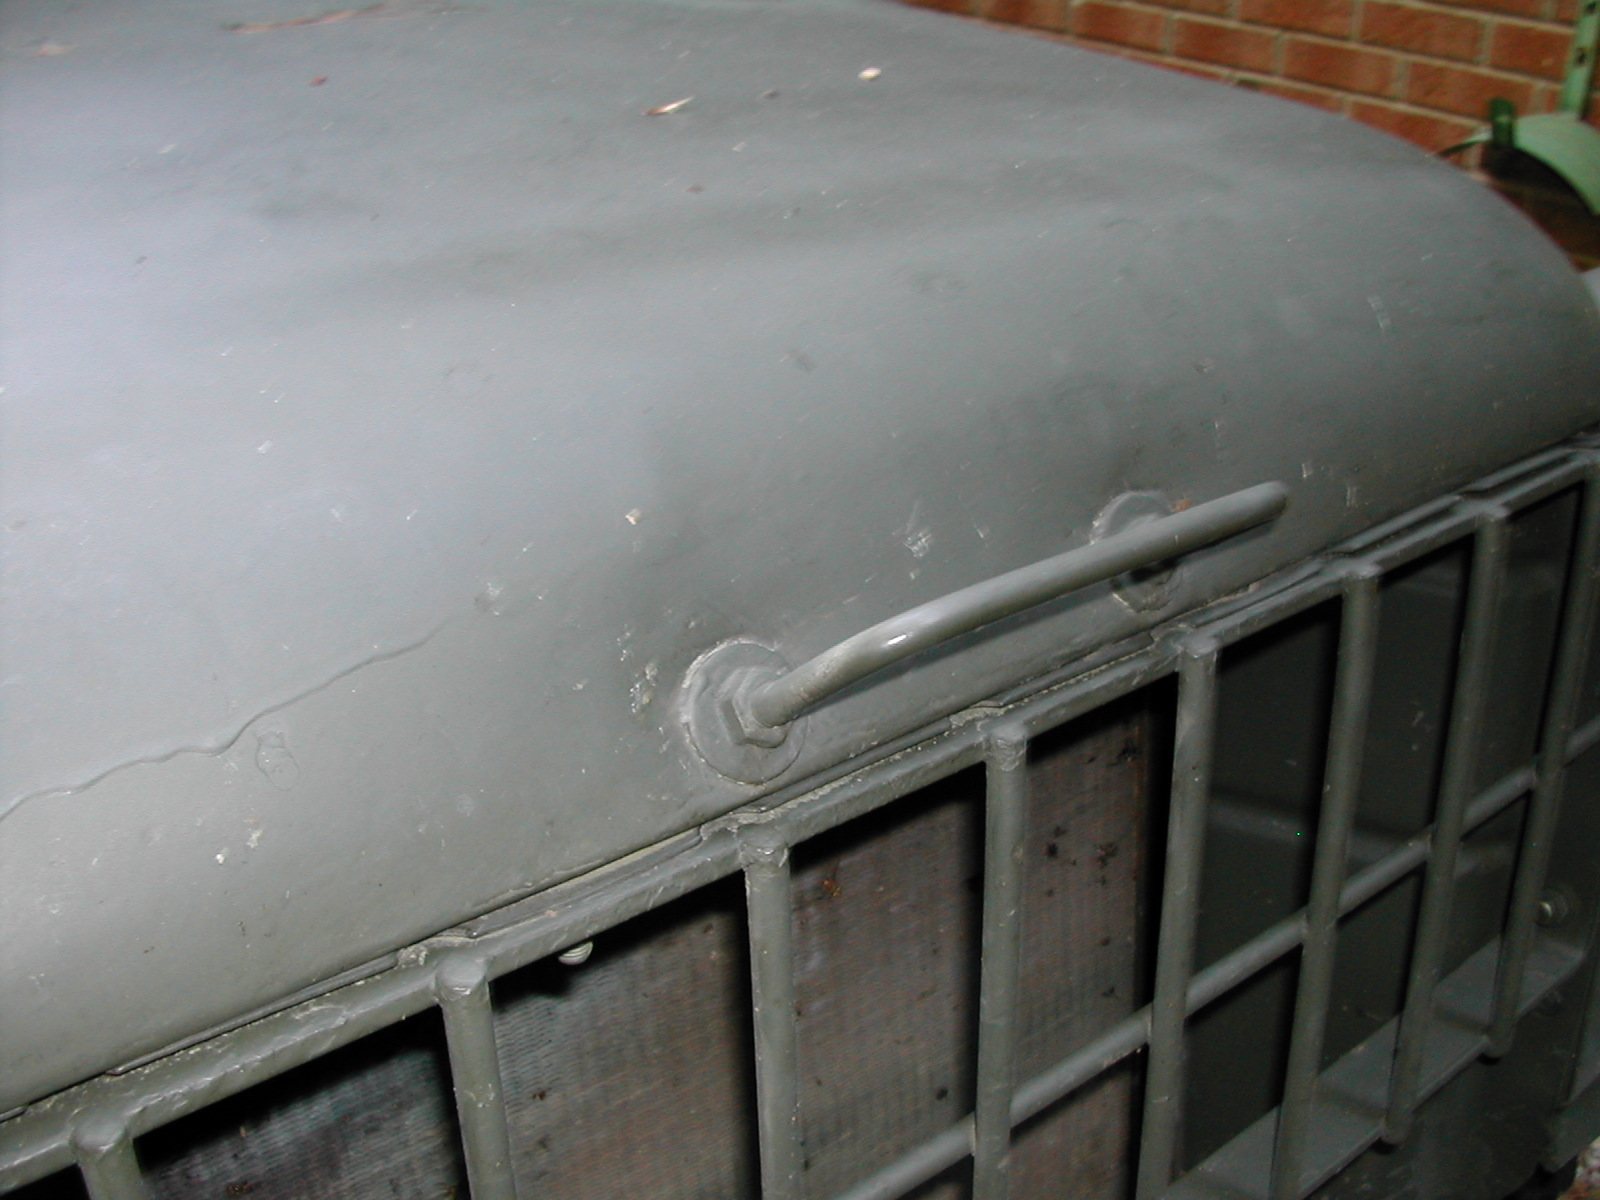
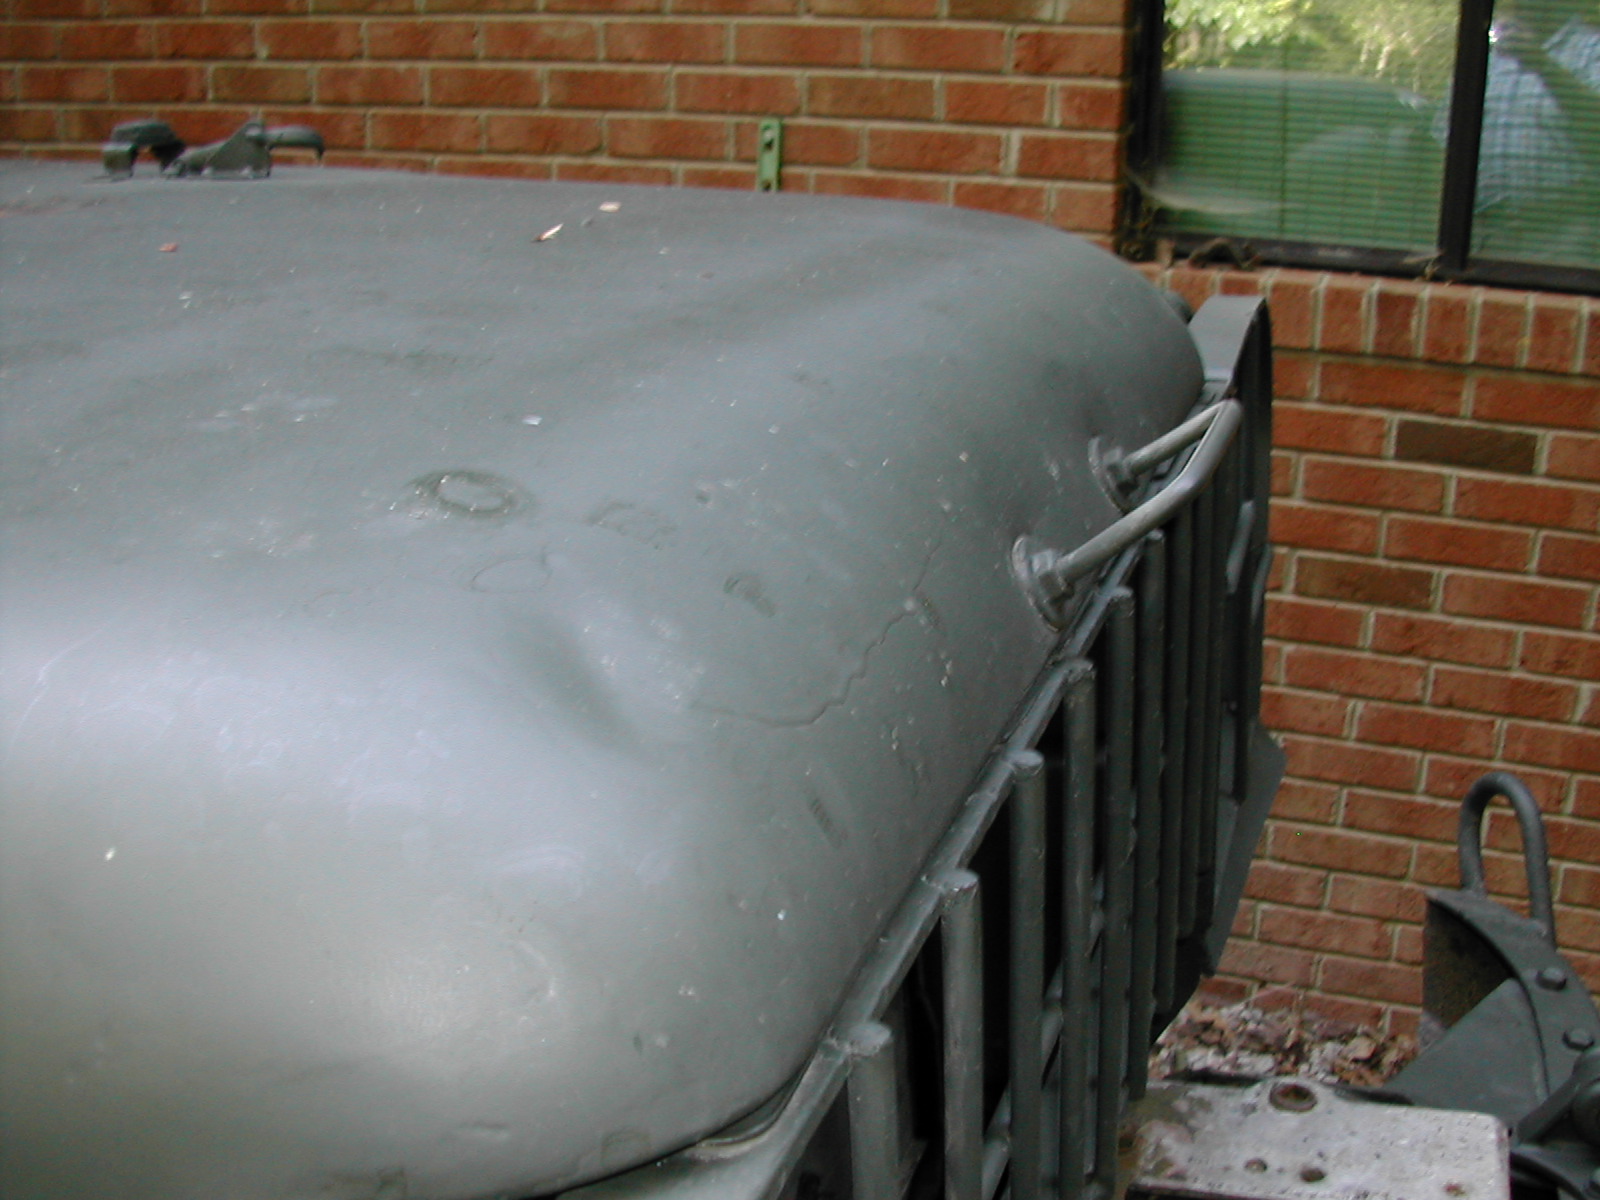
| 5 | "Paperclip" on my front bumper. |
| 6 | Another view of the "paperclip" on my bumper. |
| 7 | Combination bracket that not only protects the taillight assembly, but is used to relocate the rear shackles for tie down when the truck is on board seaborne transport. Note that I have installed M561 full red lenses in place of the original lenses on my truck in an effort to be a little more visible to following traffic. |
| 8 | Another view of the rear lifting shackle relocation bracket on my truck. |
| 9 | Not a photo, but a JPG of a dimensioned drawing of the rear lifting shackle relocation bracket that may be used to fabricate a set if your truck is missing them. Many thanks to BillL in Florida and MarkE in Georgia for making this available... |
Below are photos that show some of the other modifications used on the M37 by the USMC and by the other branches.
 A A |
 B B |
 C C |
 D D |
| Photo | Description |
| A. | Clips made out of angle iron welded to bed and tool box door for locking doors. Clip is on the back side of the door (edge closest to the rear wheel). |
| B. | Hood handle. On my truck, the rod the handle is fabricated from is threaded at the ends and the assembly is bolted onto the hood. |
| C. | Another view of the hood handle. |
| D. | In cab vehicle security system. Loop welded to plate that is riveted to the dash is used to secure a short section of chain that is run looped around one of the spokes of the steering wheel. I've been told by some veterans that they used a similar loop setup to chain the gear shift lever in first gear in trucks that came after the M37. More info about this is below... |
About the loop on the dash shown in Photo D above:
It looks like somebody just took a loop of chain, cut off one end, and spot welded it
to a slice of steel plate and riveted it to the dash...
Dimensions and location info:
The plate is 1" x 3" x 3/16"
The rod is 1/4" diameter, leg spacing is 3/4" from center to center and the loop
sticks out 1 3/4" (face of plate to outside edge of loop)
The loop is centered on plate vertically and horizontally, rivet holes are in line with
loop vertically and are centered between loop and ends of plate.
The plate hangs down 1/8" below bottom edge of dash with the left leg of loop is in
line vertically with the instrument panel retaining screws.
Attachment is with pop rivits..