You can also see the M561 full red lens on the taillight and the USMC combination lifting shackle bracket/light guard.
License Plate Bracket
One of the items that is required in order to successfully pass a vehicle safety inspection in North Carolina is a lighted license plate. Obviously, this is not an item that was originally installed on the M37 when it was delivered from the factory.
I installed a lighted bracket on my truck in one afternoon using a light and universal bracket that I purchased from Agri-Supply for less than ten dollars, and some wiring connectors and small hardware that I already had on hand.
I started by attaching the light fixture to the bracket. I drilled a 1/4" hole in the bracket between and in line with the two holes that already existed for mounting the fixture in order to enable the power lead from the light to go through the bracket. I then held the bracket up to the rear crossmember and marked the locations for the mounting holes. As may be noted from the photos, I located the bracket beneath the right bumperette. This location allowed me to run the wire from the light through a cutout that already existed in the frame member. Once the locations for the mounting holes had been marked, I drilled a pair of holes using a size O drillbit. I then mounted the bracket to the crossmember using a pair of 1/4 bolts, nylock nuts, and external tooth washers. The flat portion of the bracket is on the front side of the crossmember with the nuts and washers on the back side.
I then cut into the taillight power lead that I had previously installed across the top of the rear crossmember when I had previously updated the right rear light housing. The wire that I cut into provides power to the right rear taillight from a y-tap installed into the reproduction wiring harness at the left taillight. I then installed a pair of male connectors to the cut wire and reconnected them using a y-tap. I took an eighteen inch length of wire and installed a male connector at one end, and soldered and shrink-wrapped the other end to the pigtail on the license plate light. I routed this wire through the large hole in the frame crossmember under the bumperette, through a wire clip on top of the frame, and plugged it into the y-tap.
Parts used:
| Peterson V436SX license plate light | 1 |
| generic license plate bracket (had 428-09 stamped on back) | 1 |
| #10 washers | 2 |
| y-tap | 1 |
| male connector | 3 |
| 14 gauge wire | 18" |
| 1/4" bolt 1.5" long | 2 |
| 1/4" nylock | 2 |
| 1//4" external tooth washer | 2 |
|
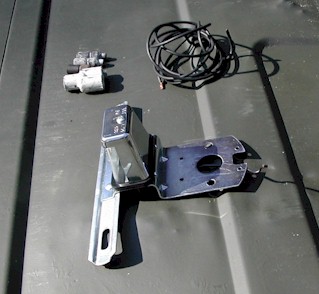
The photo shows the bracket with the installed light with the rubber wire connectors and wire used. |
|
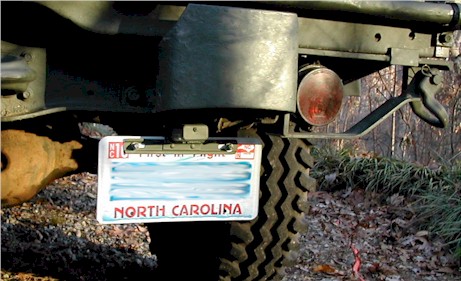
This photo shows the installed bracket. Notice that the tag does
hang down a bit, but entire assembly can be easily removed when going off road by
disconnecting the wiring plug and removing two small bolts. The bracket was painted
with Lusterless Forest Green to match the truck.
You can also see the M561 full red lens on the taillight and the USMC combination lifting shackle bracket/light guard. |
|
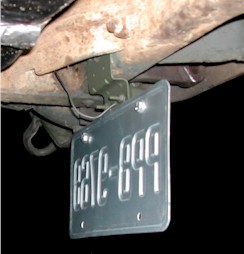
The rear of the installed bracket. |