 1
1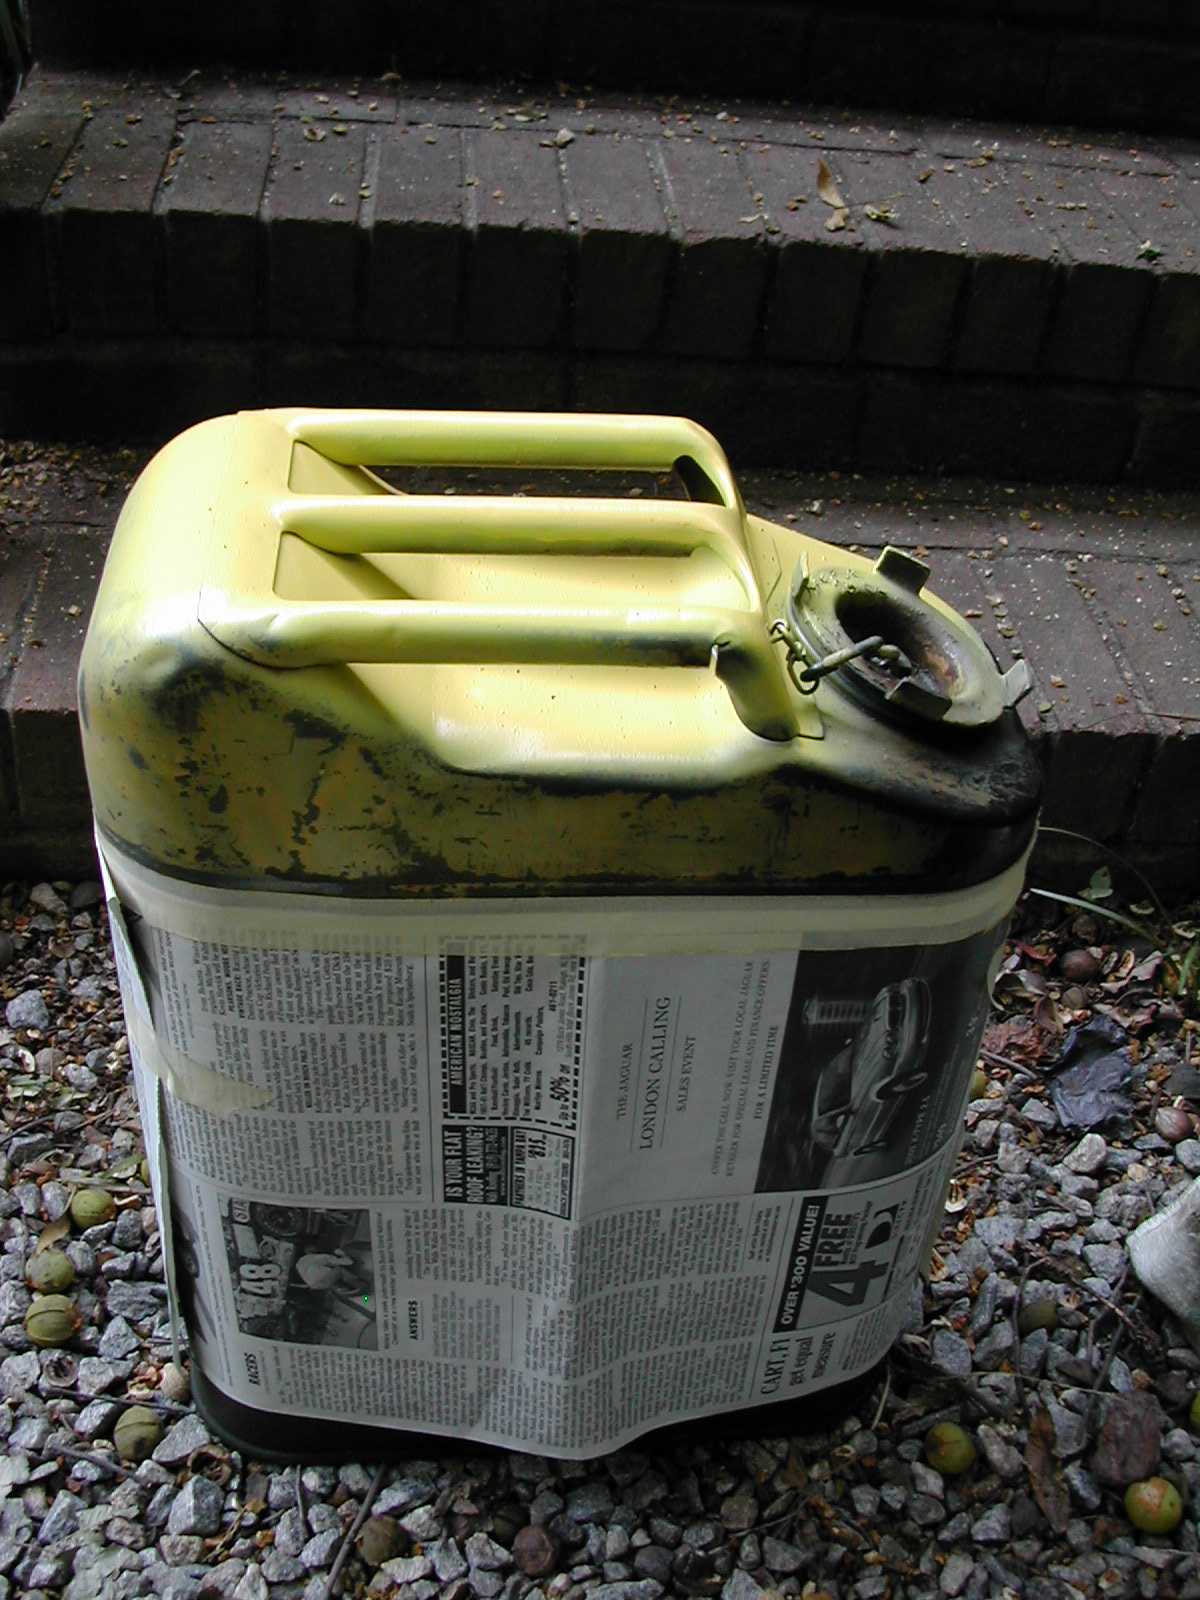 2
2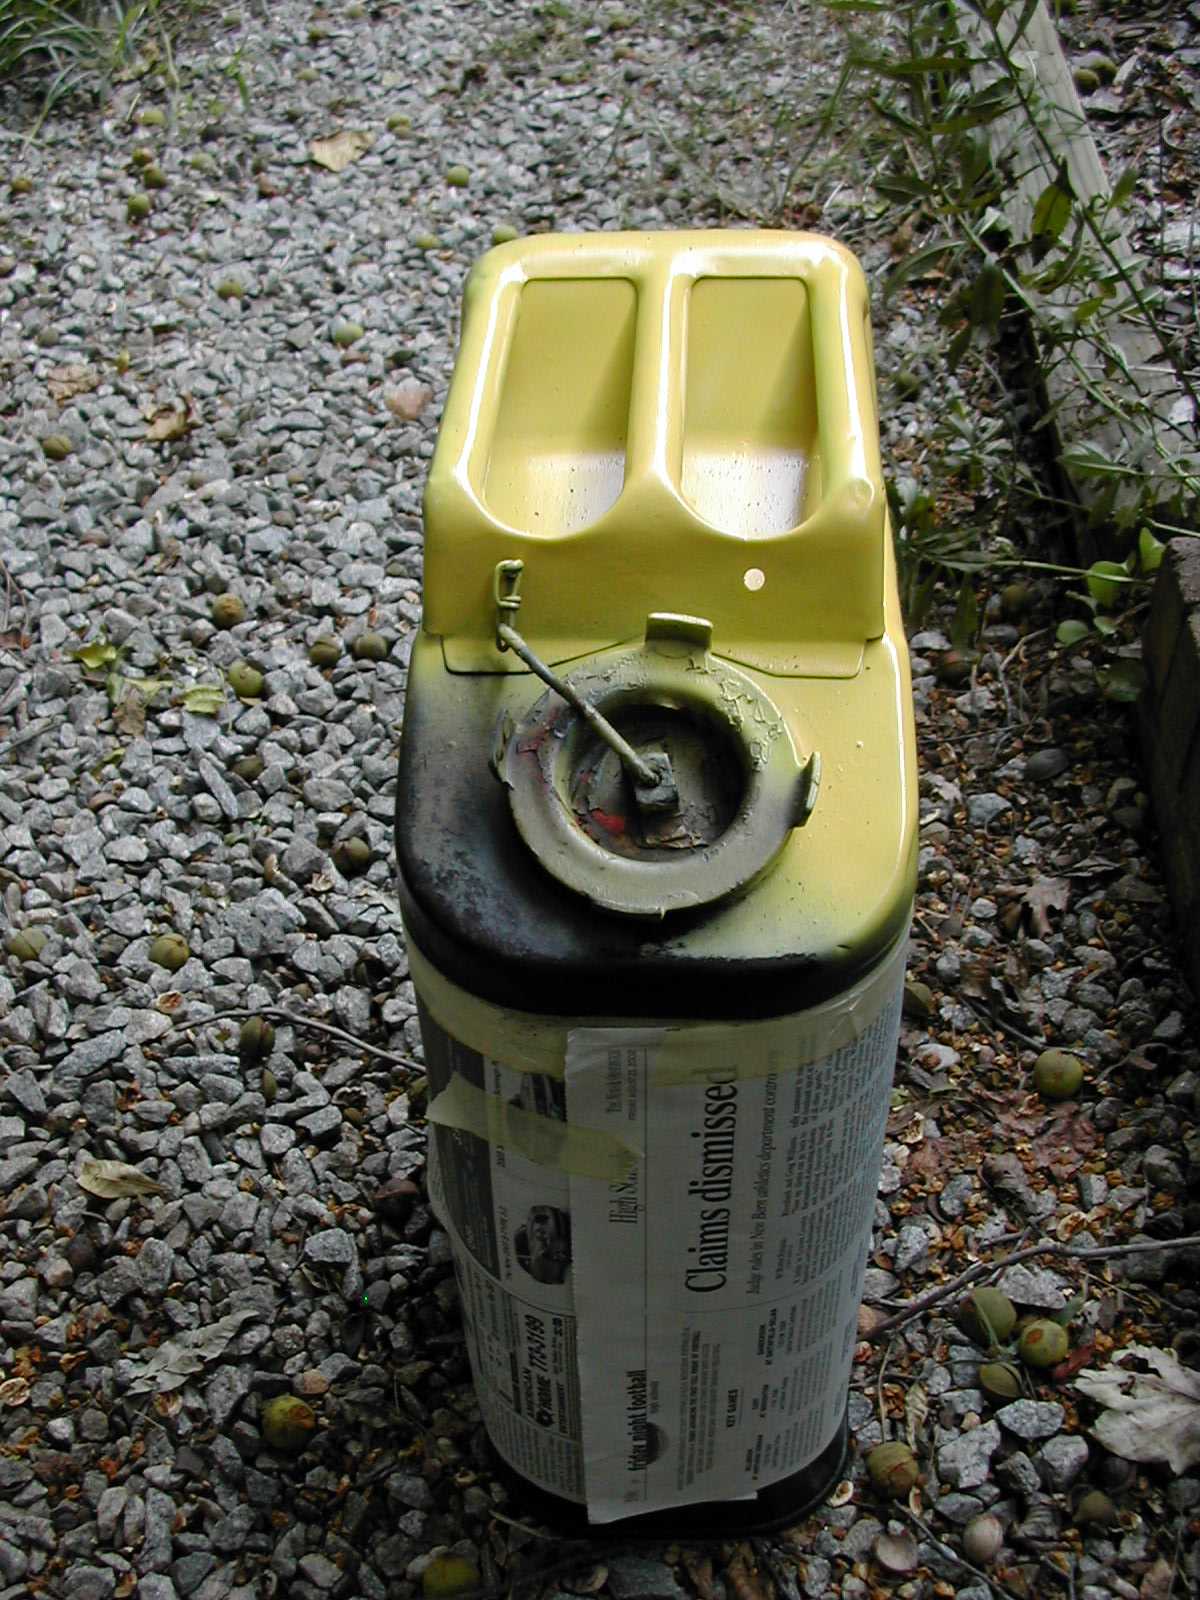 3
3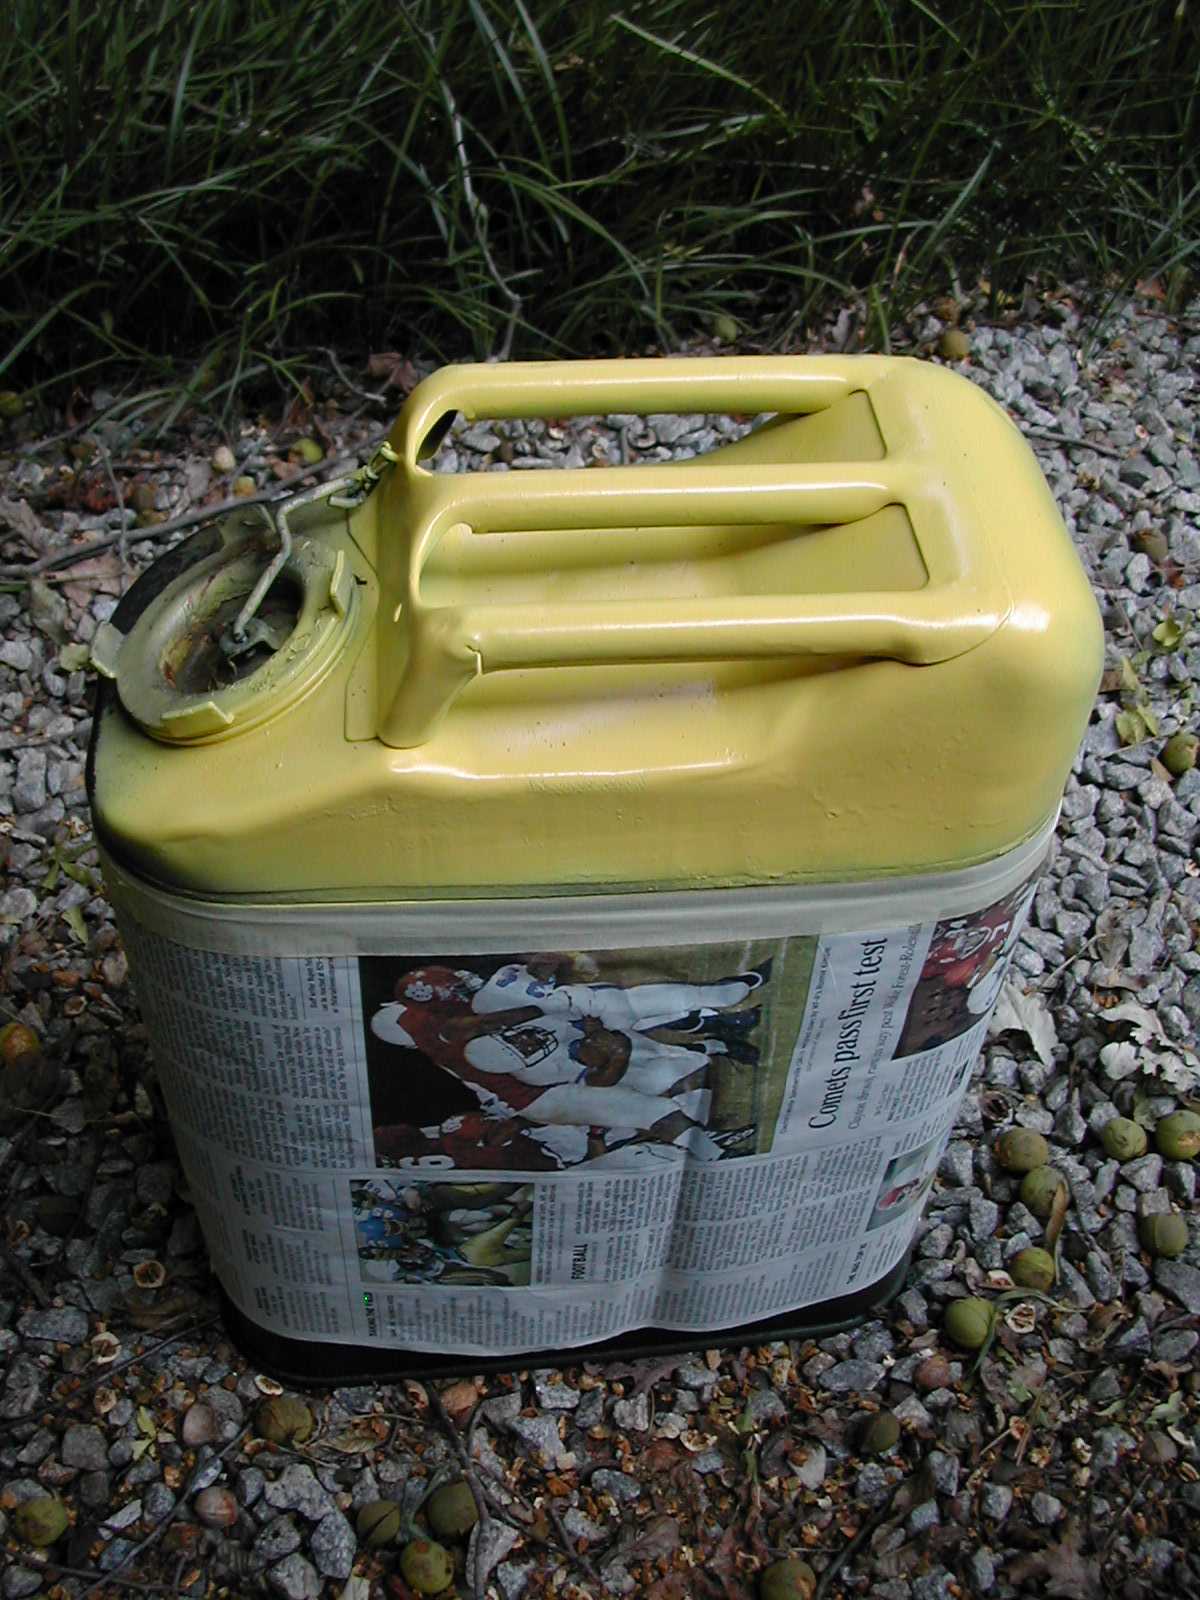 4
4 5
5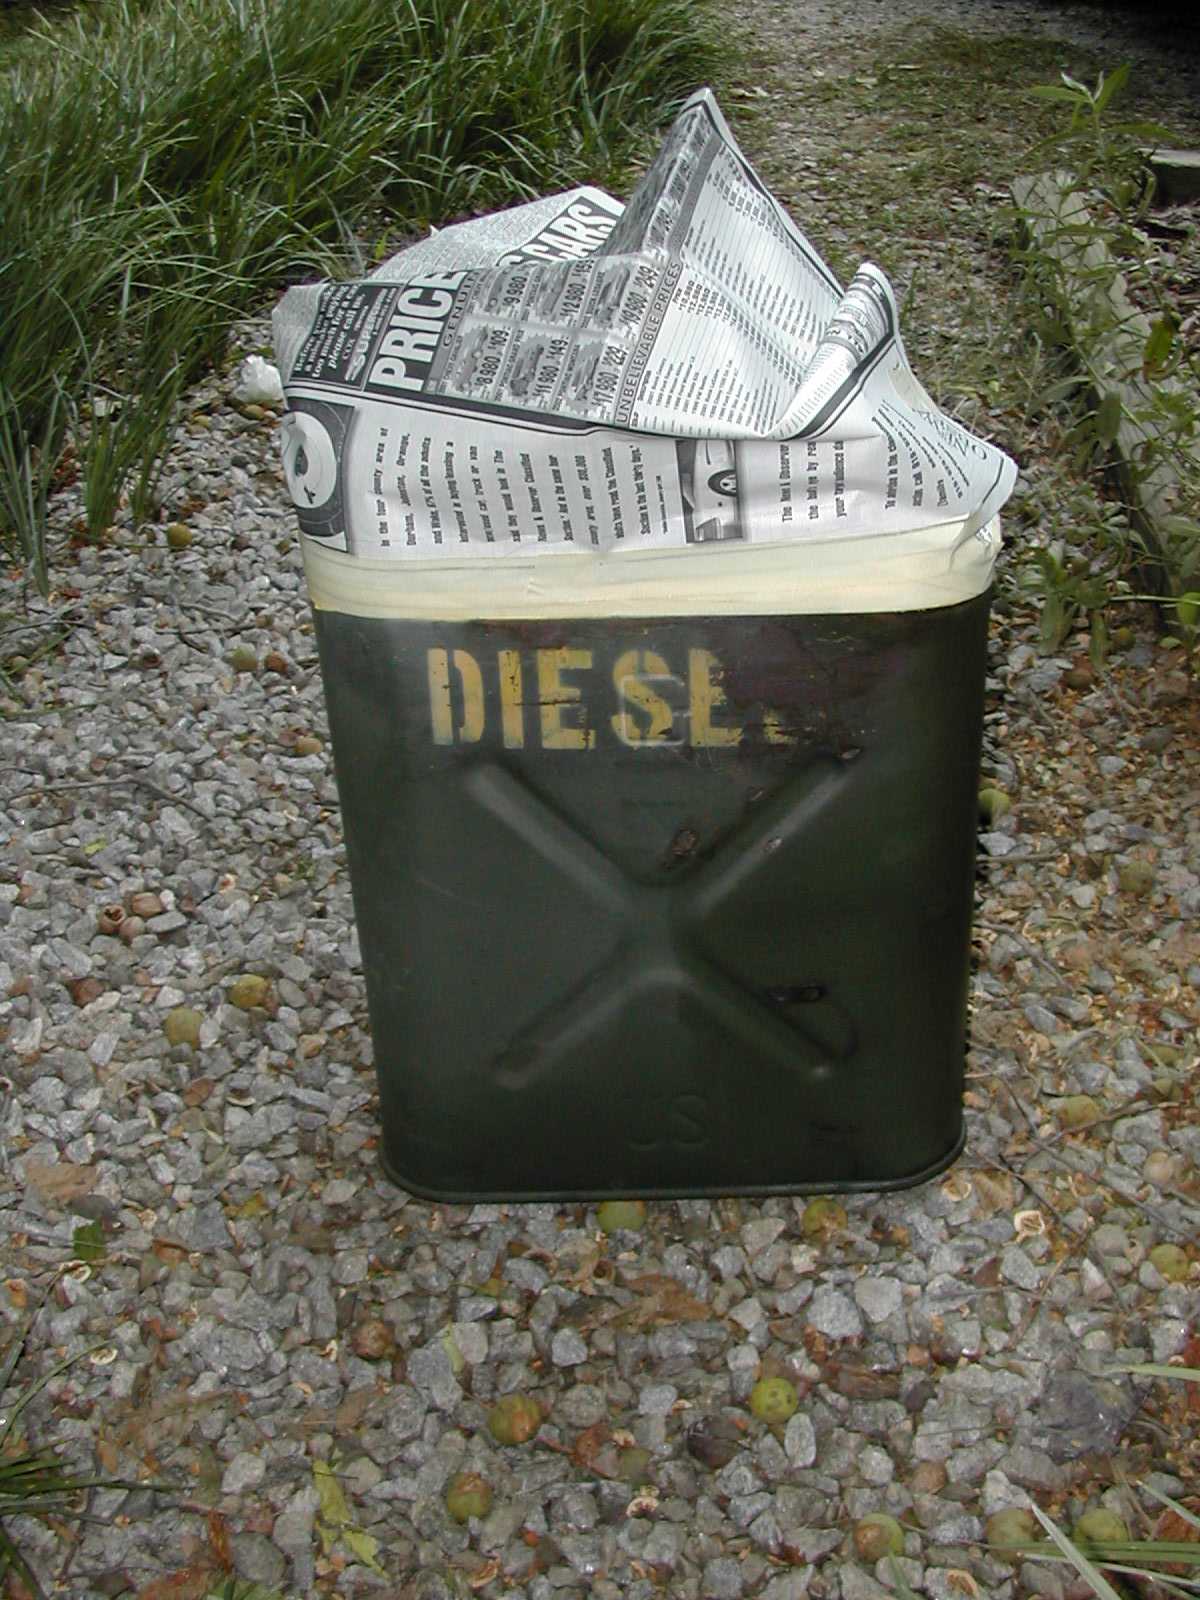 6
6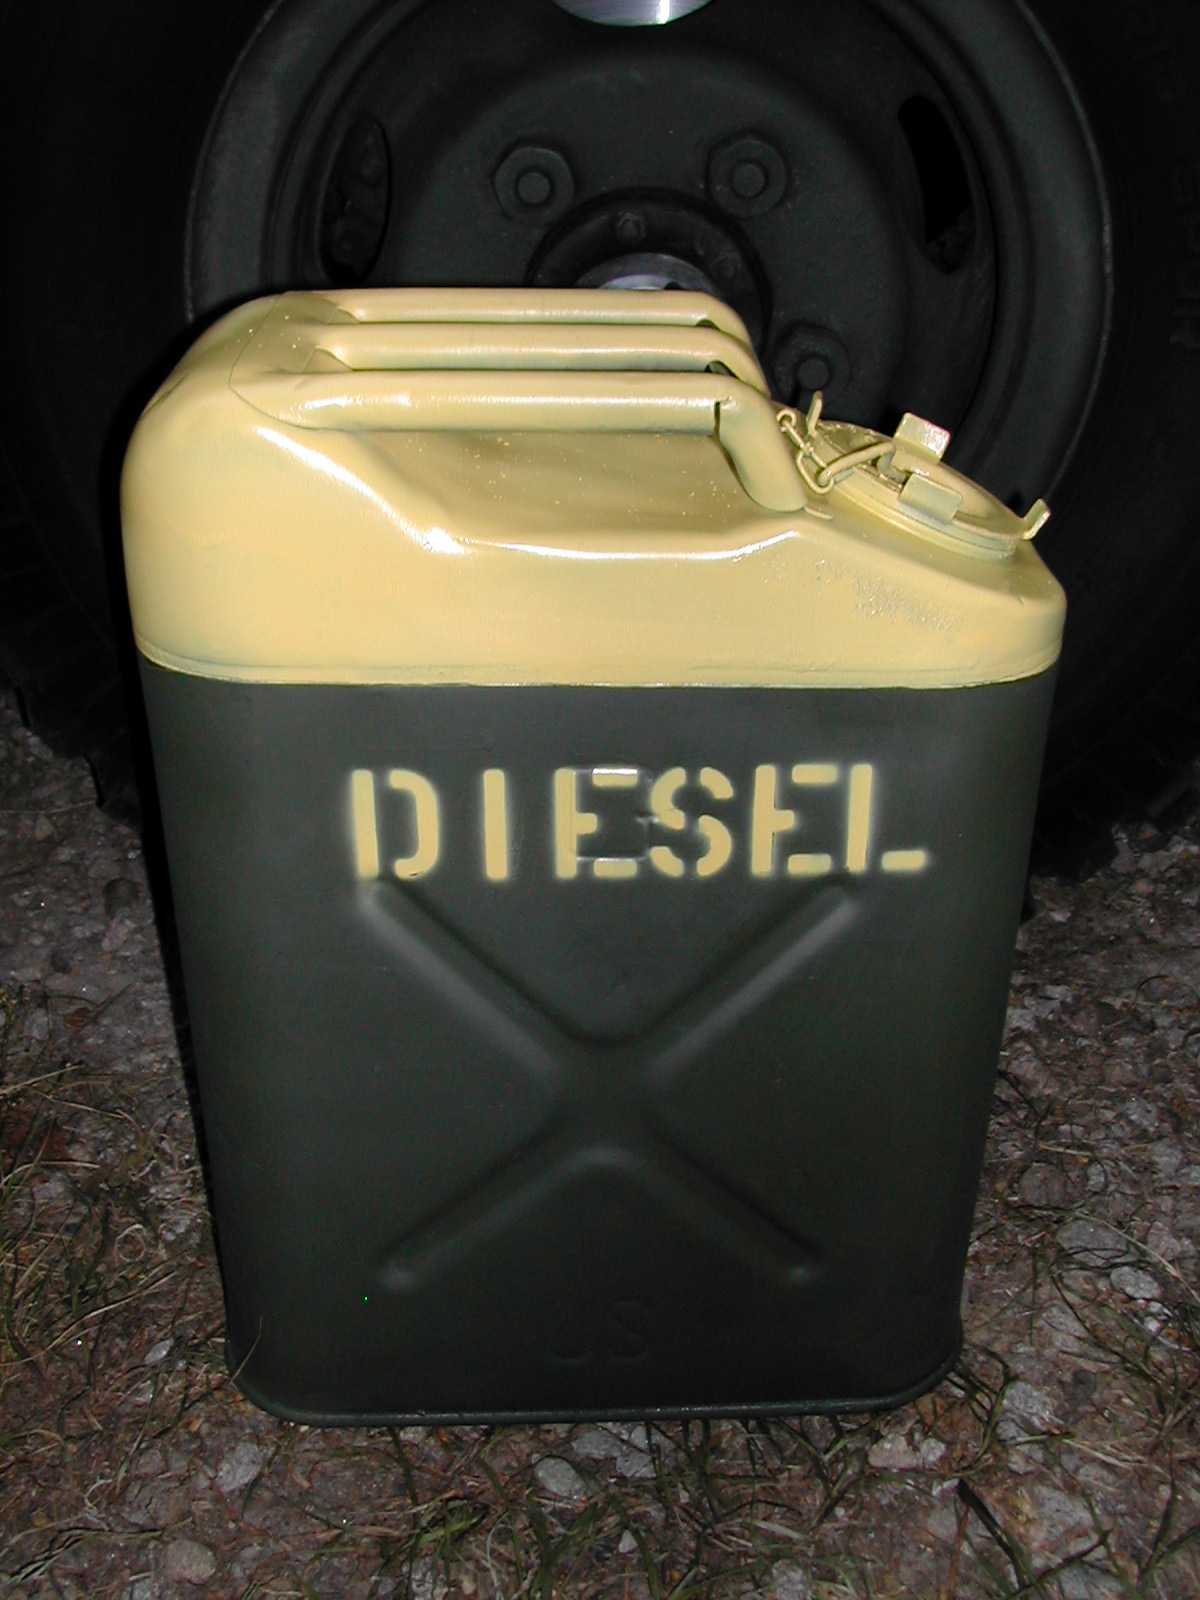 7
7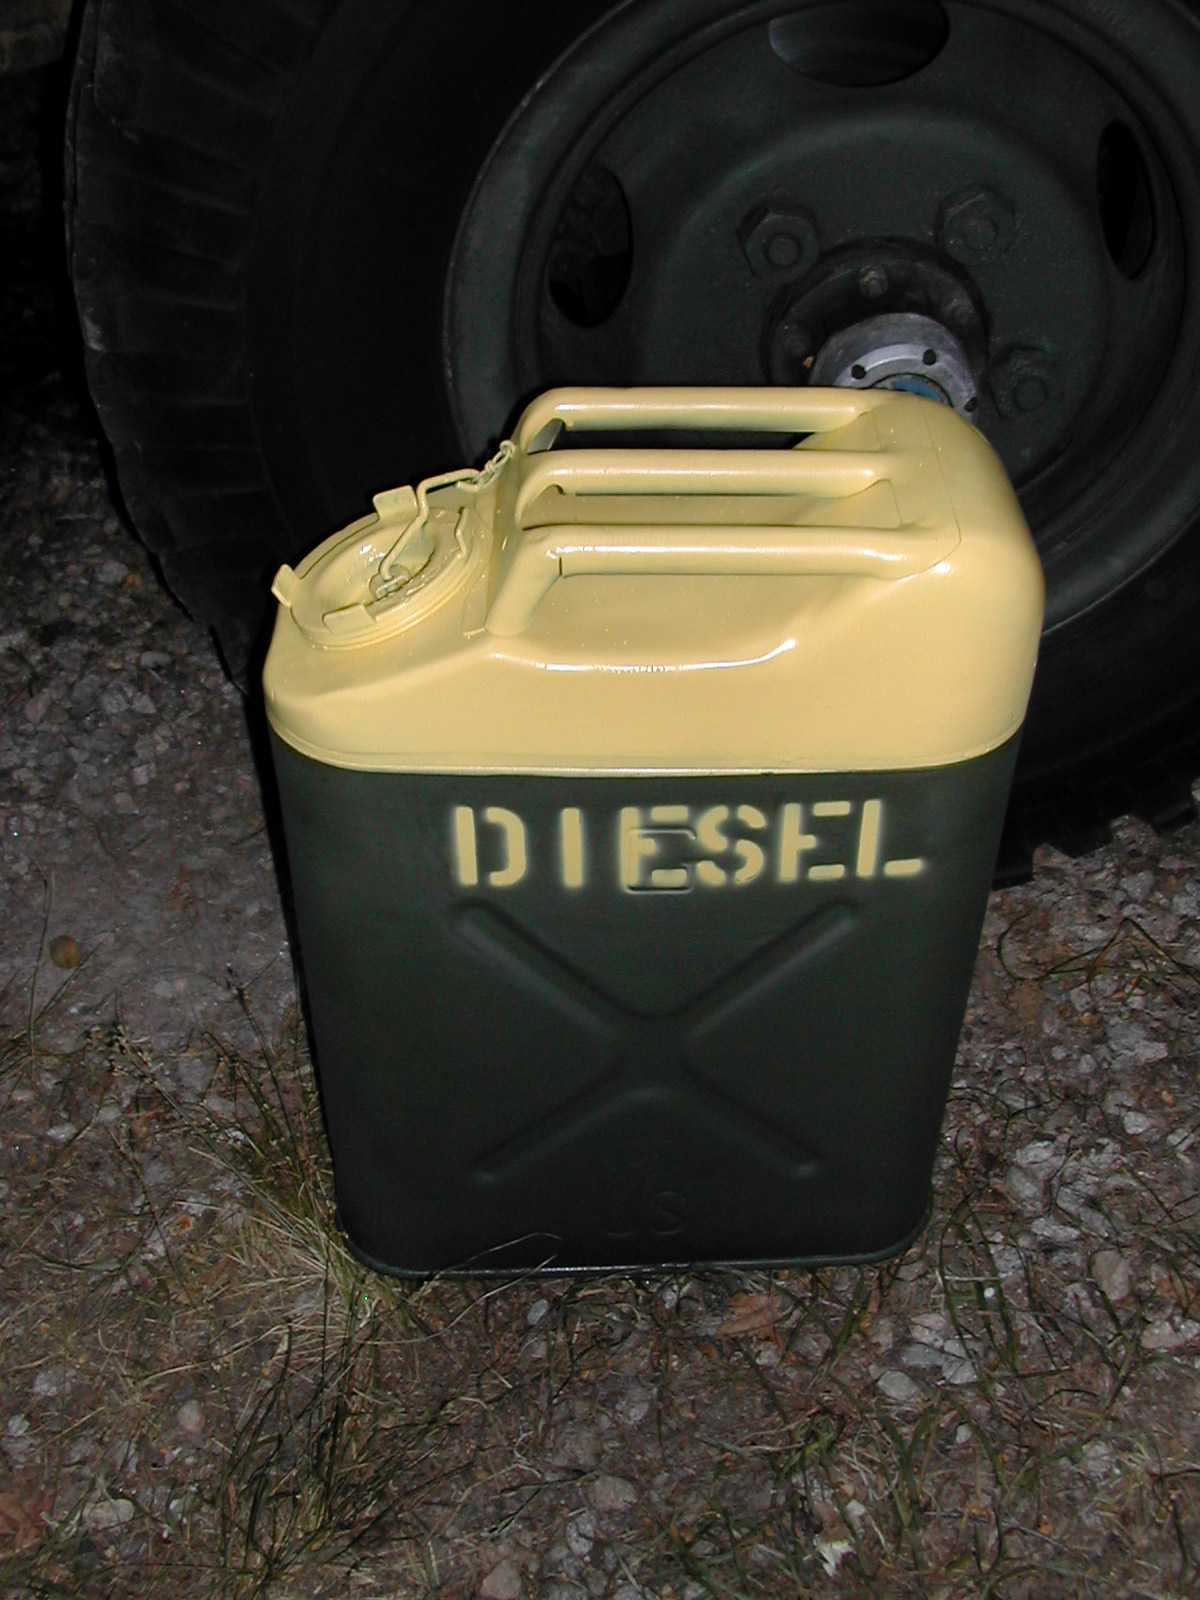 8
8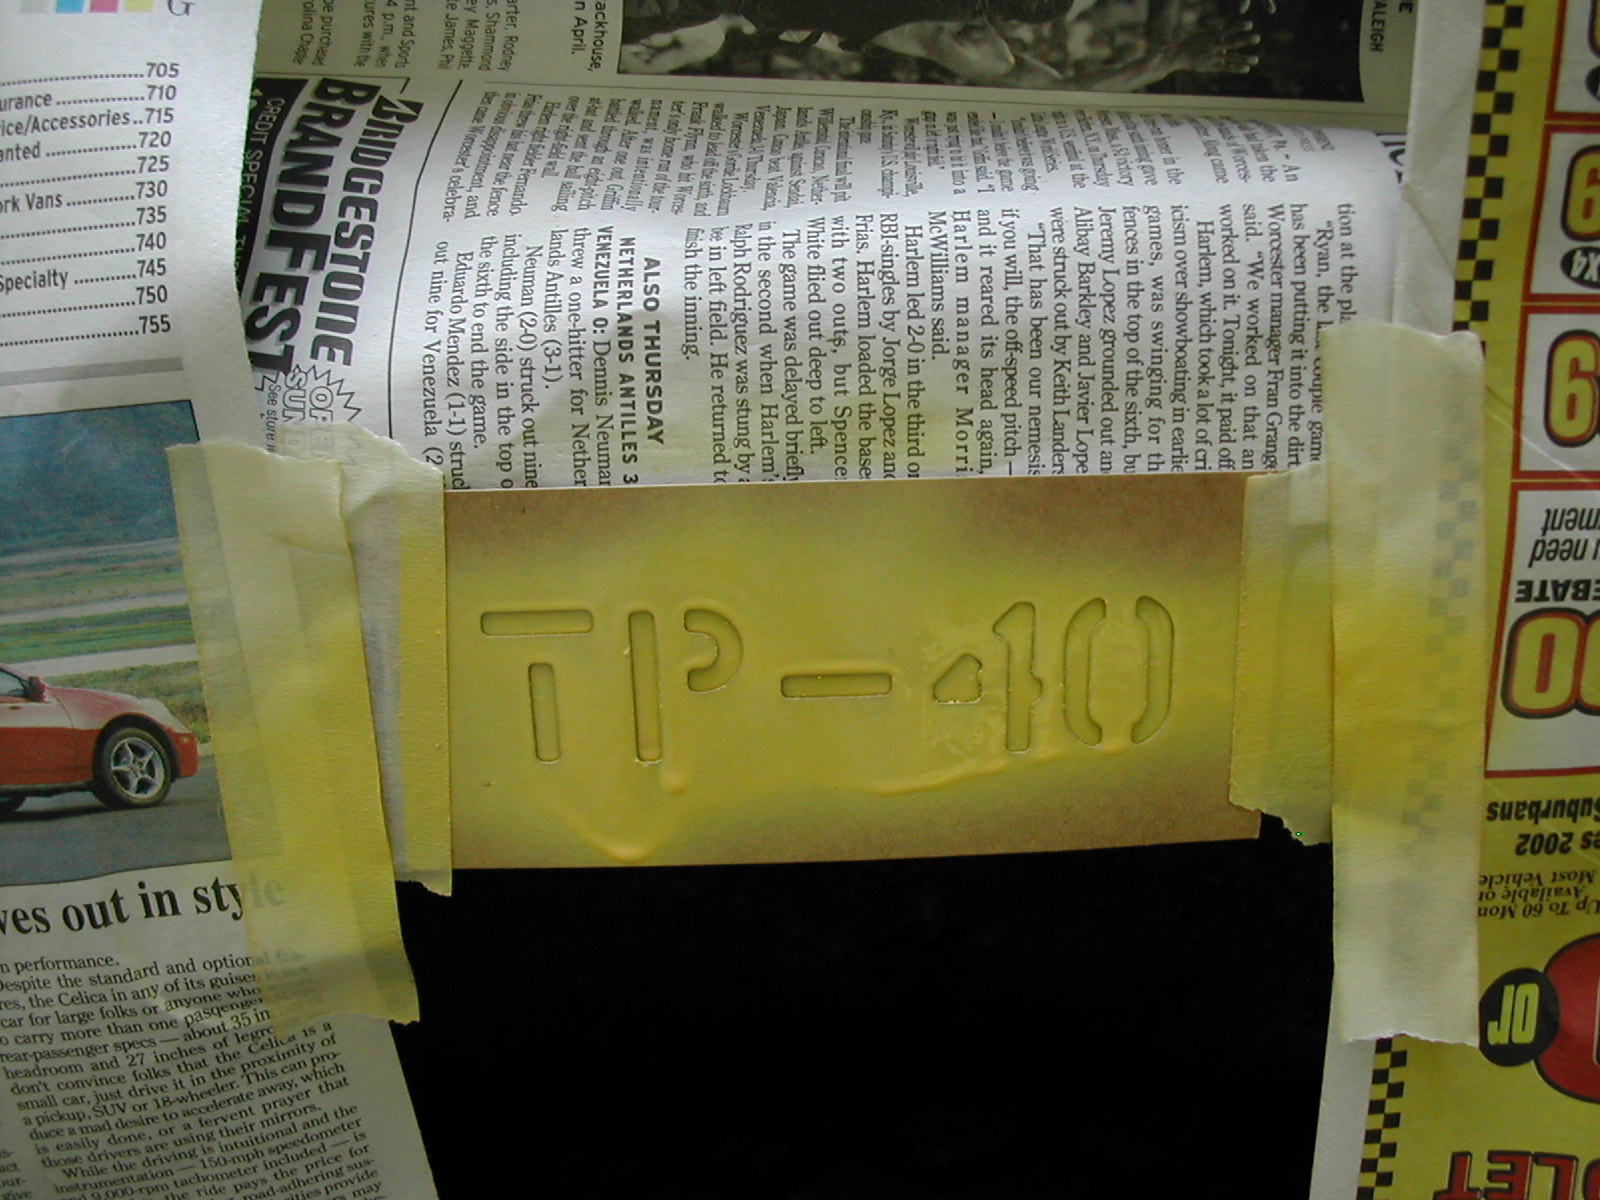 9
9 10
10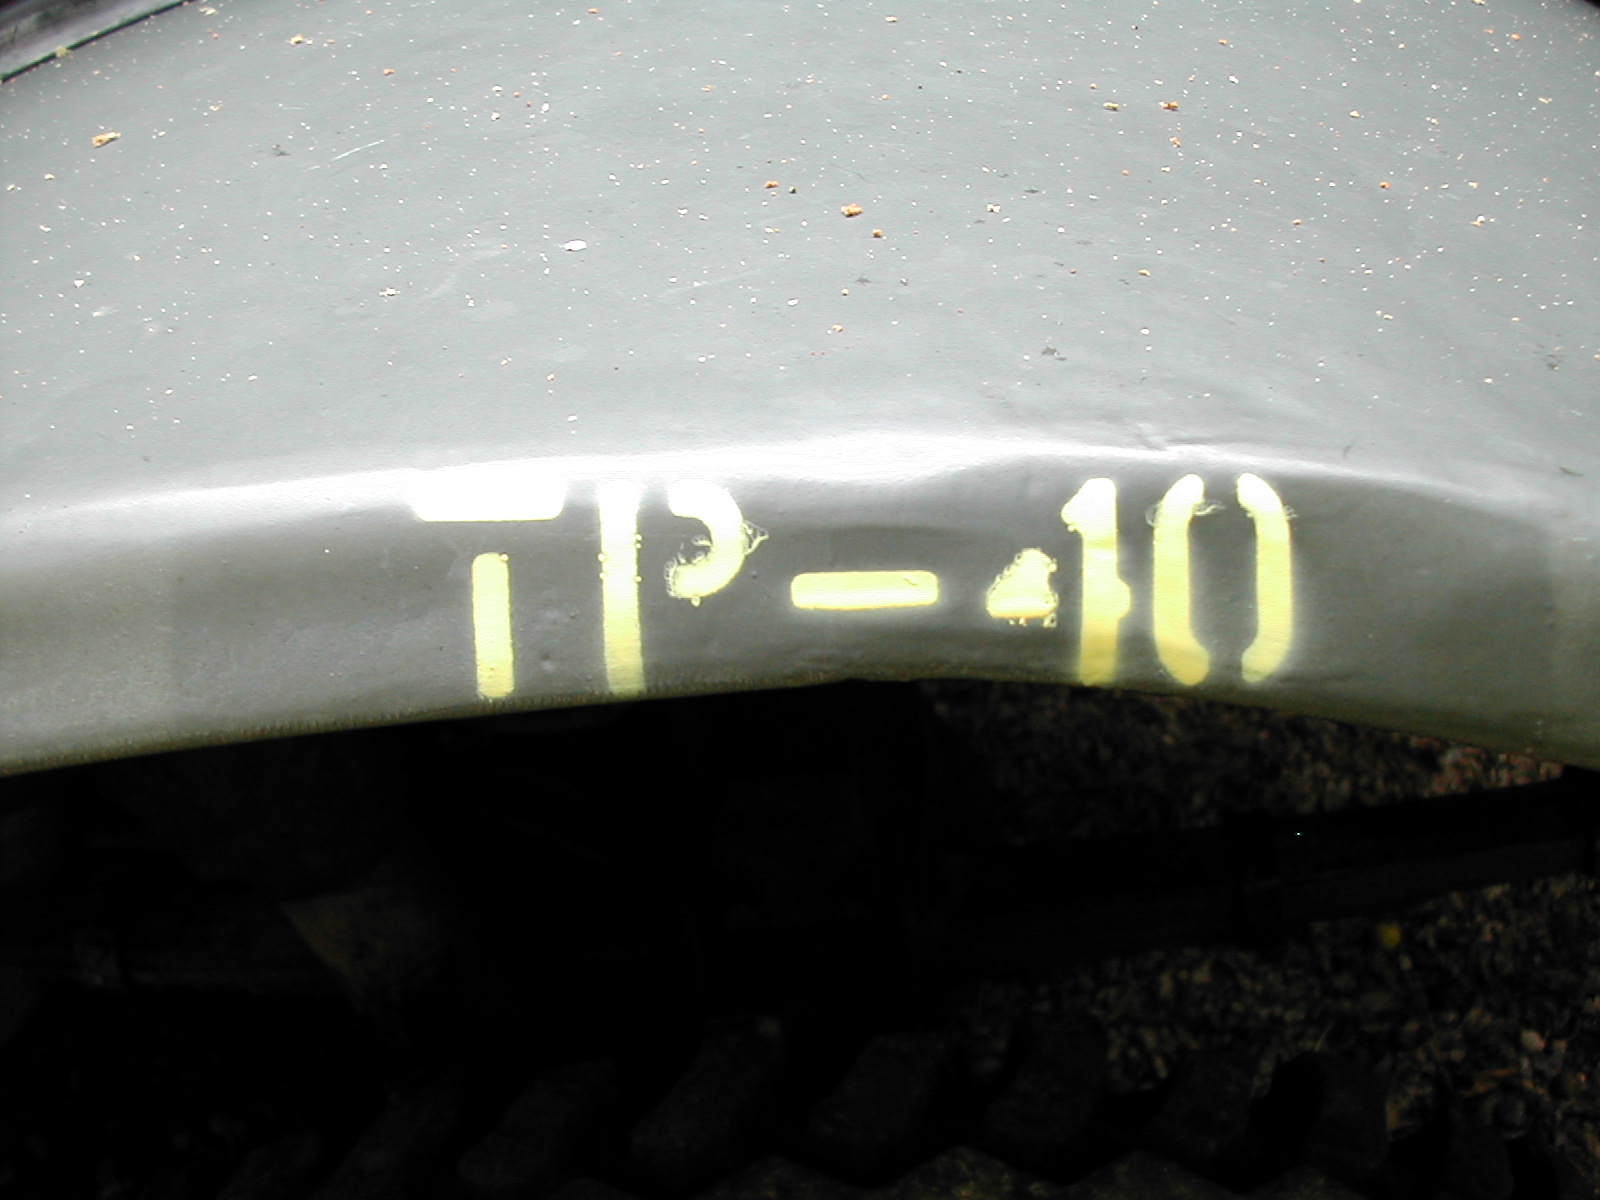 11
11 12
12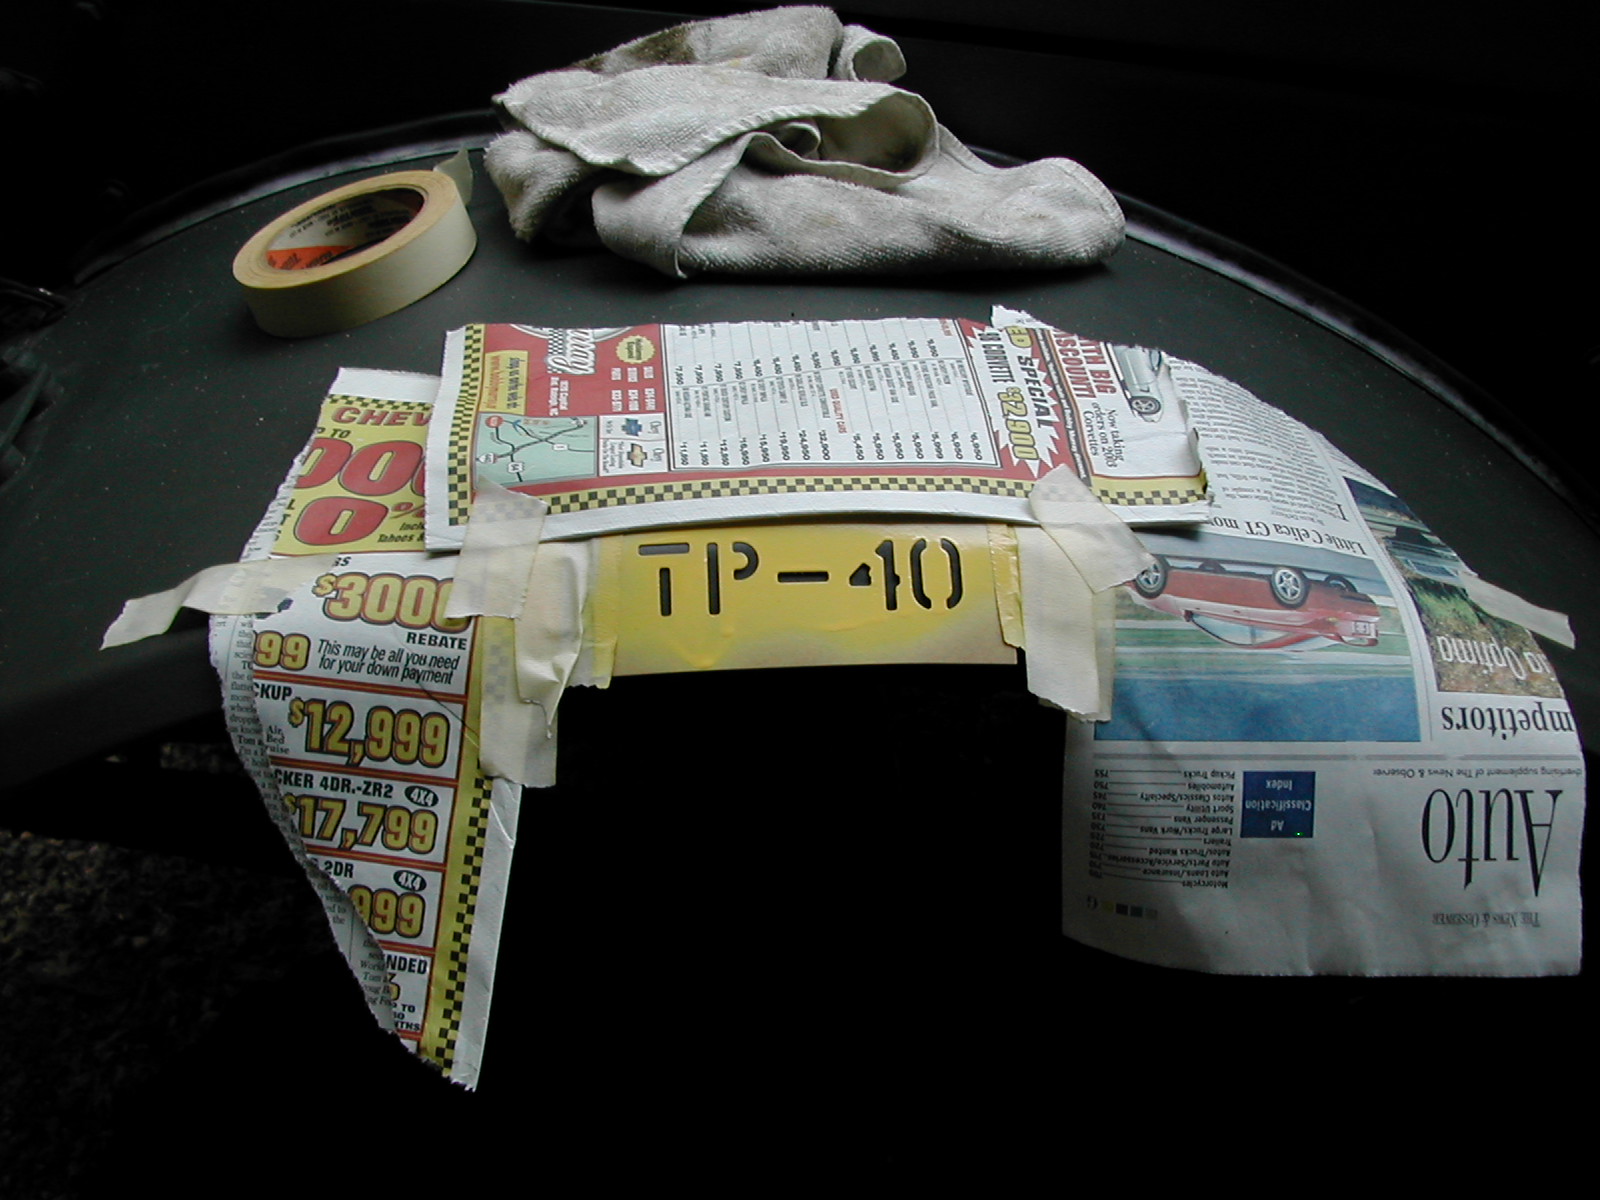 13
13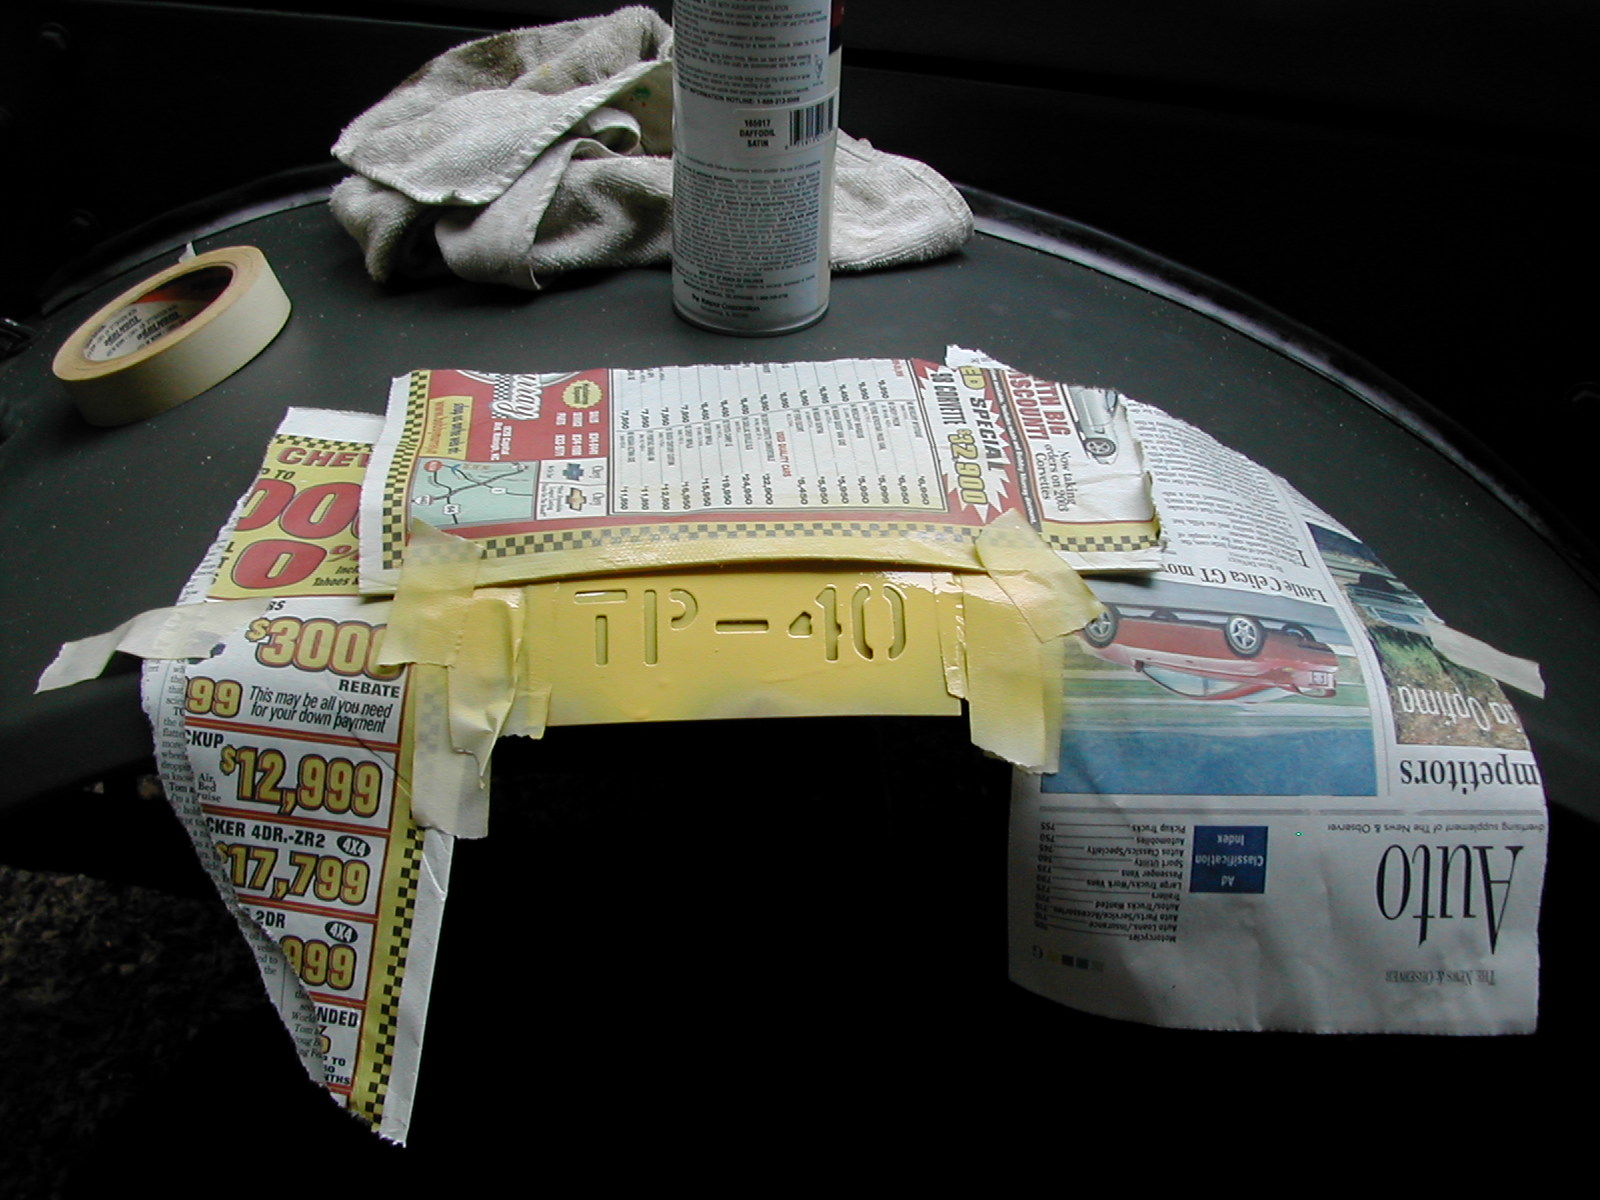 14
14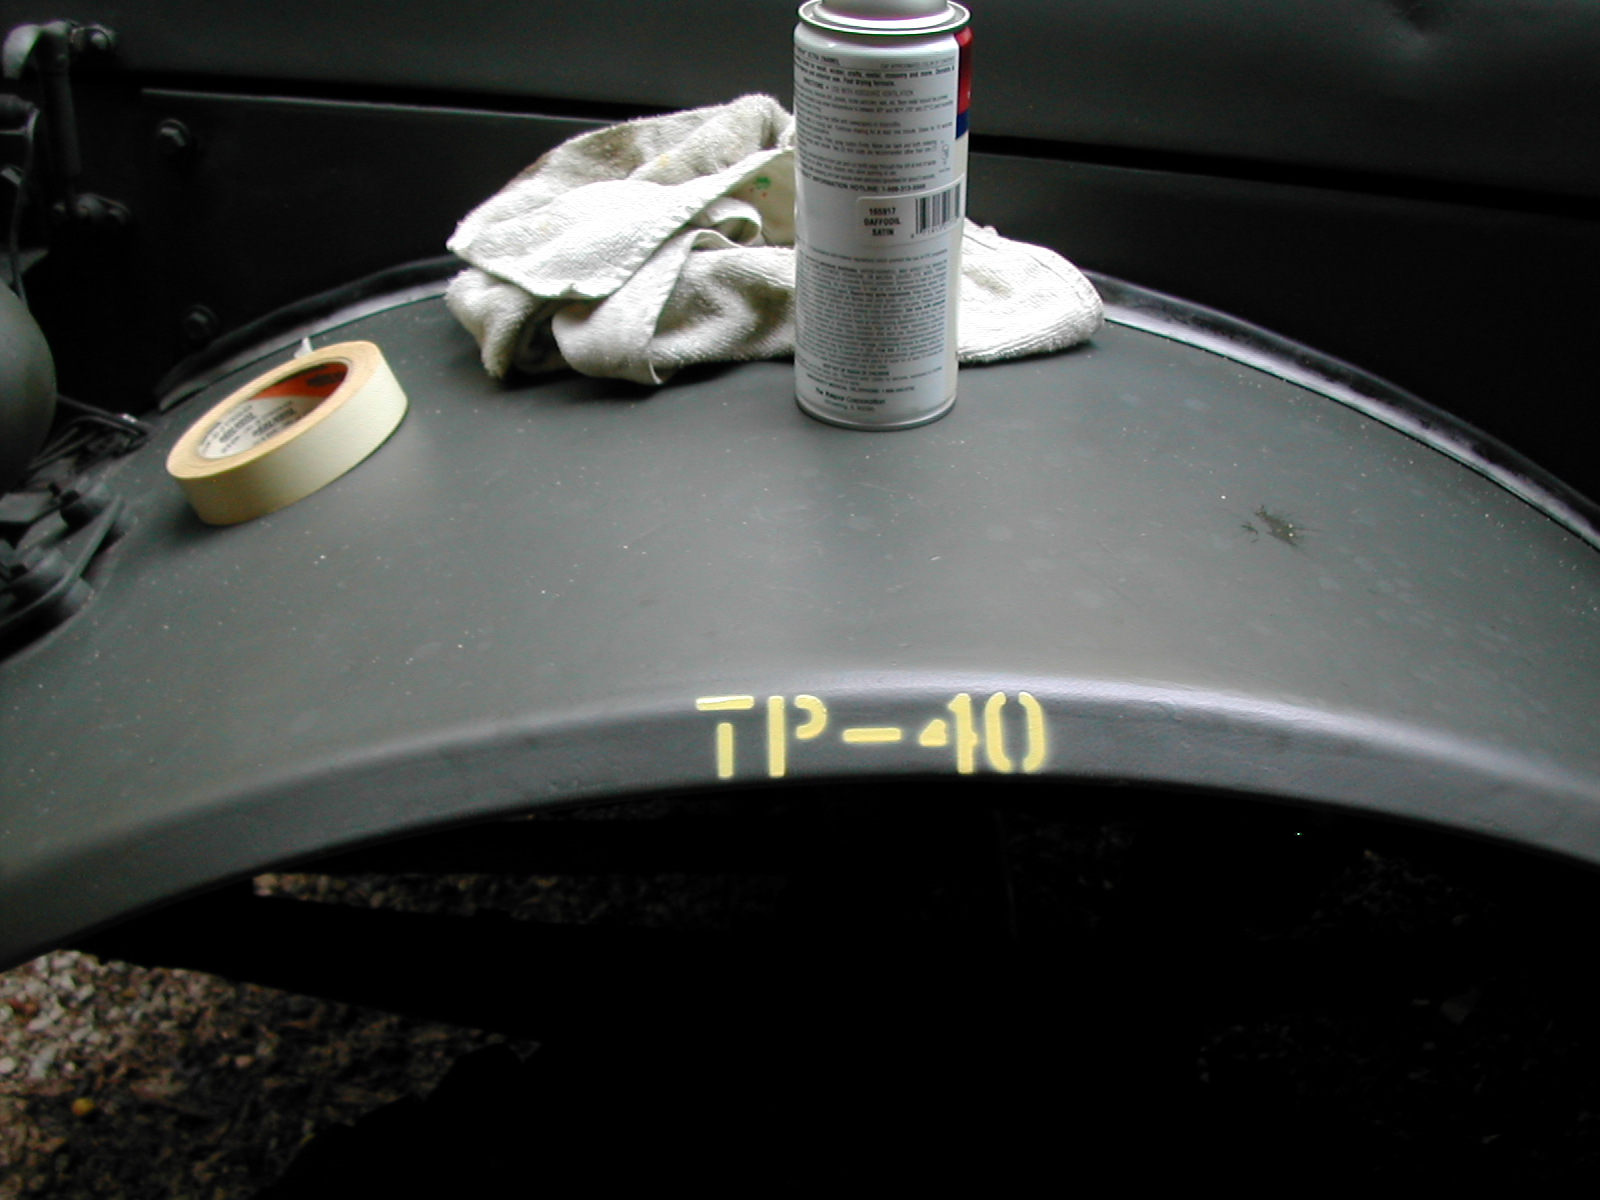 15
15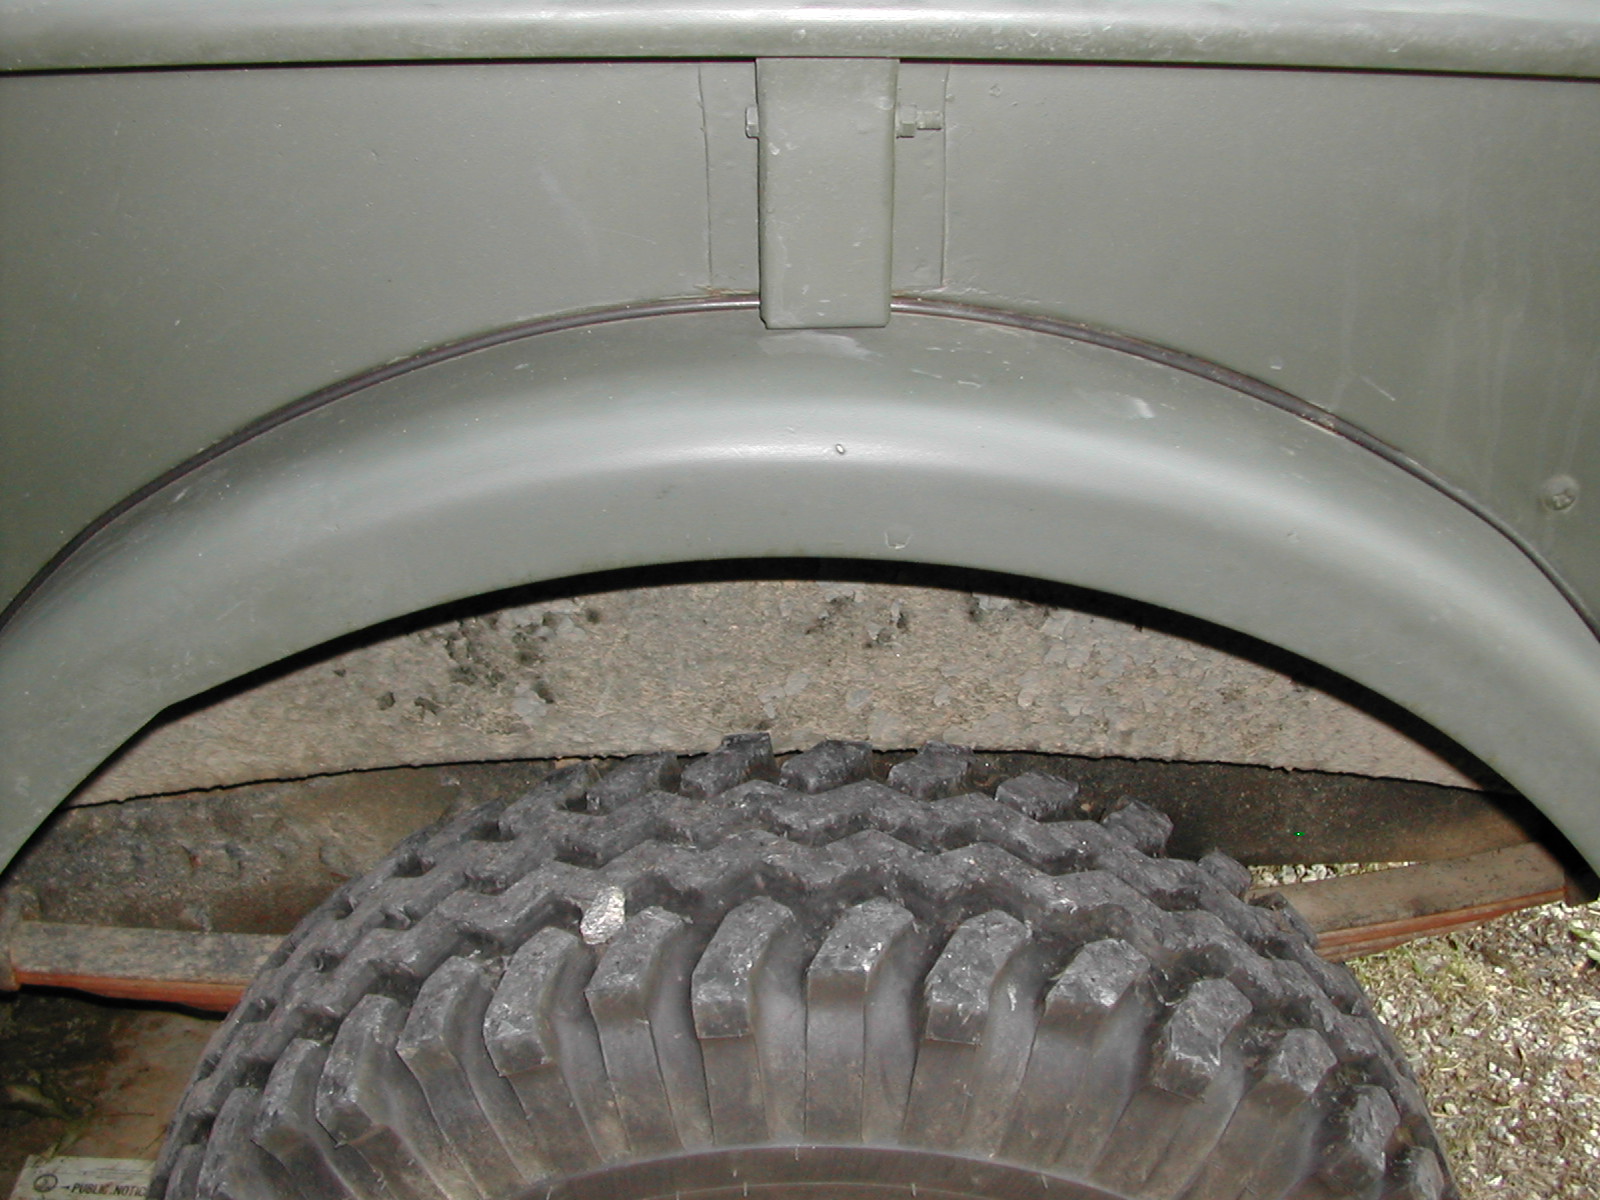 16
16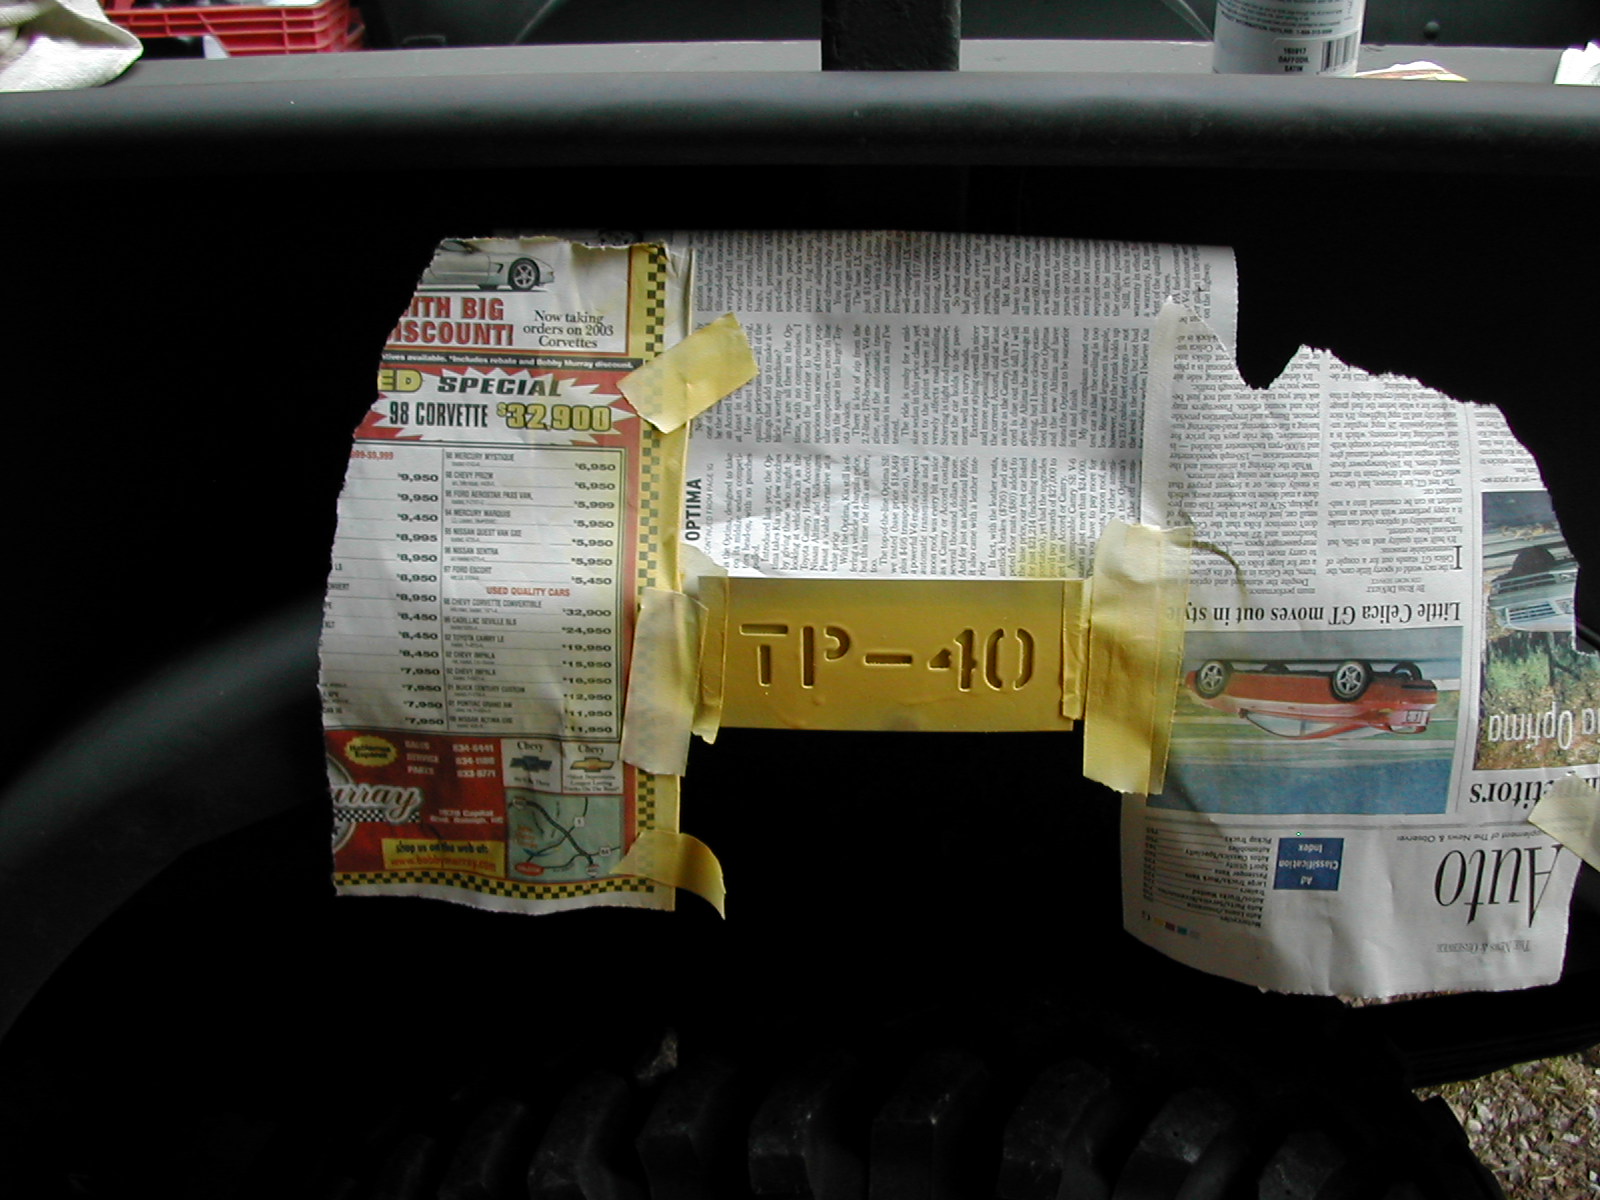 17
17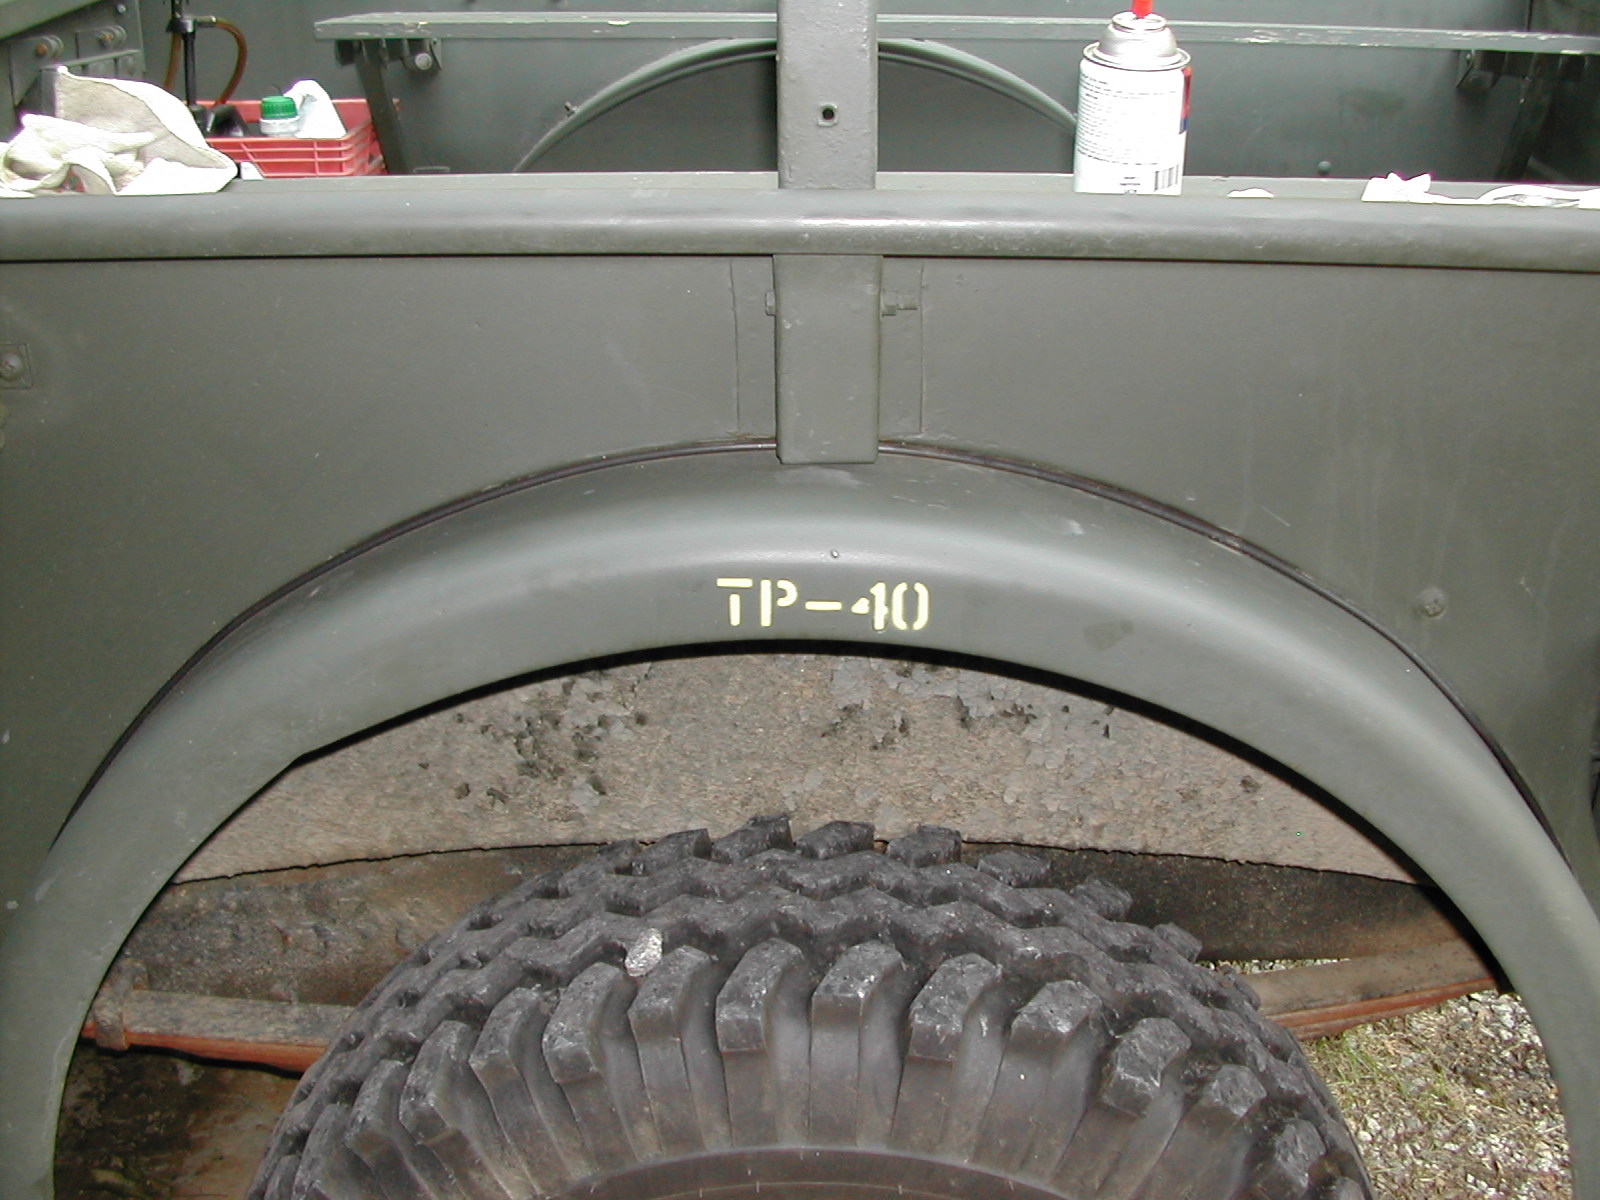 18
18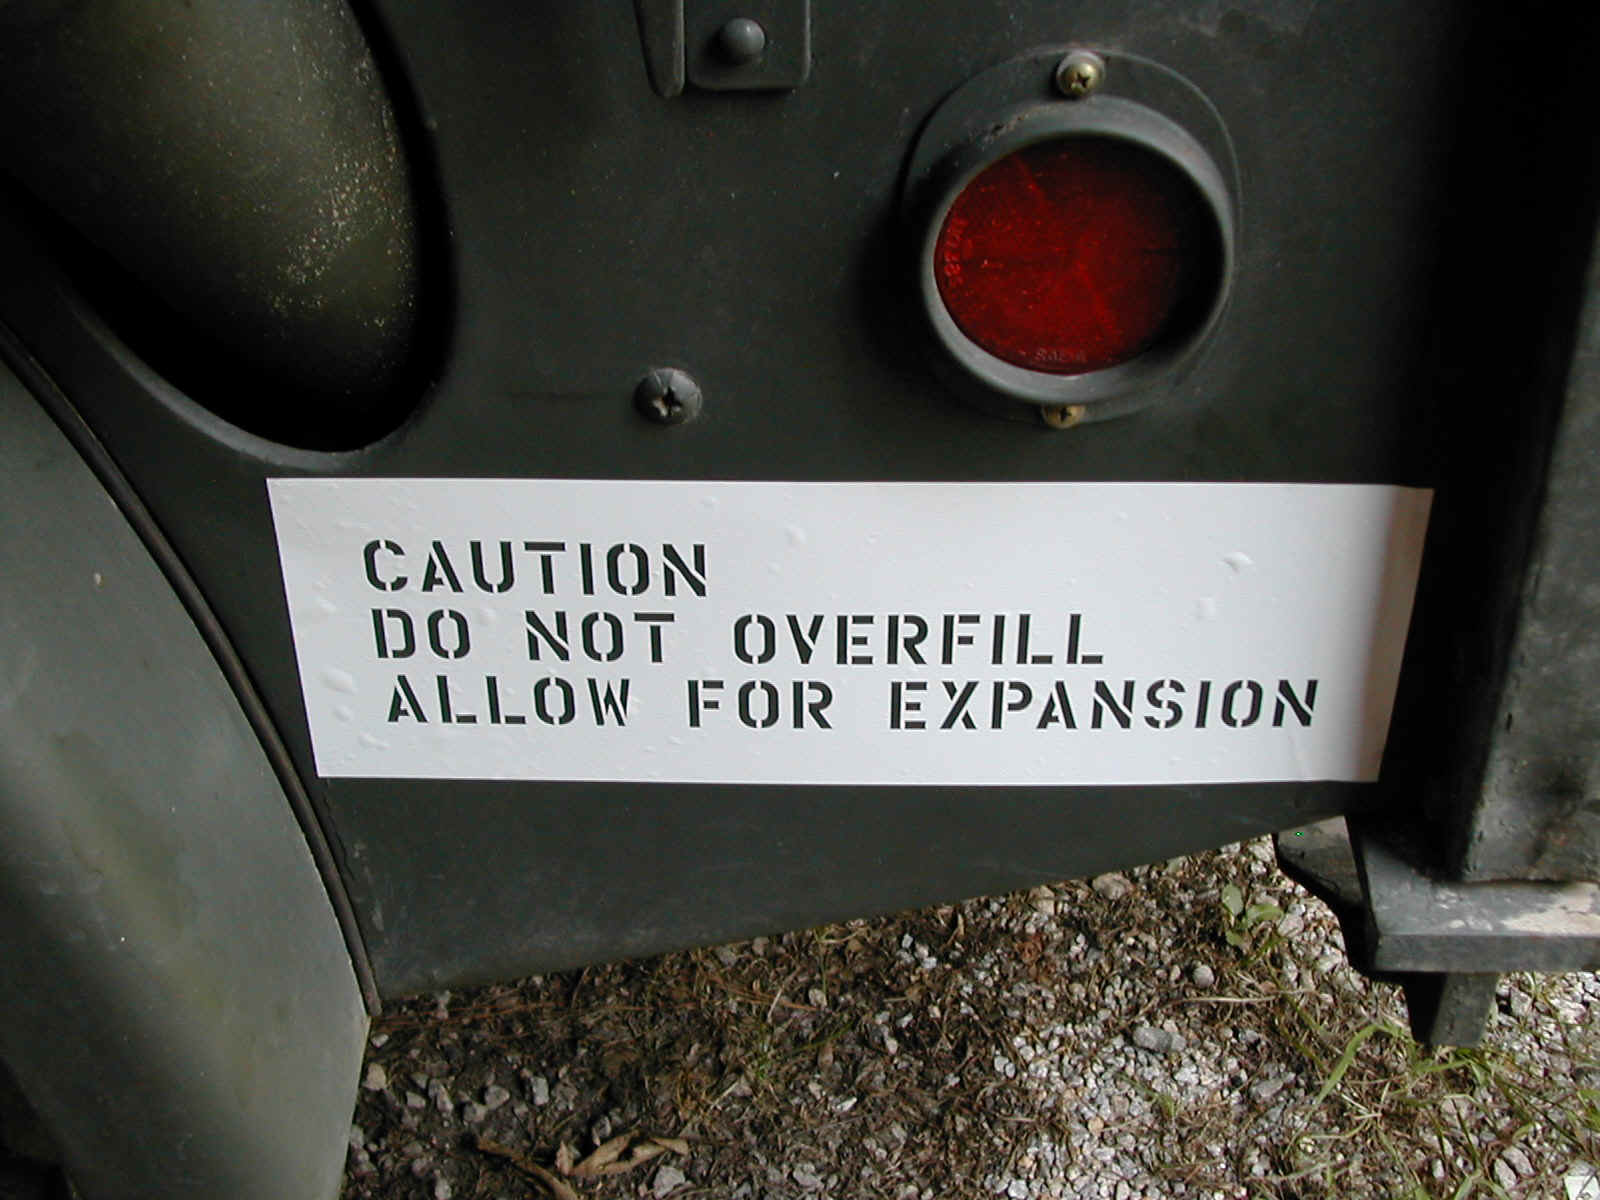 19
19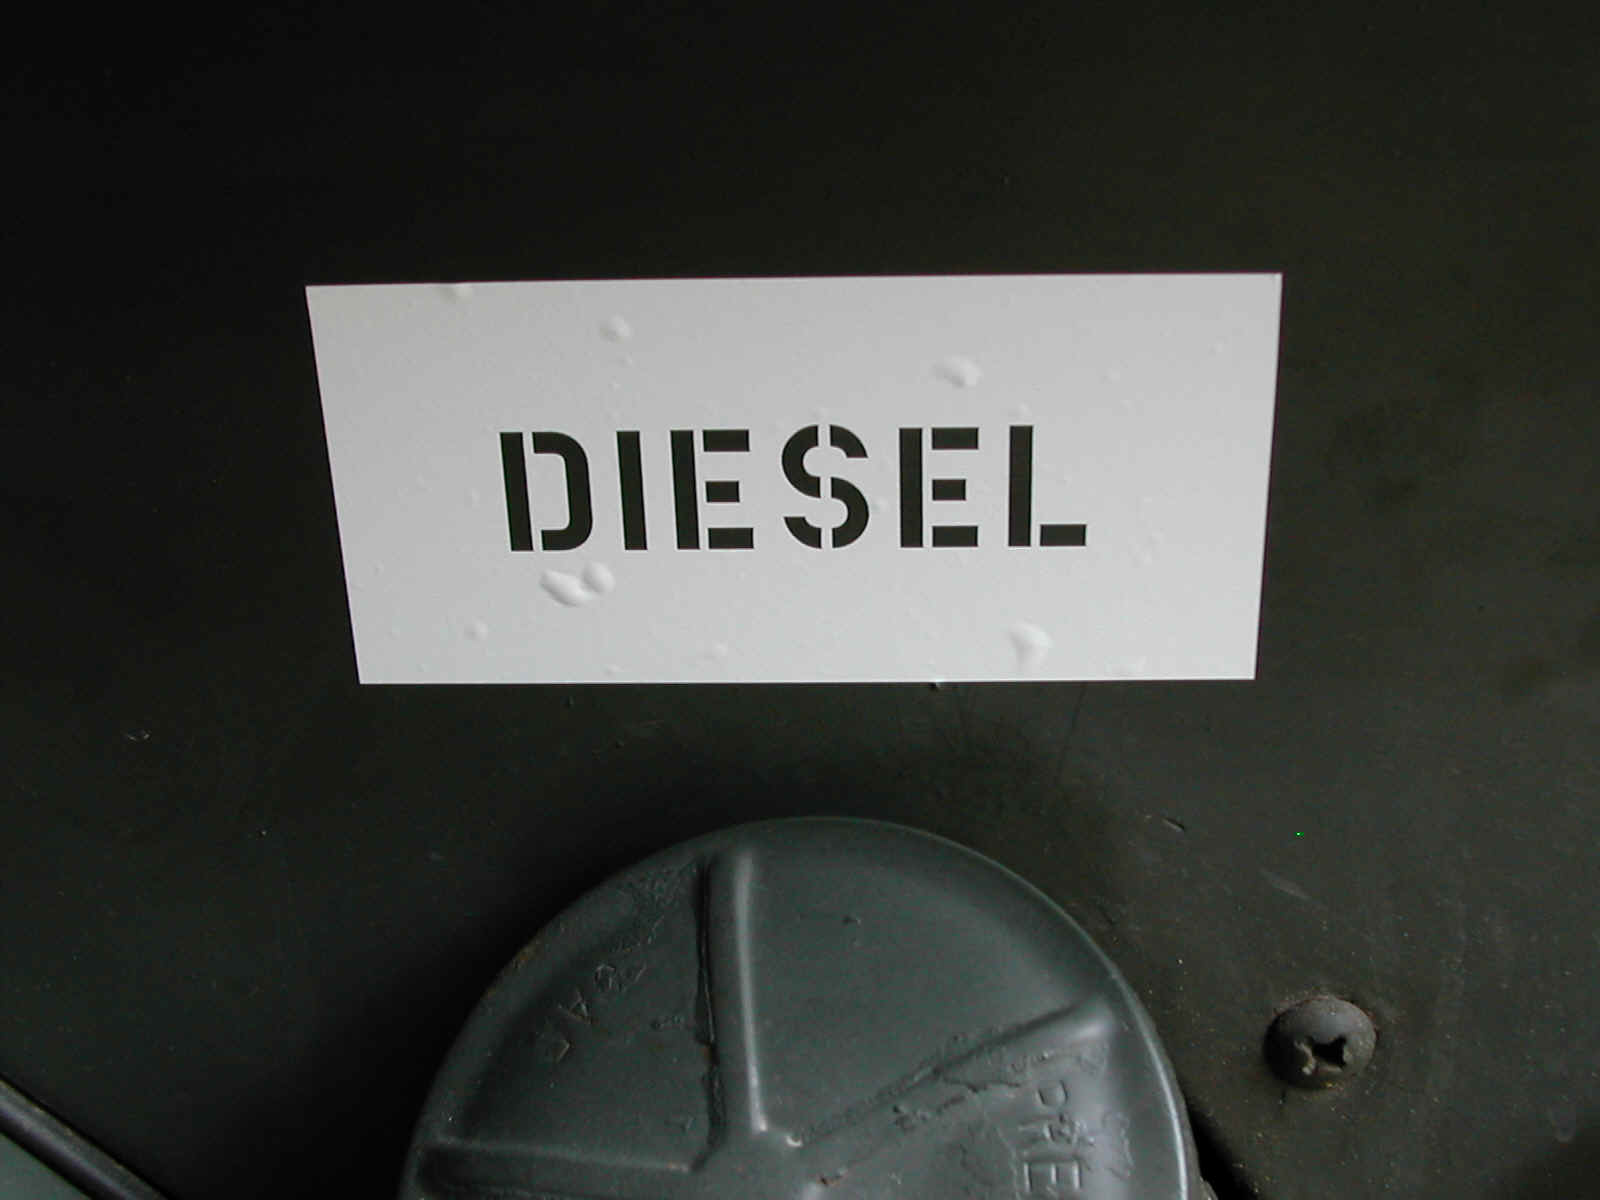 20
20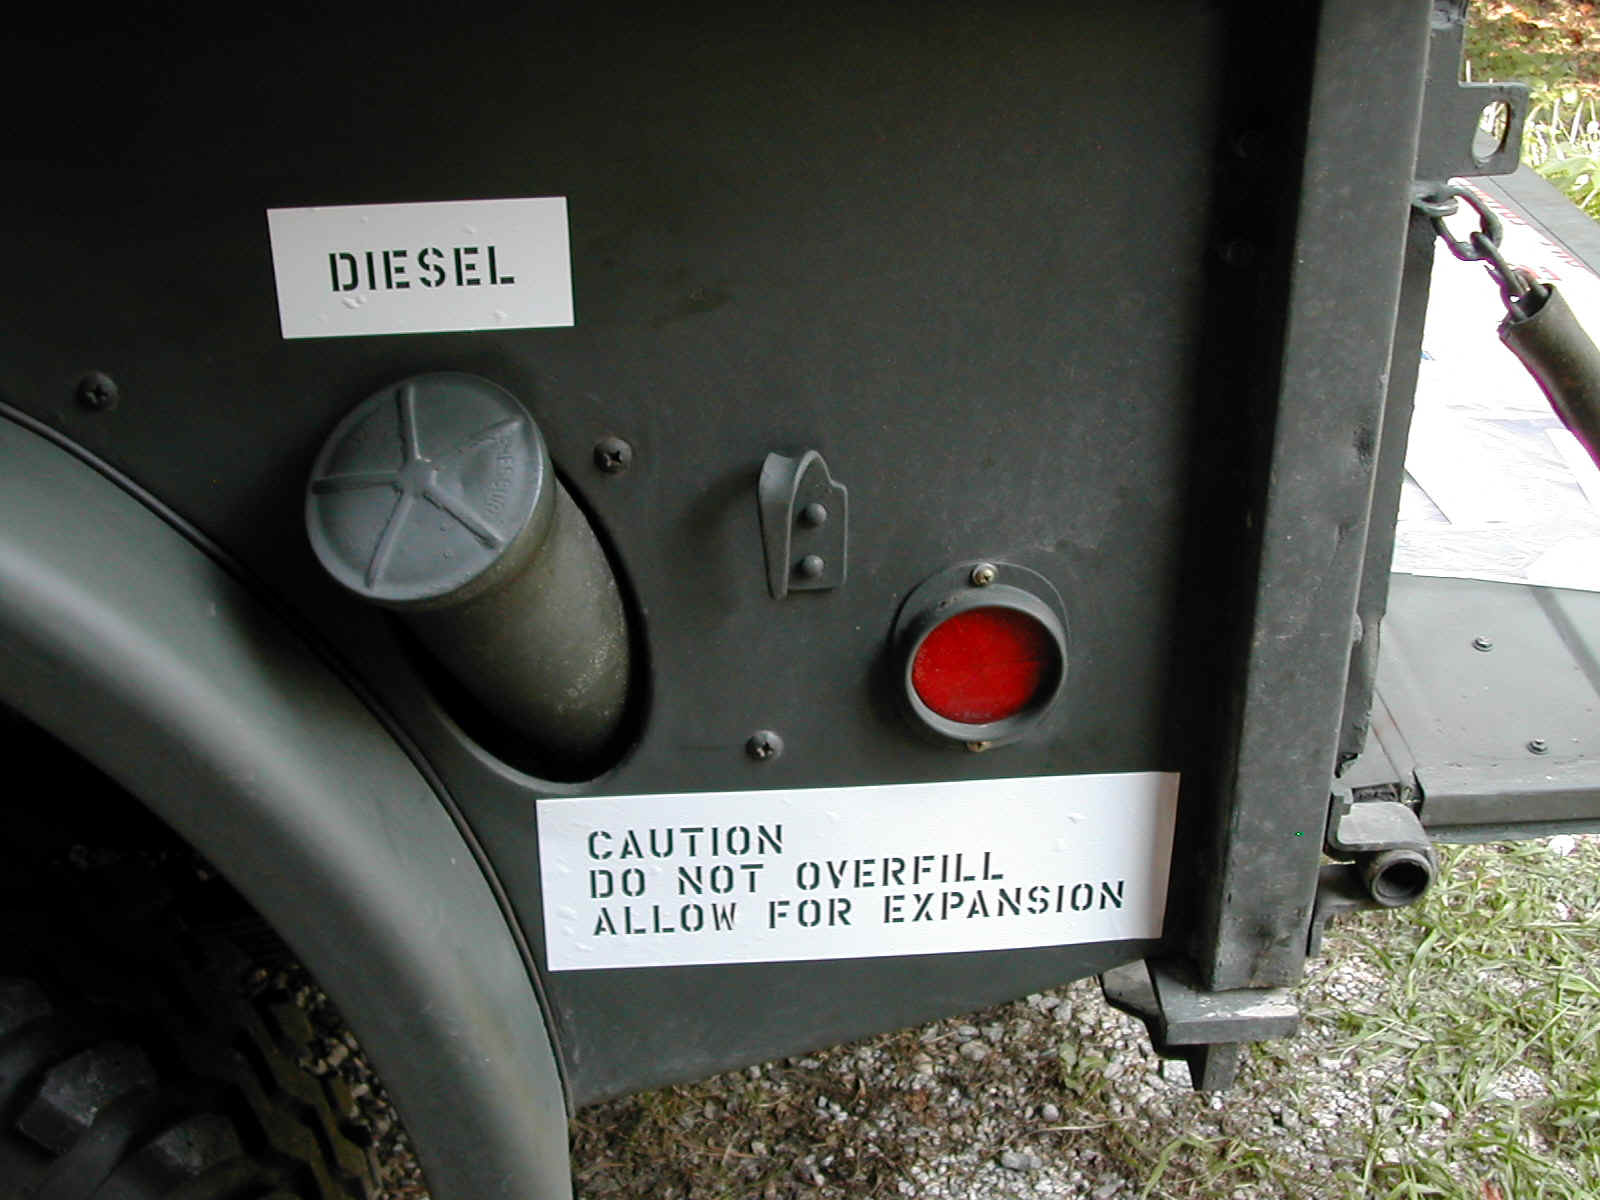 21
21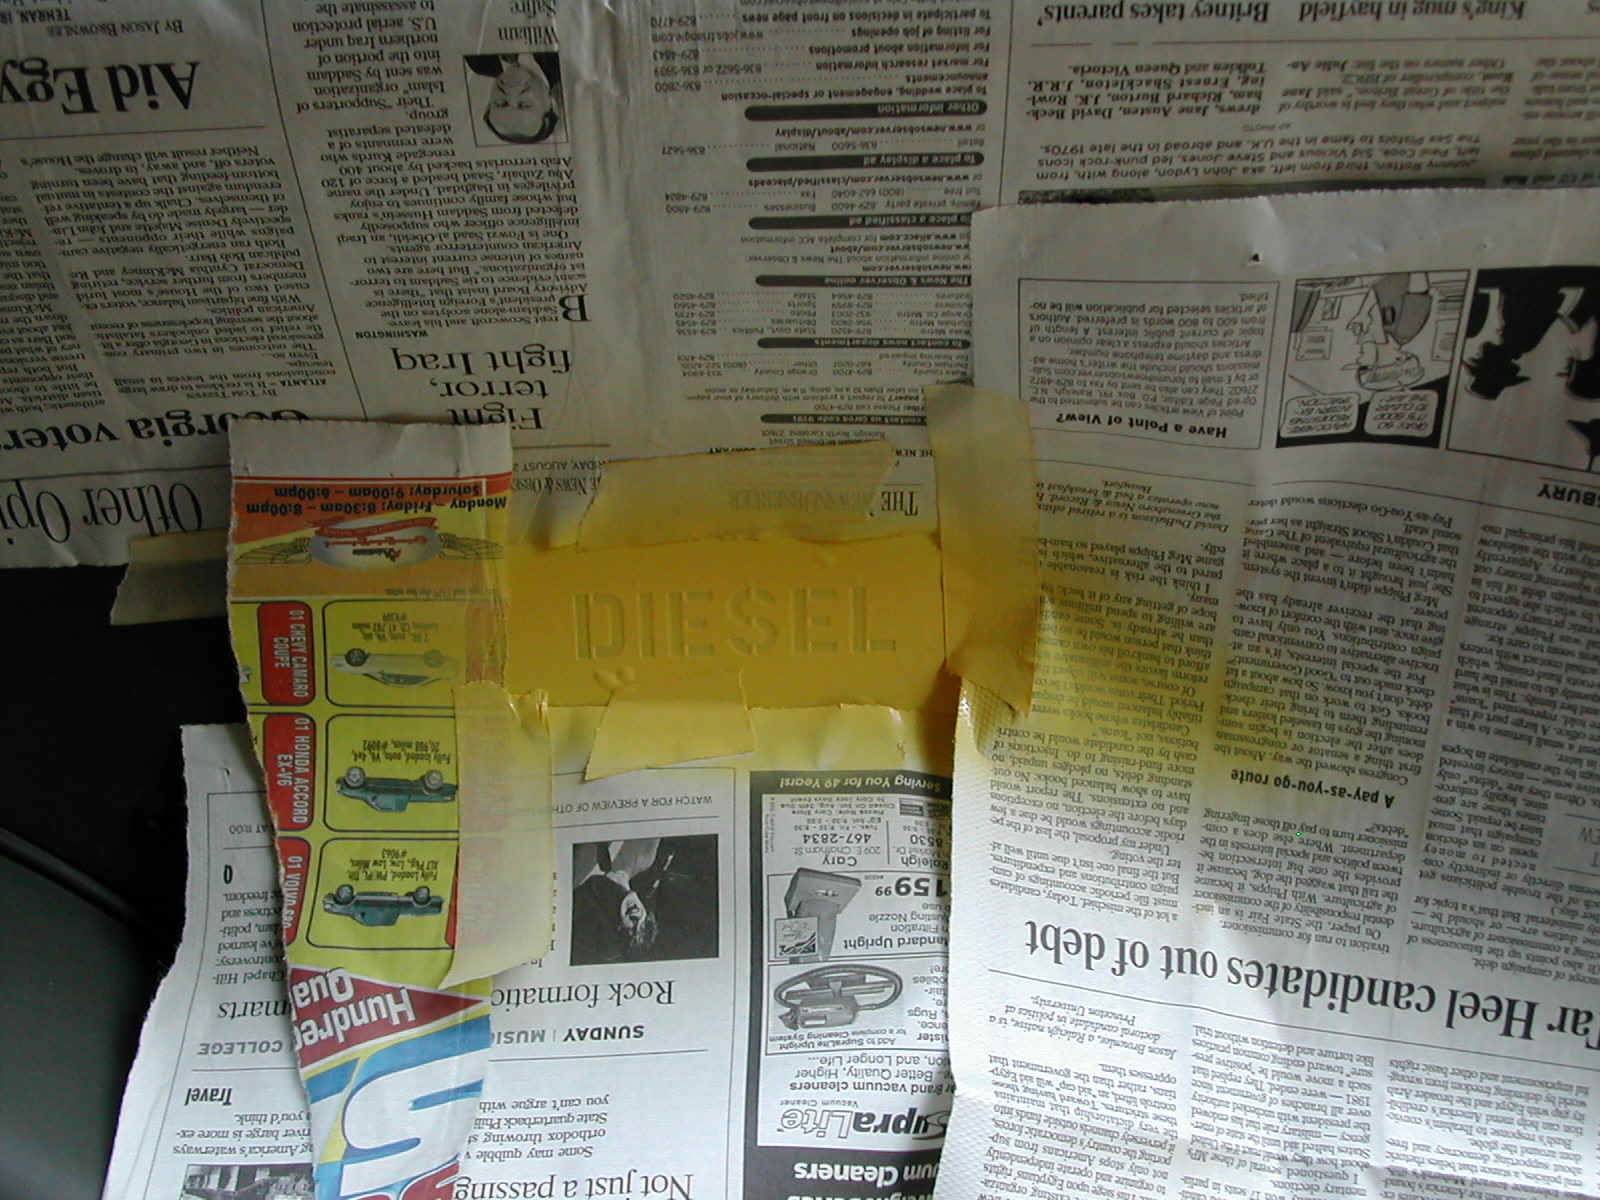 22
22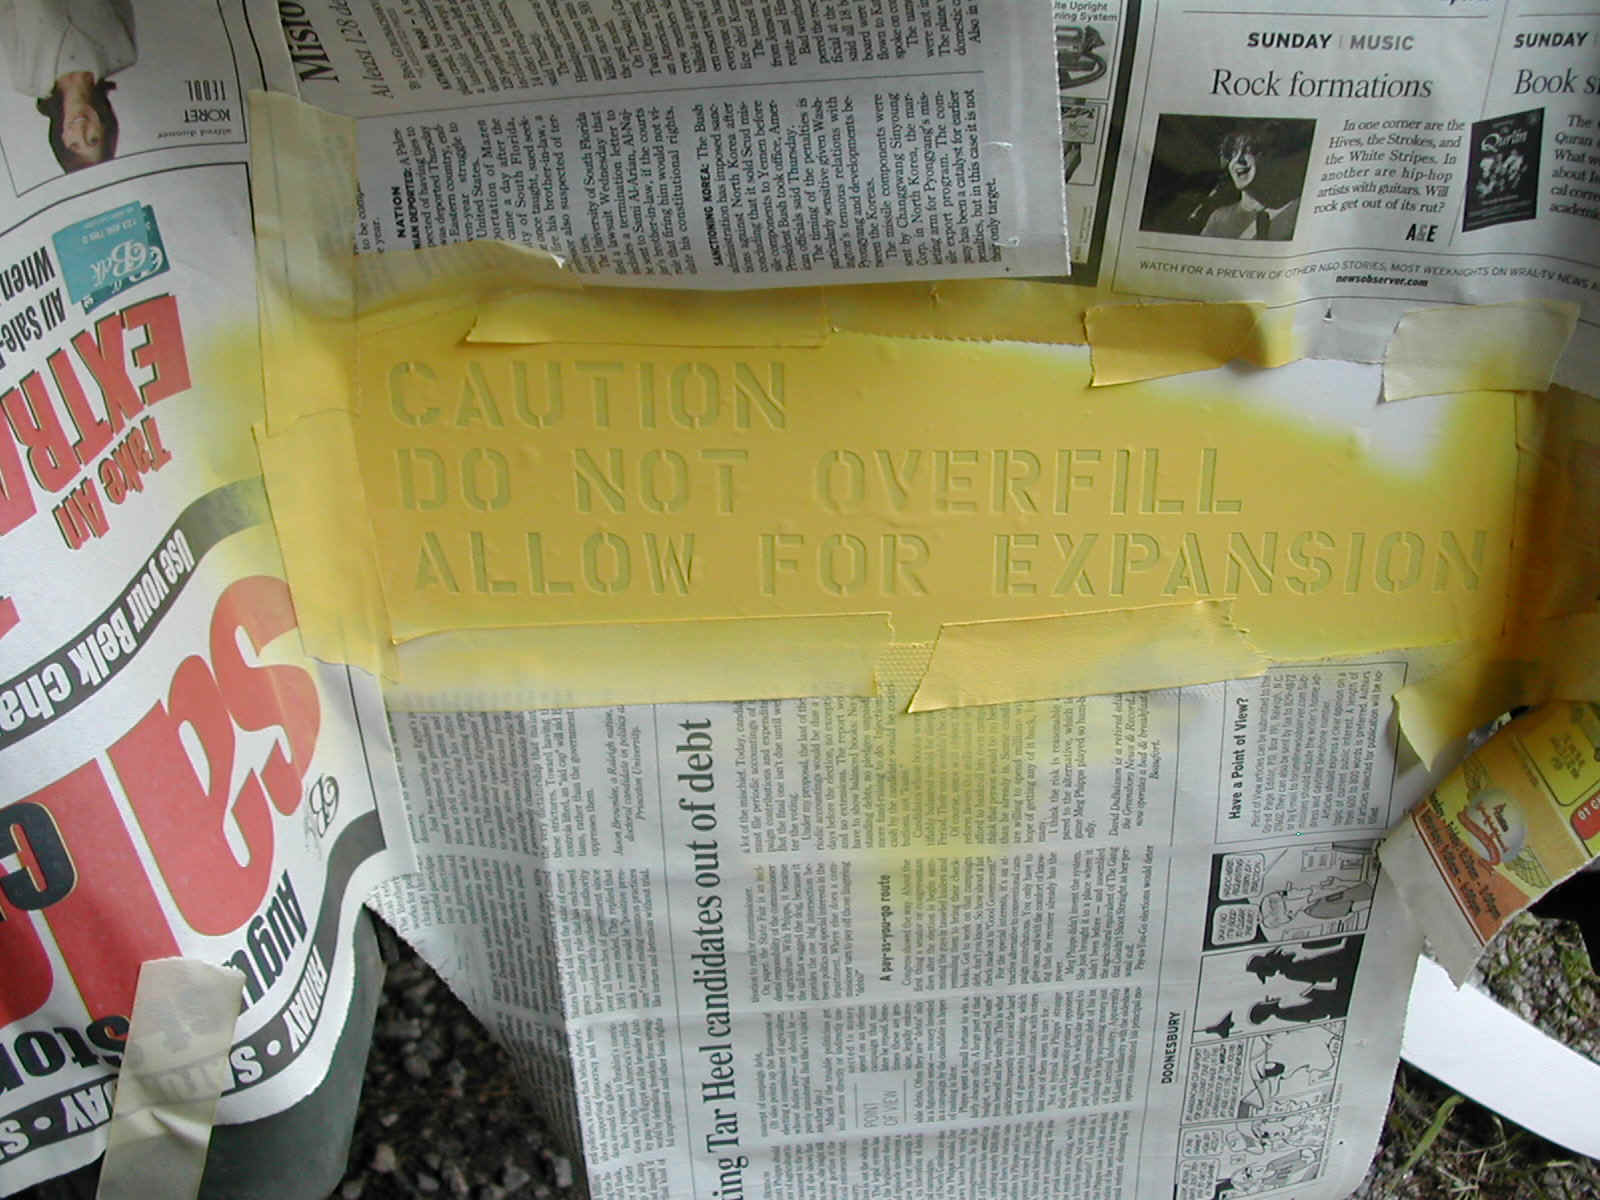 23
23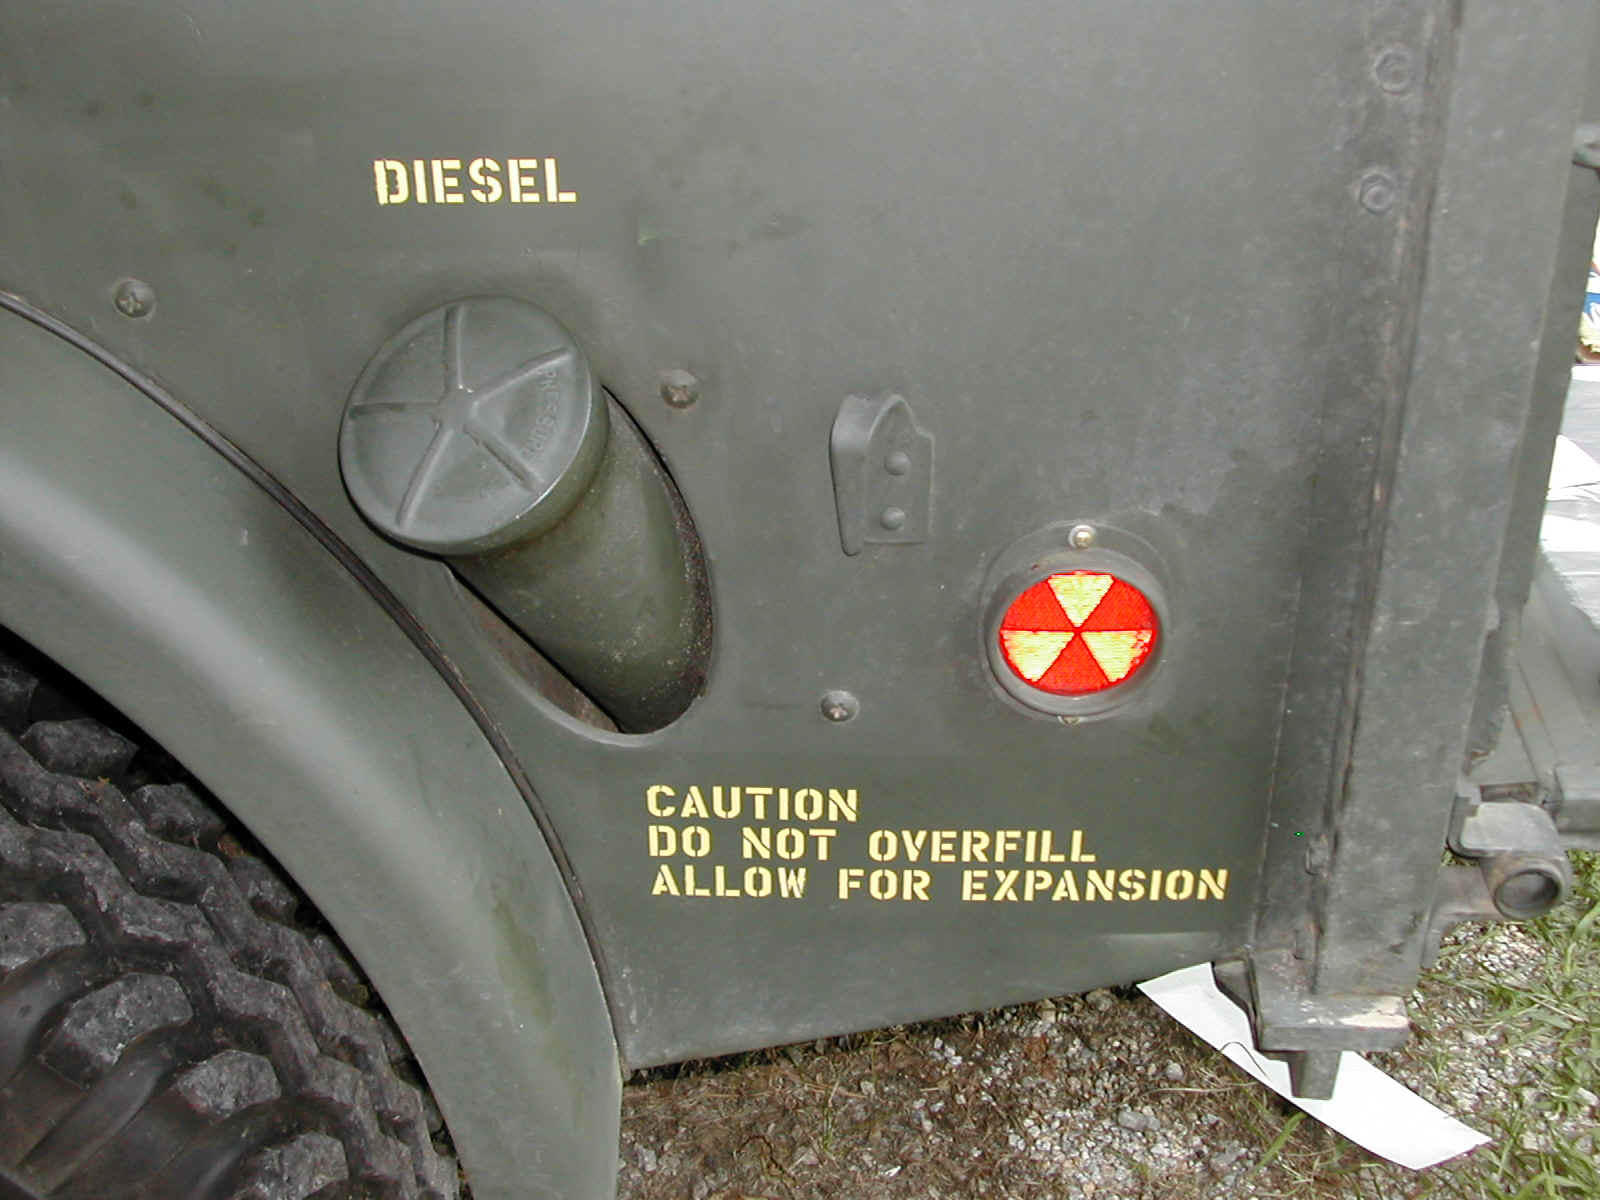 24
24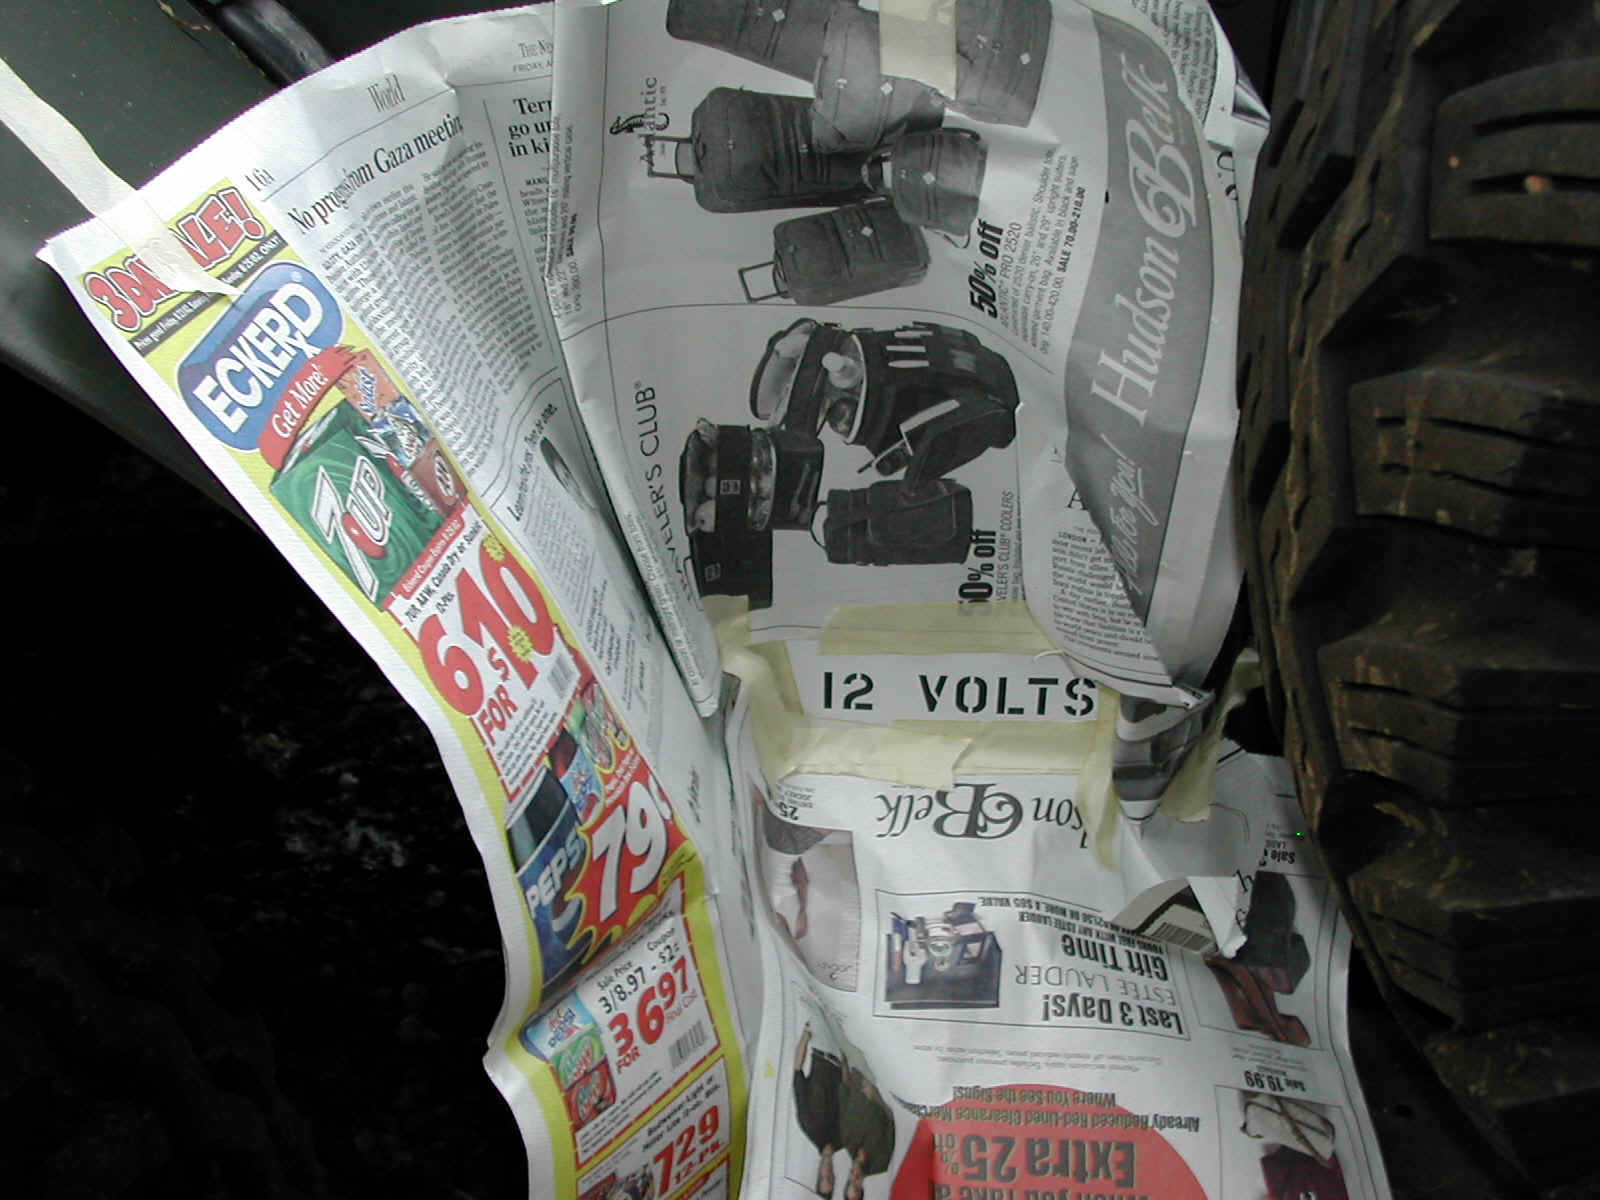 25
25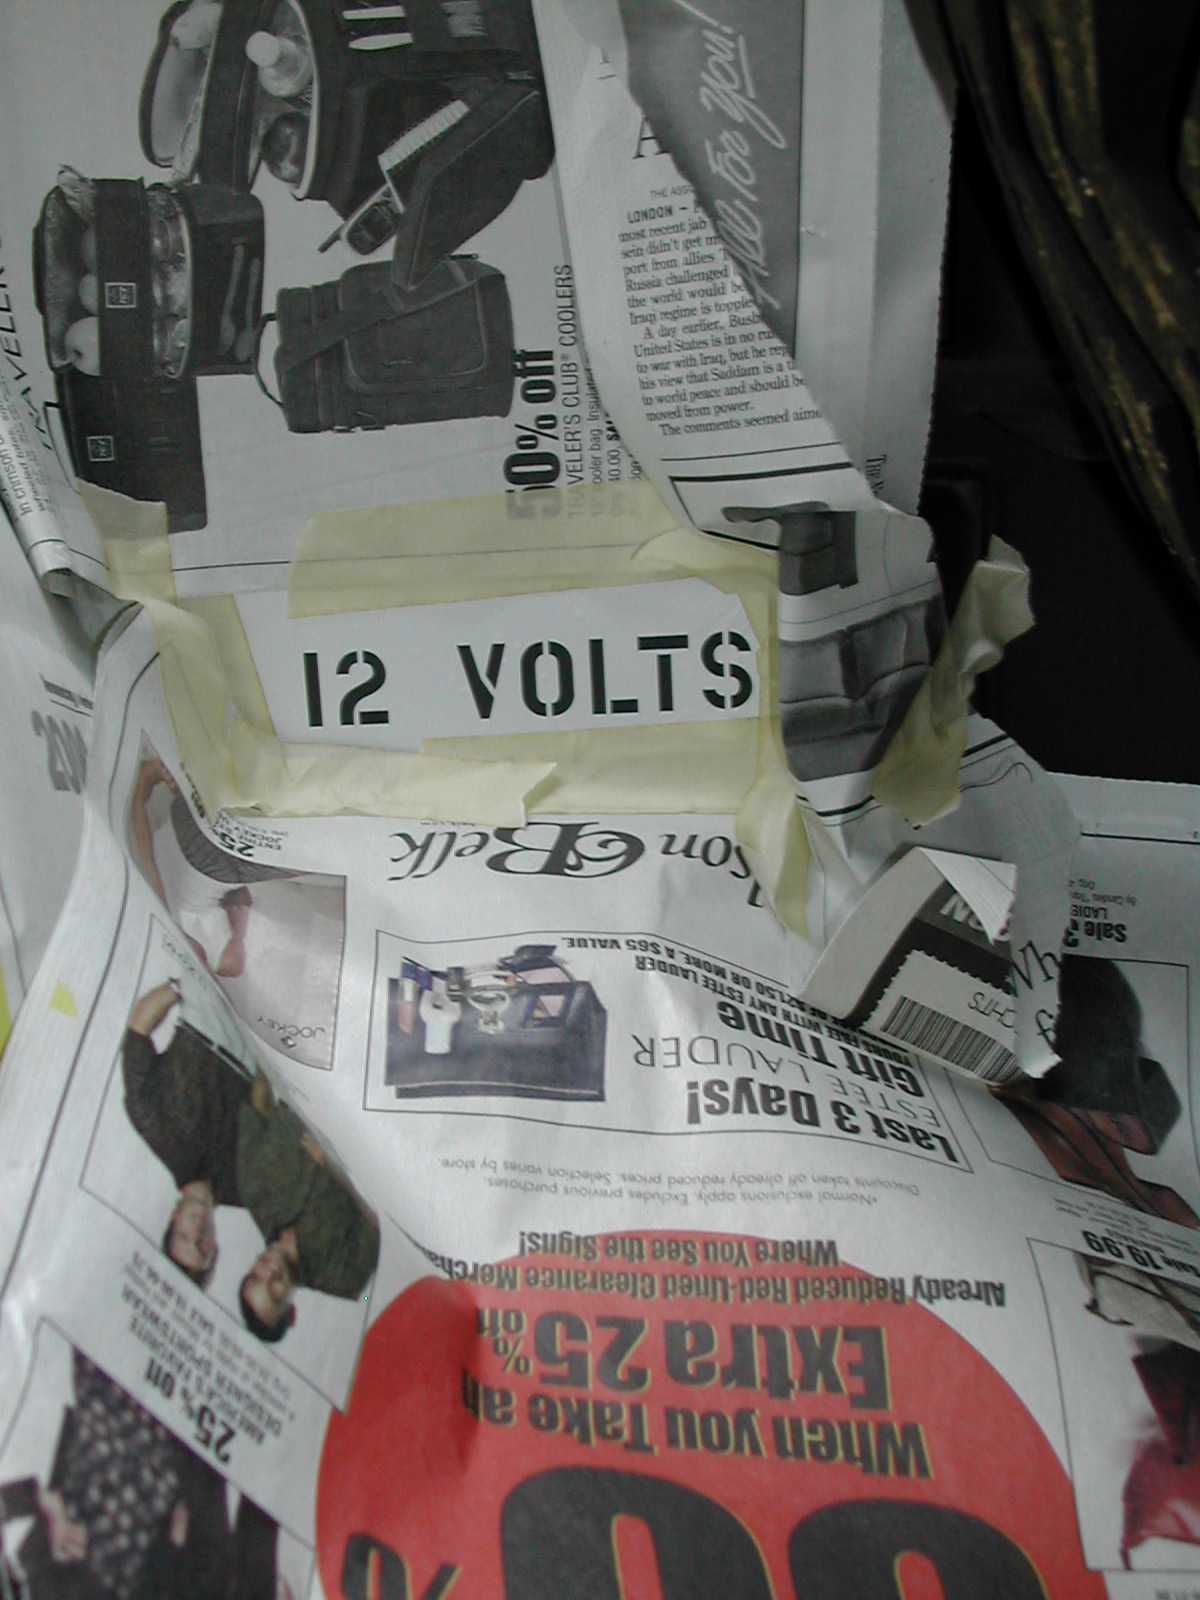 26
26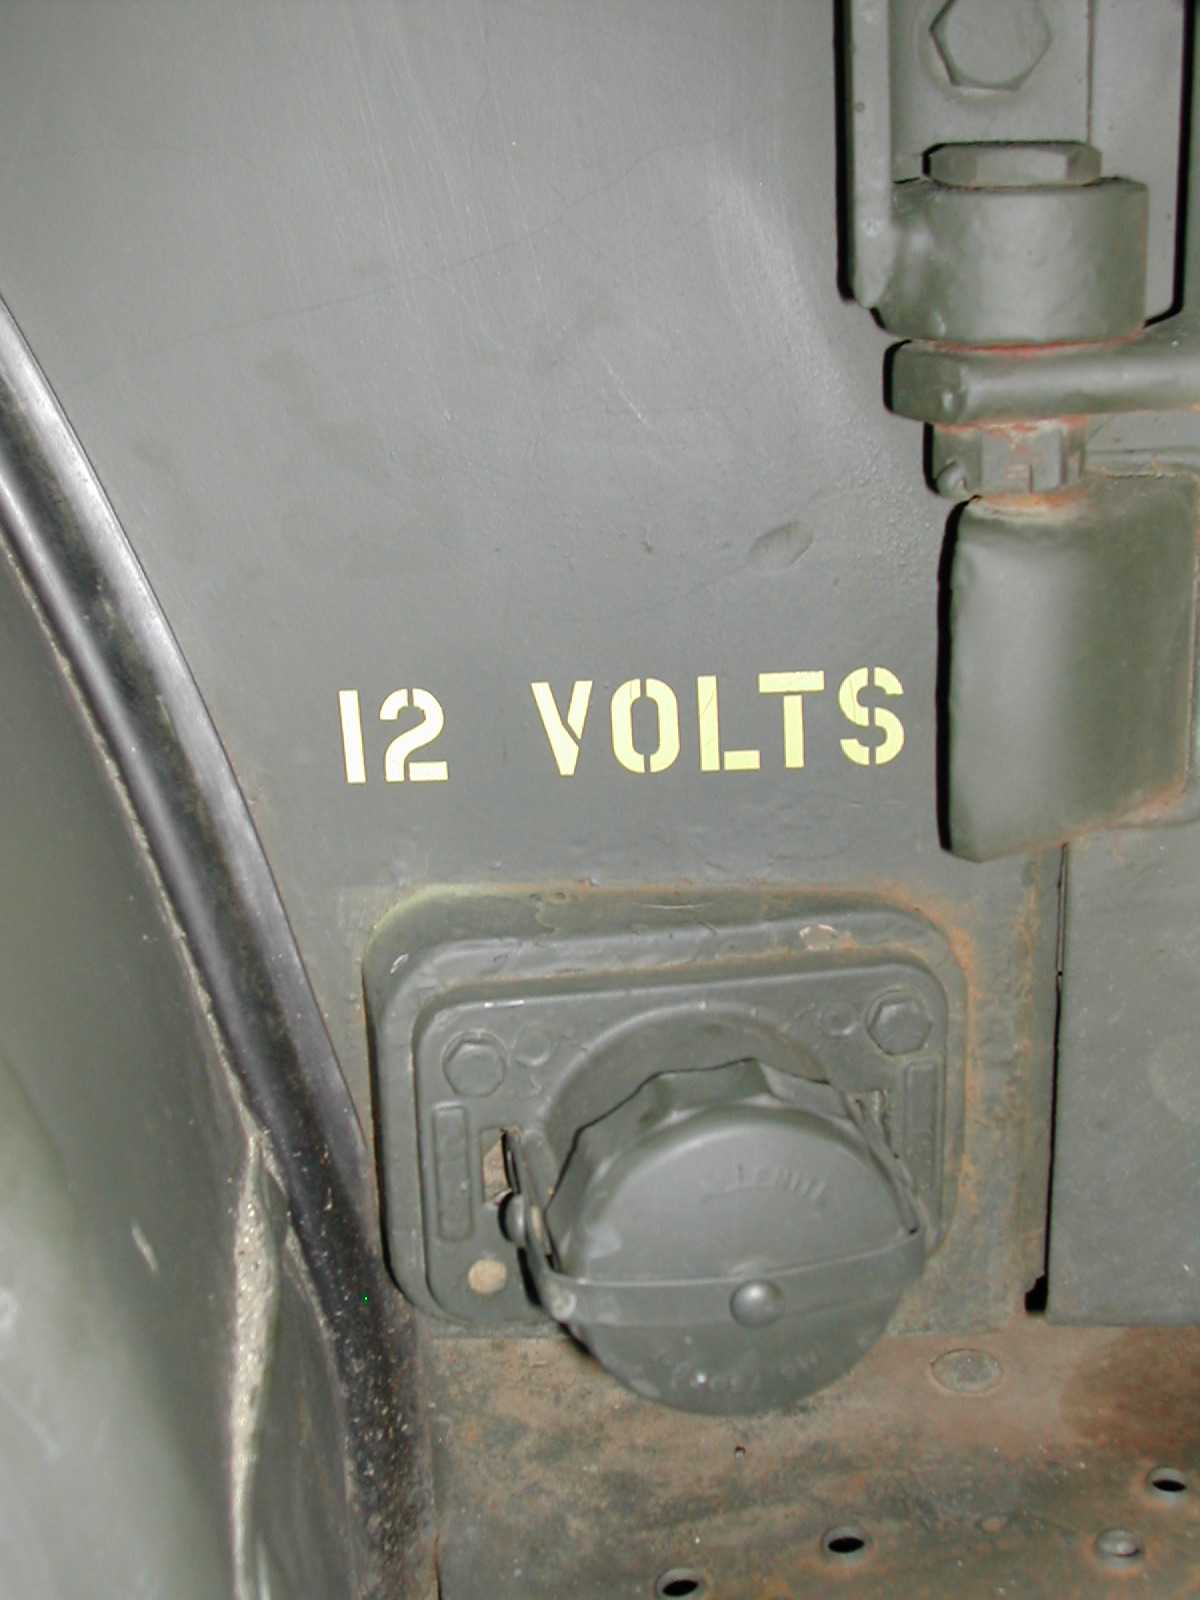 27
27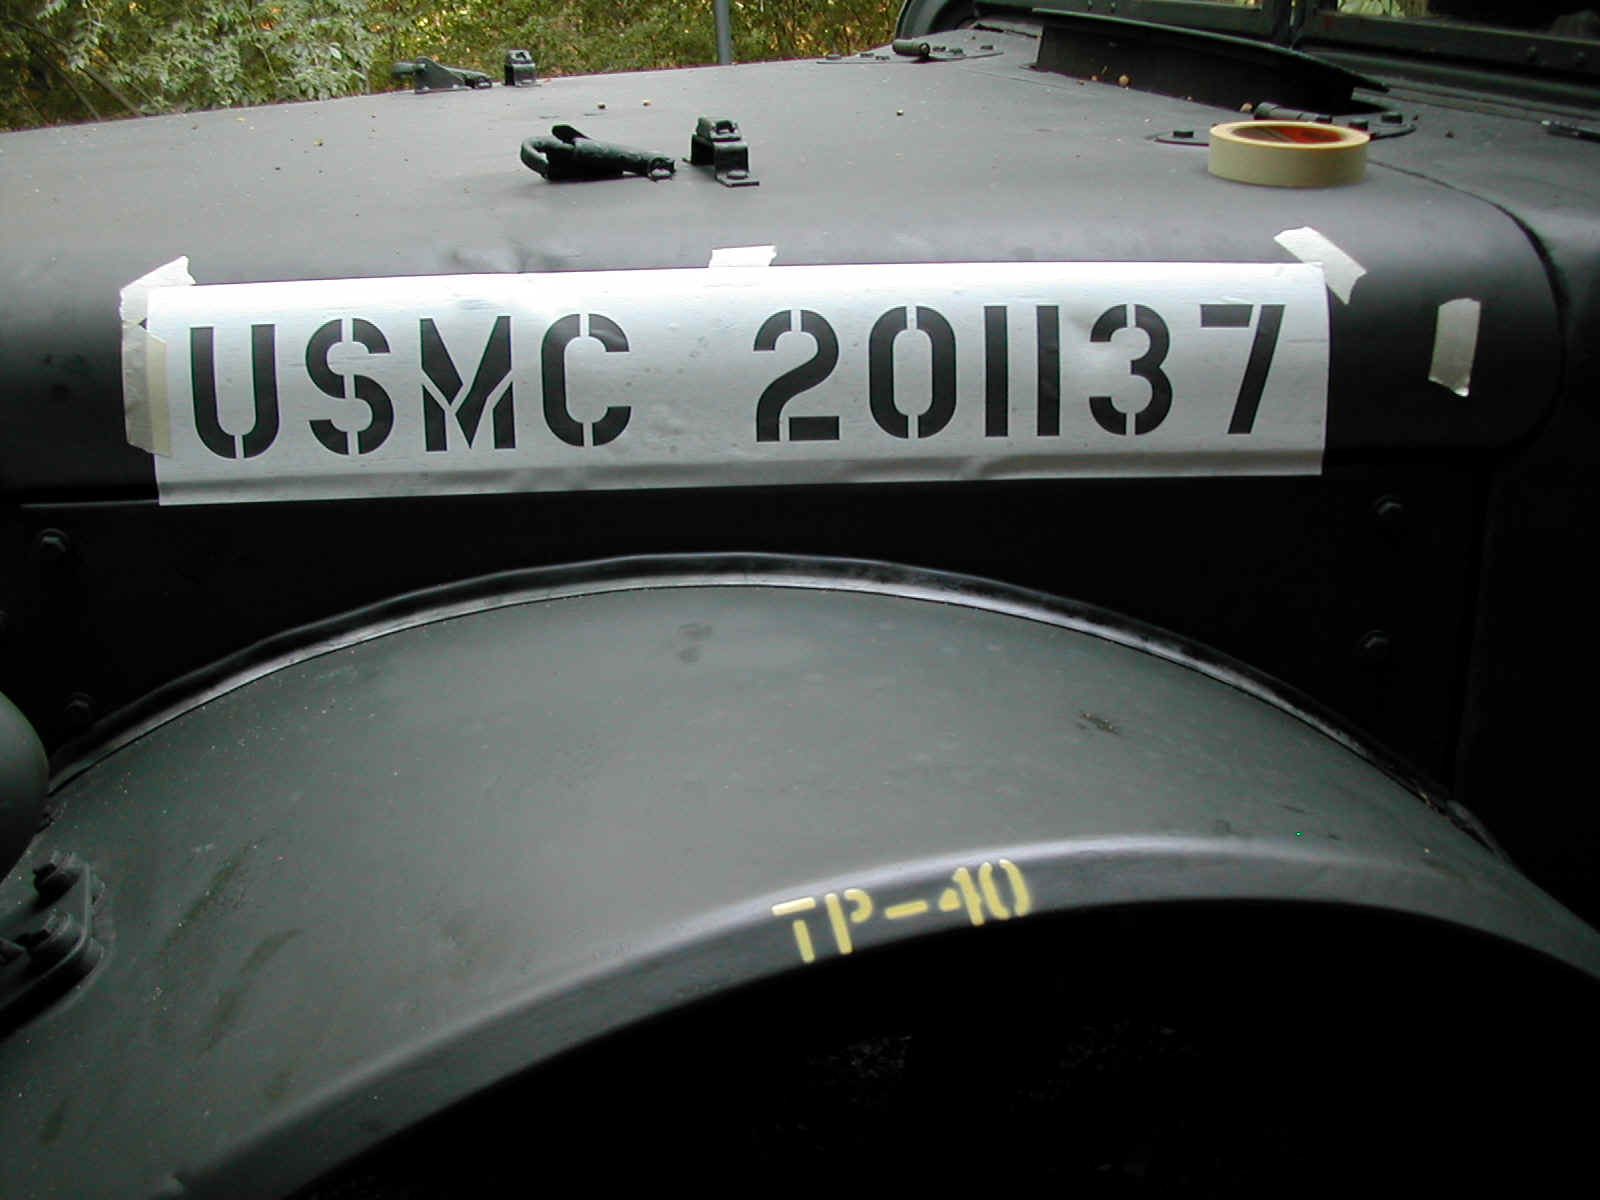 28
28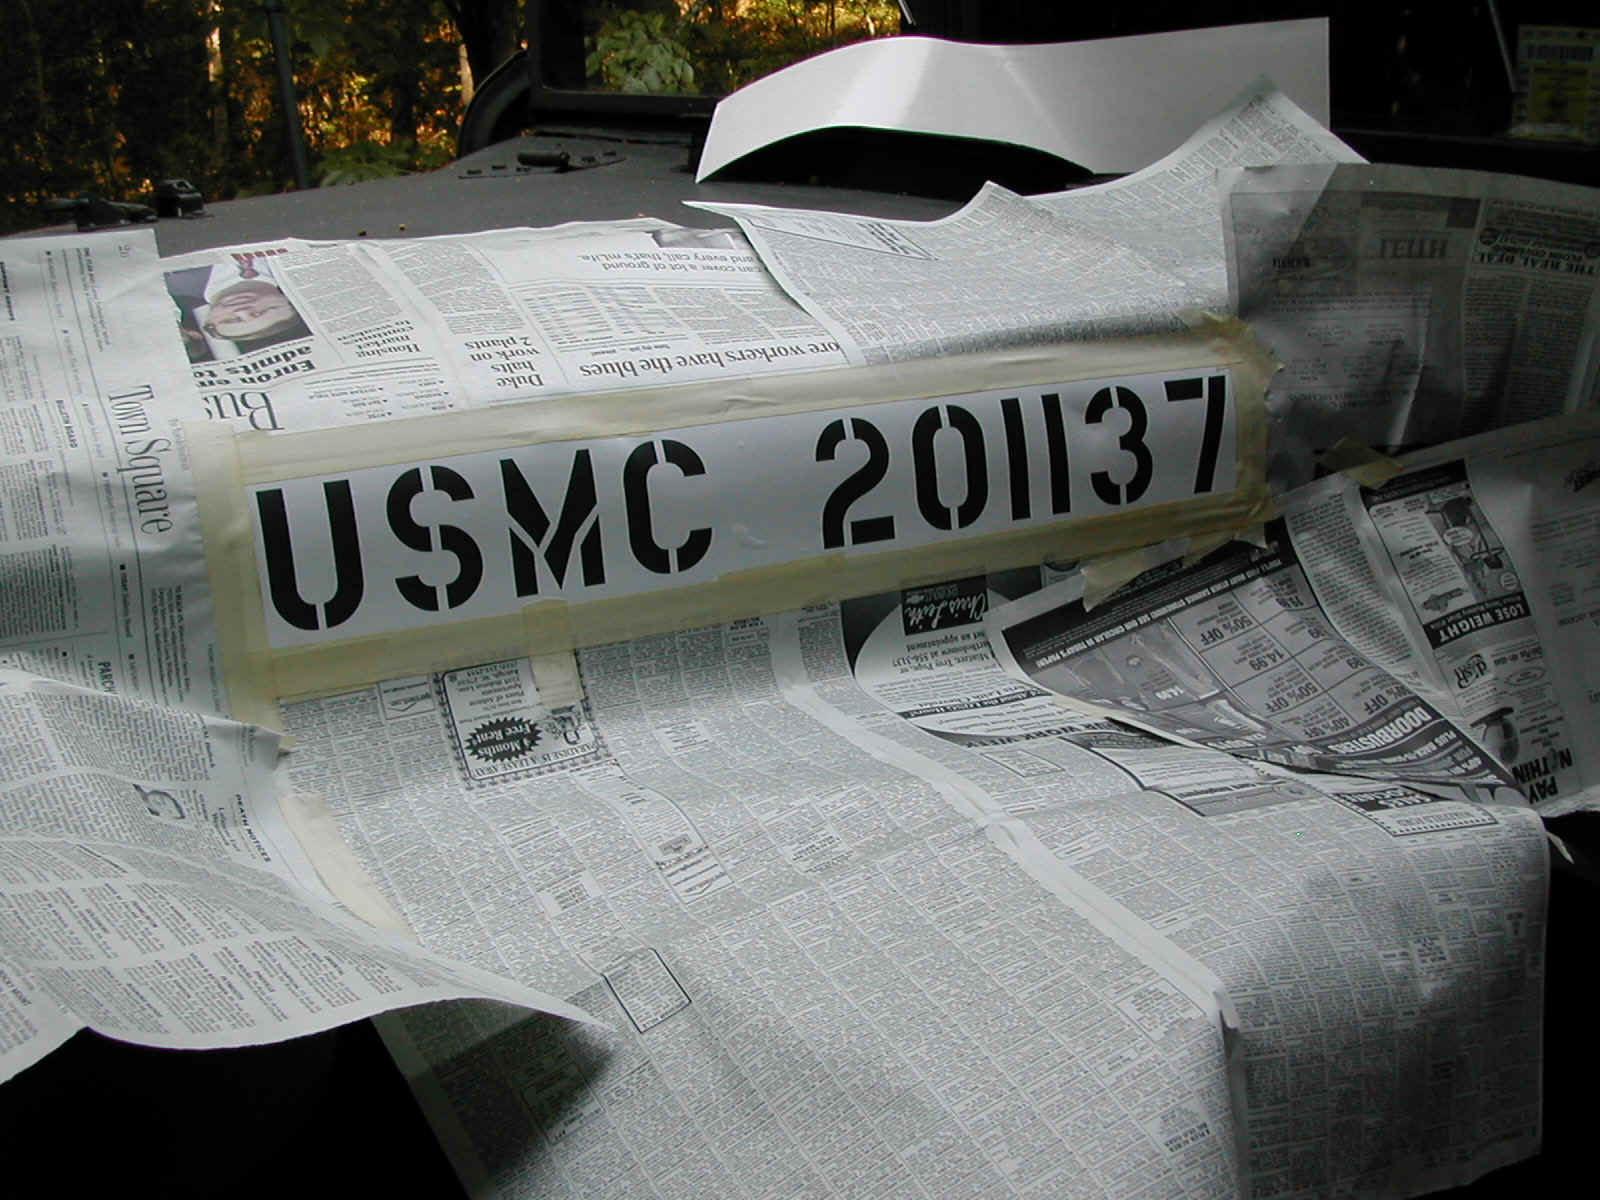 29
29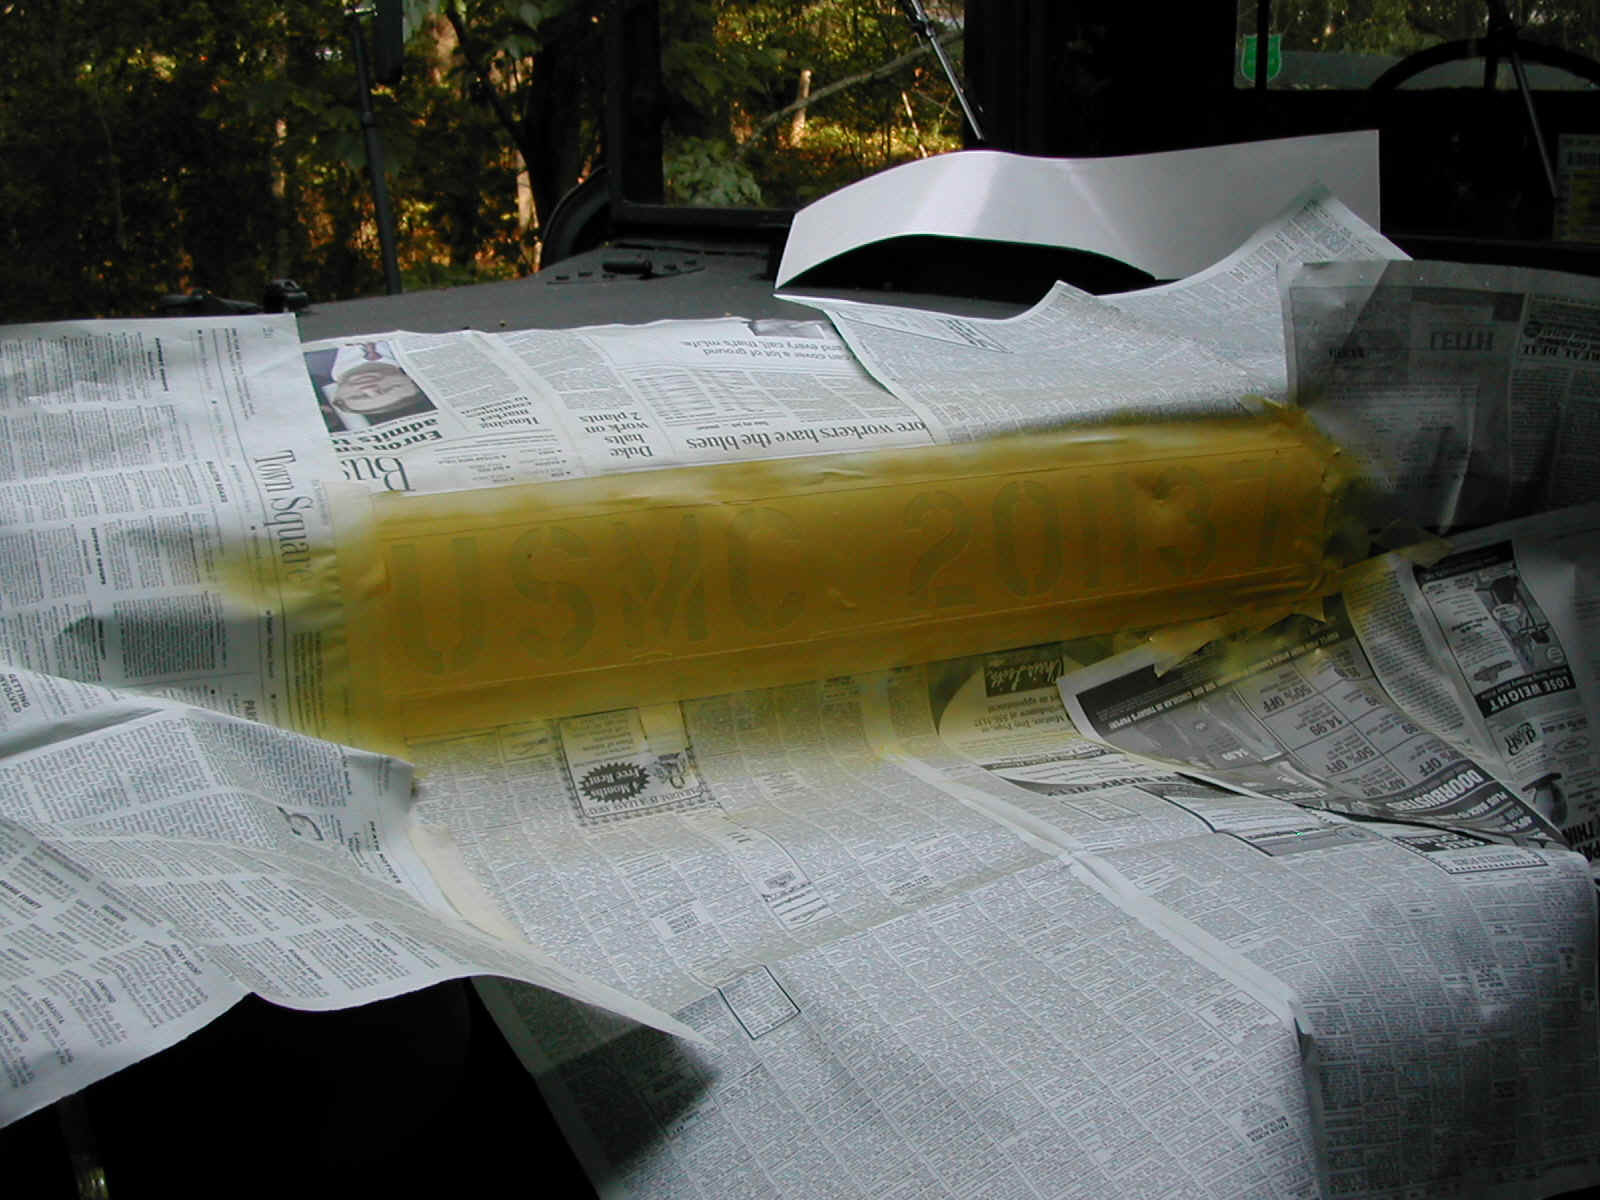 30
30 31
31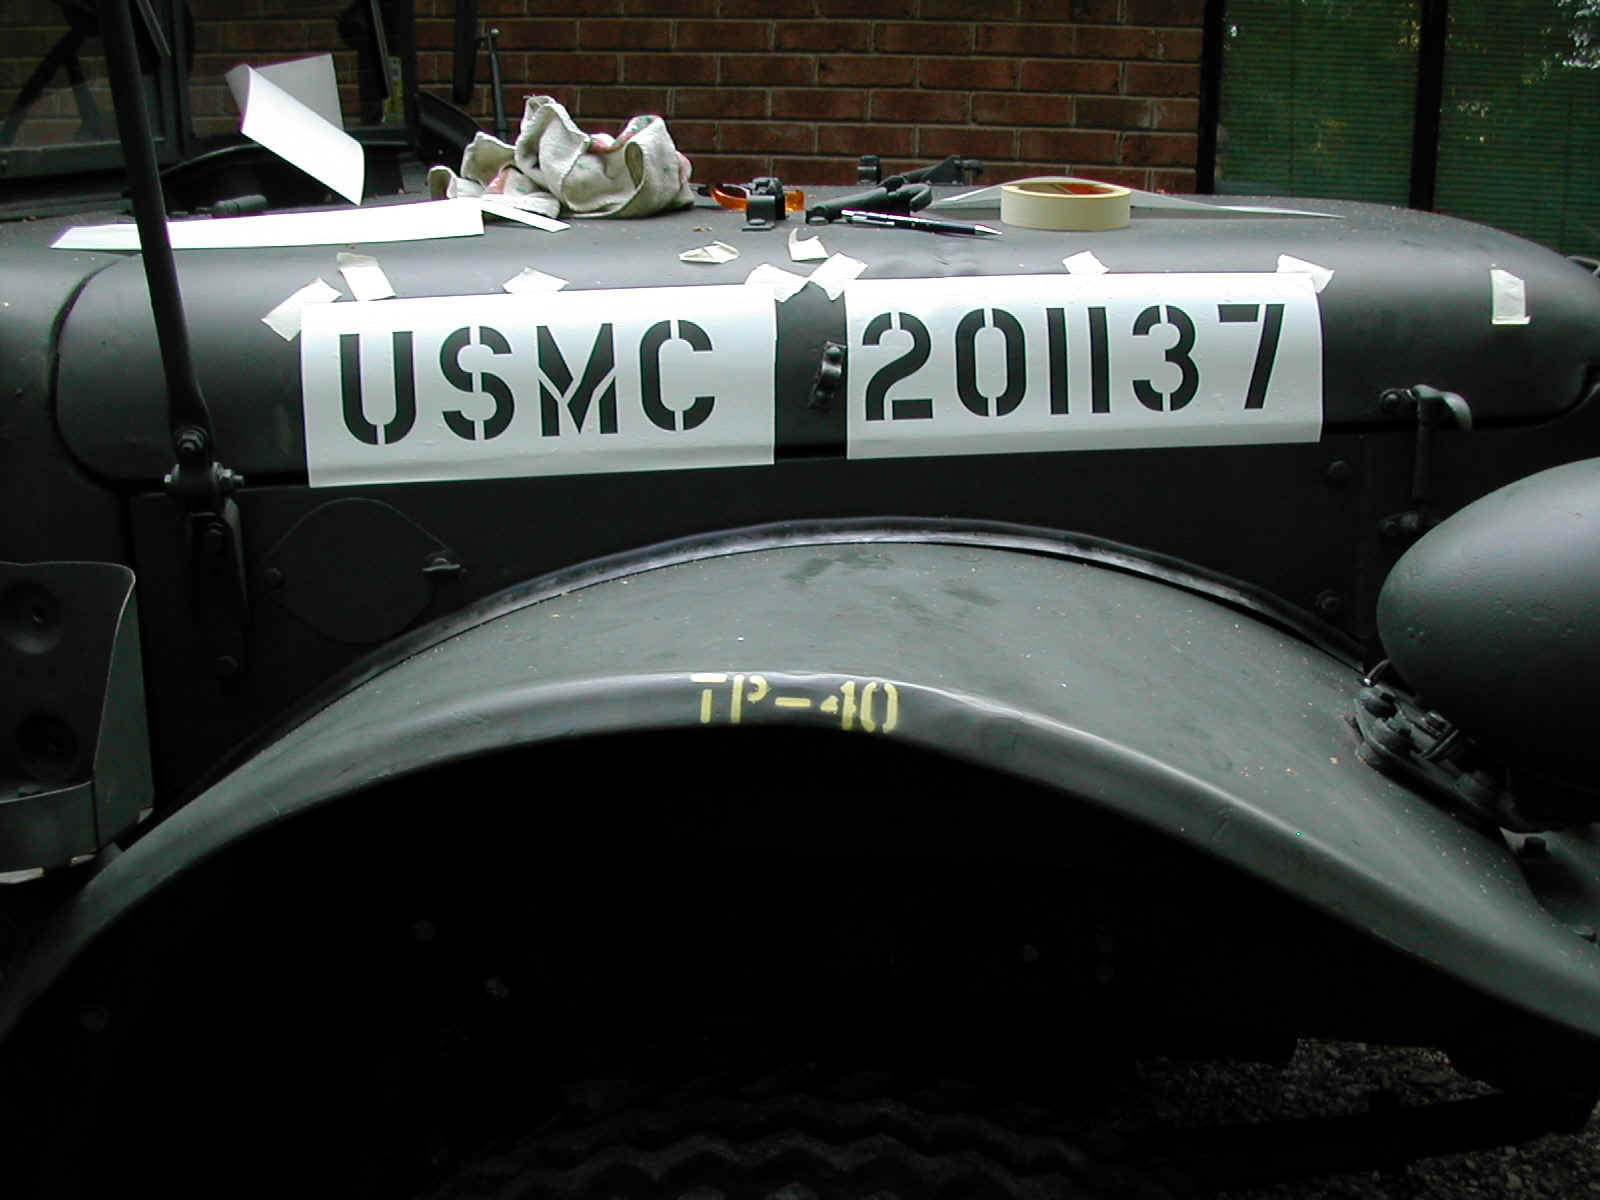 32
32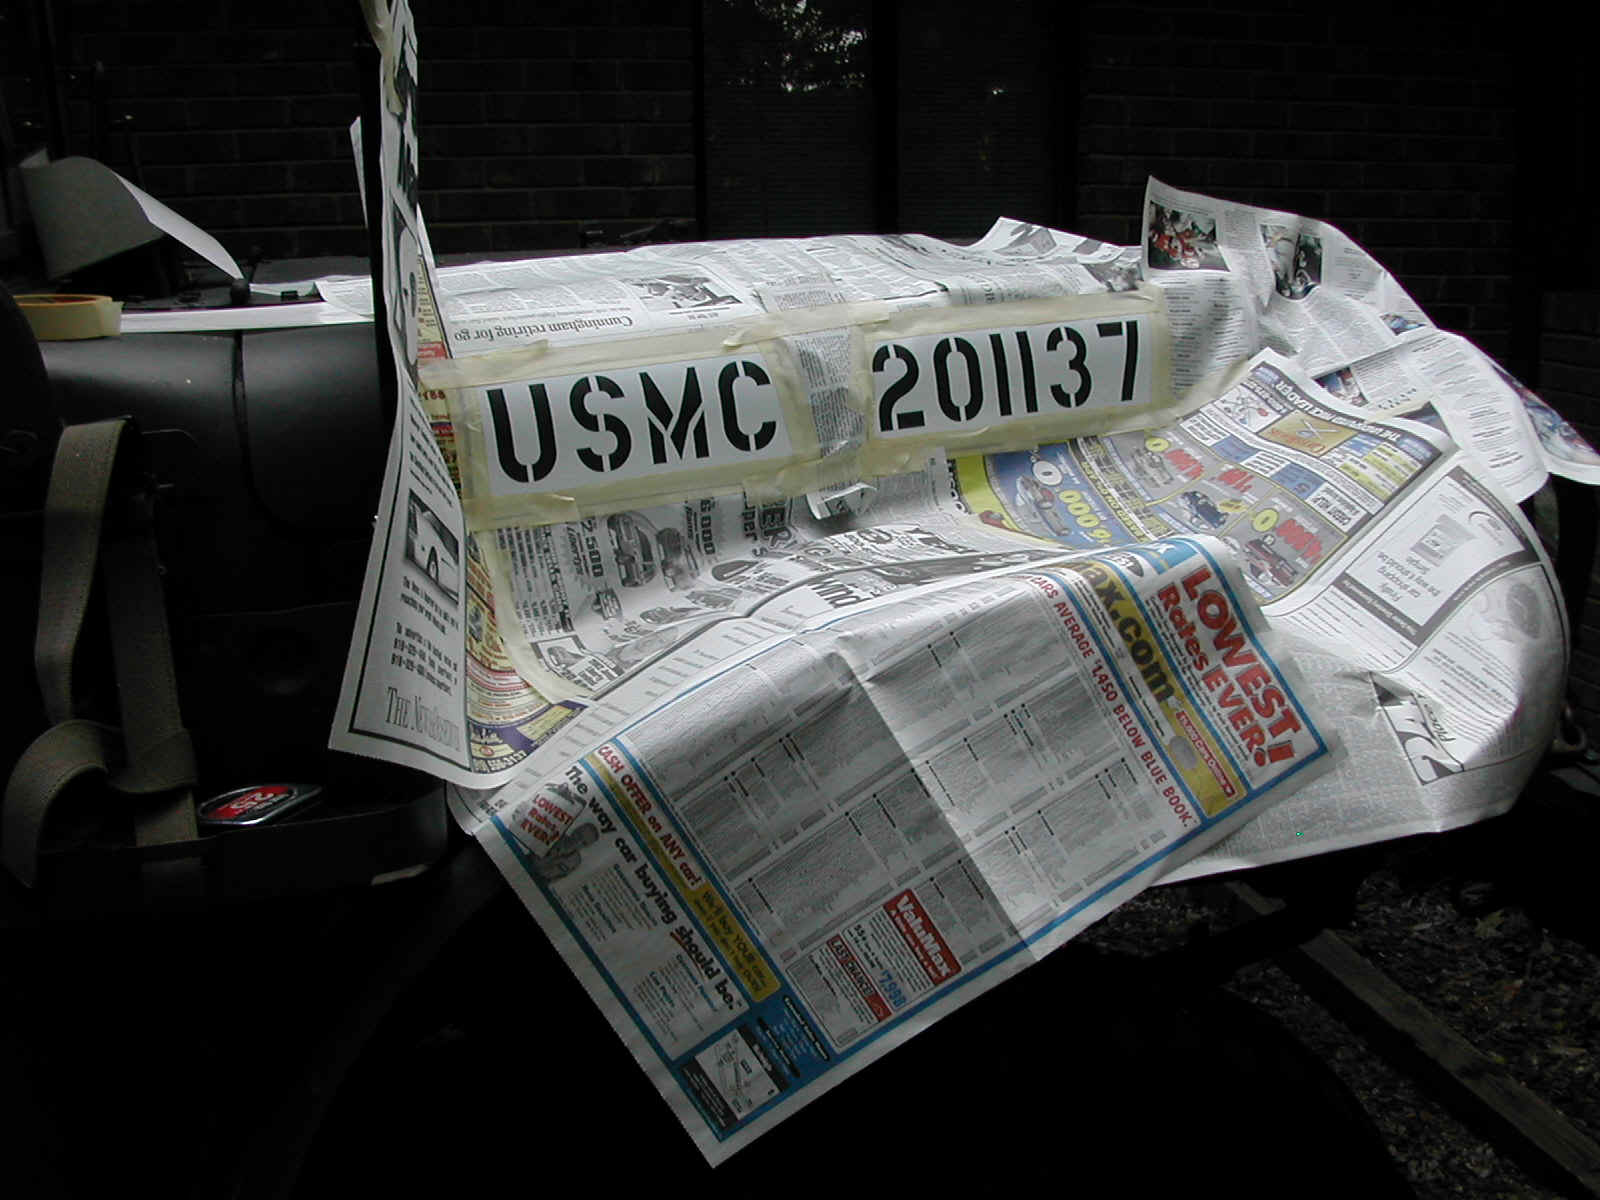 33
33 34
34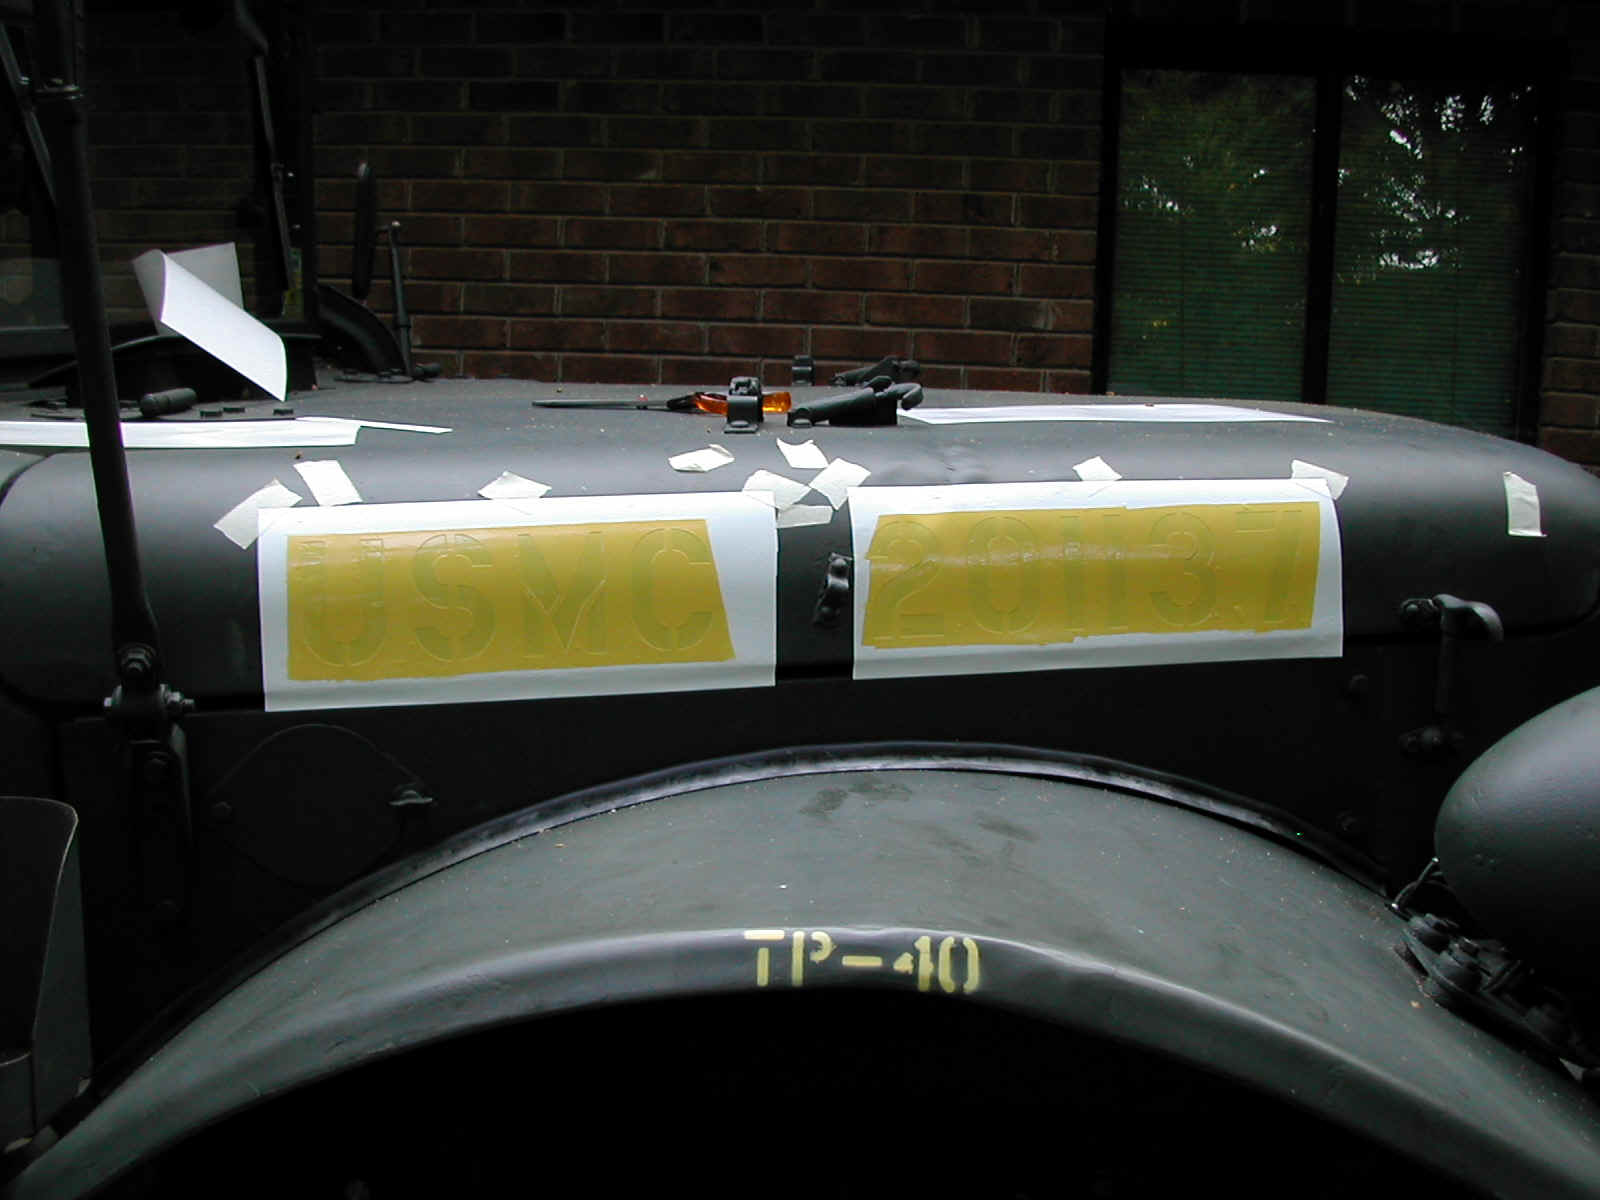 35
35 36
36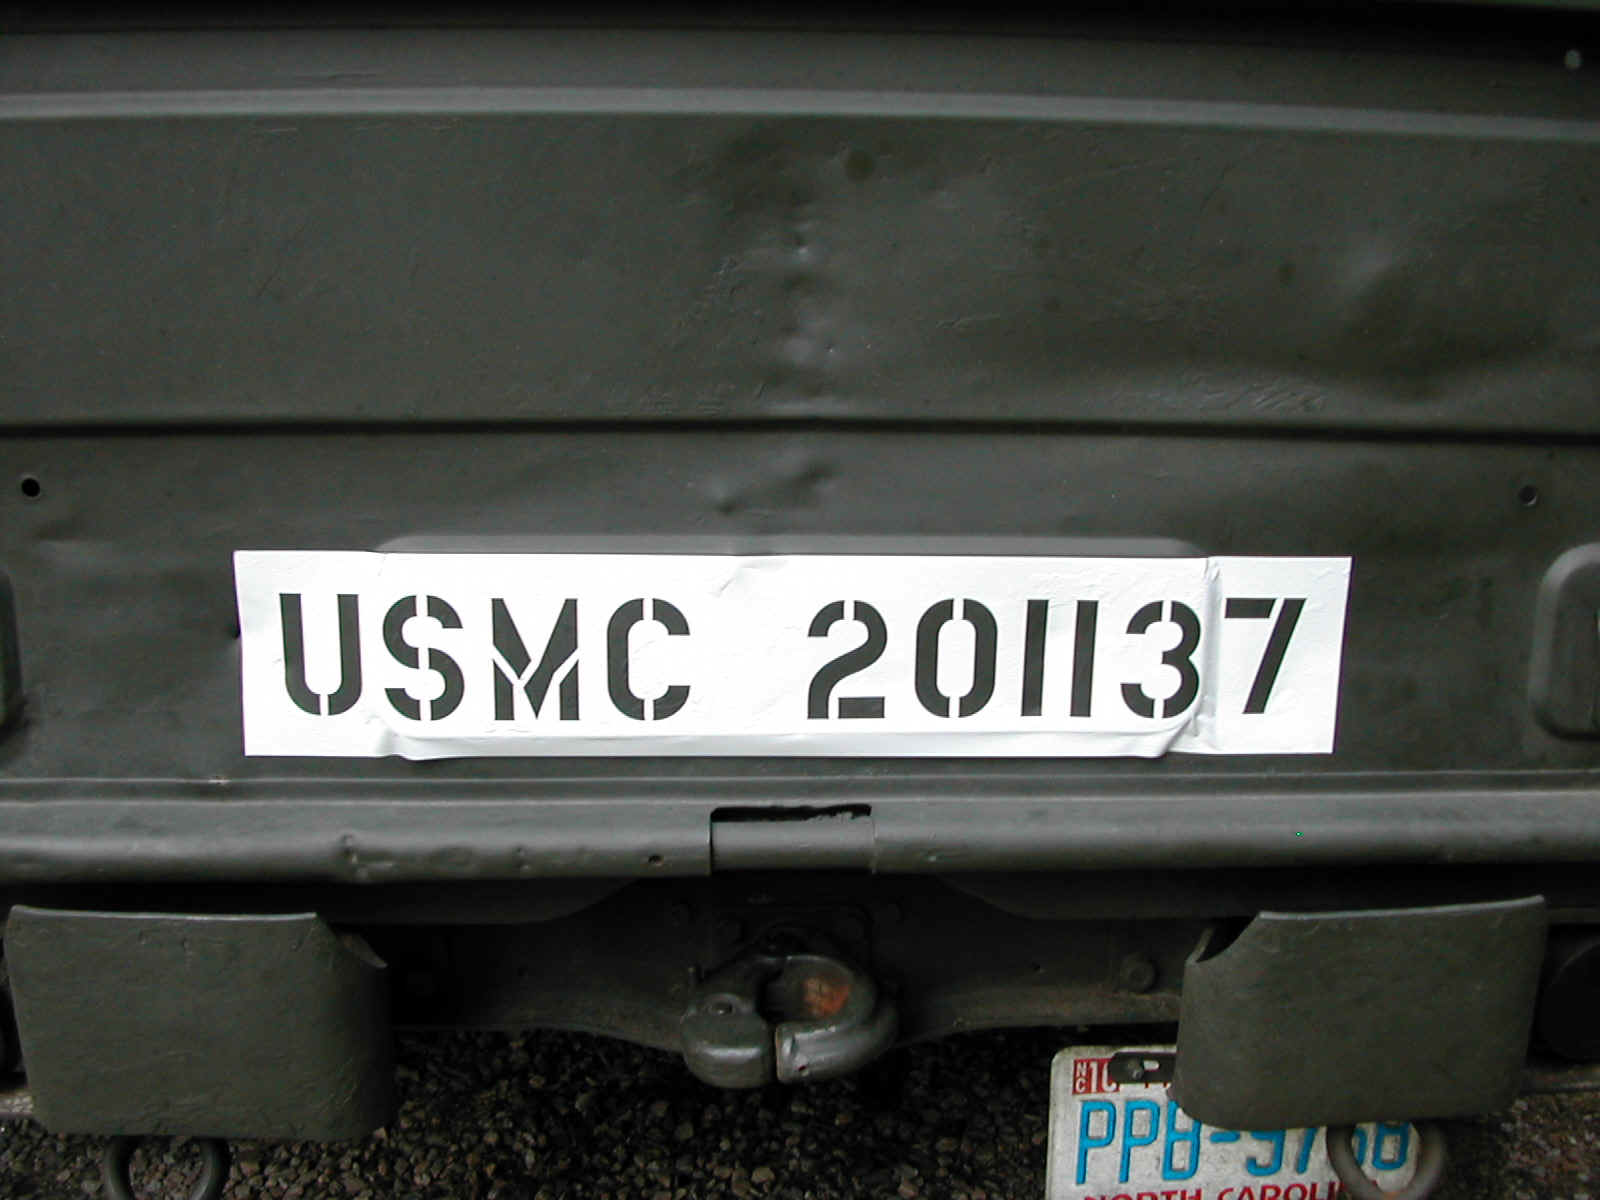 37
37 38
38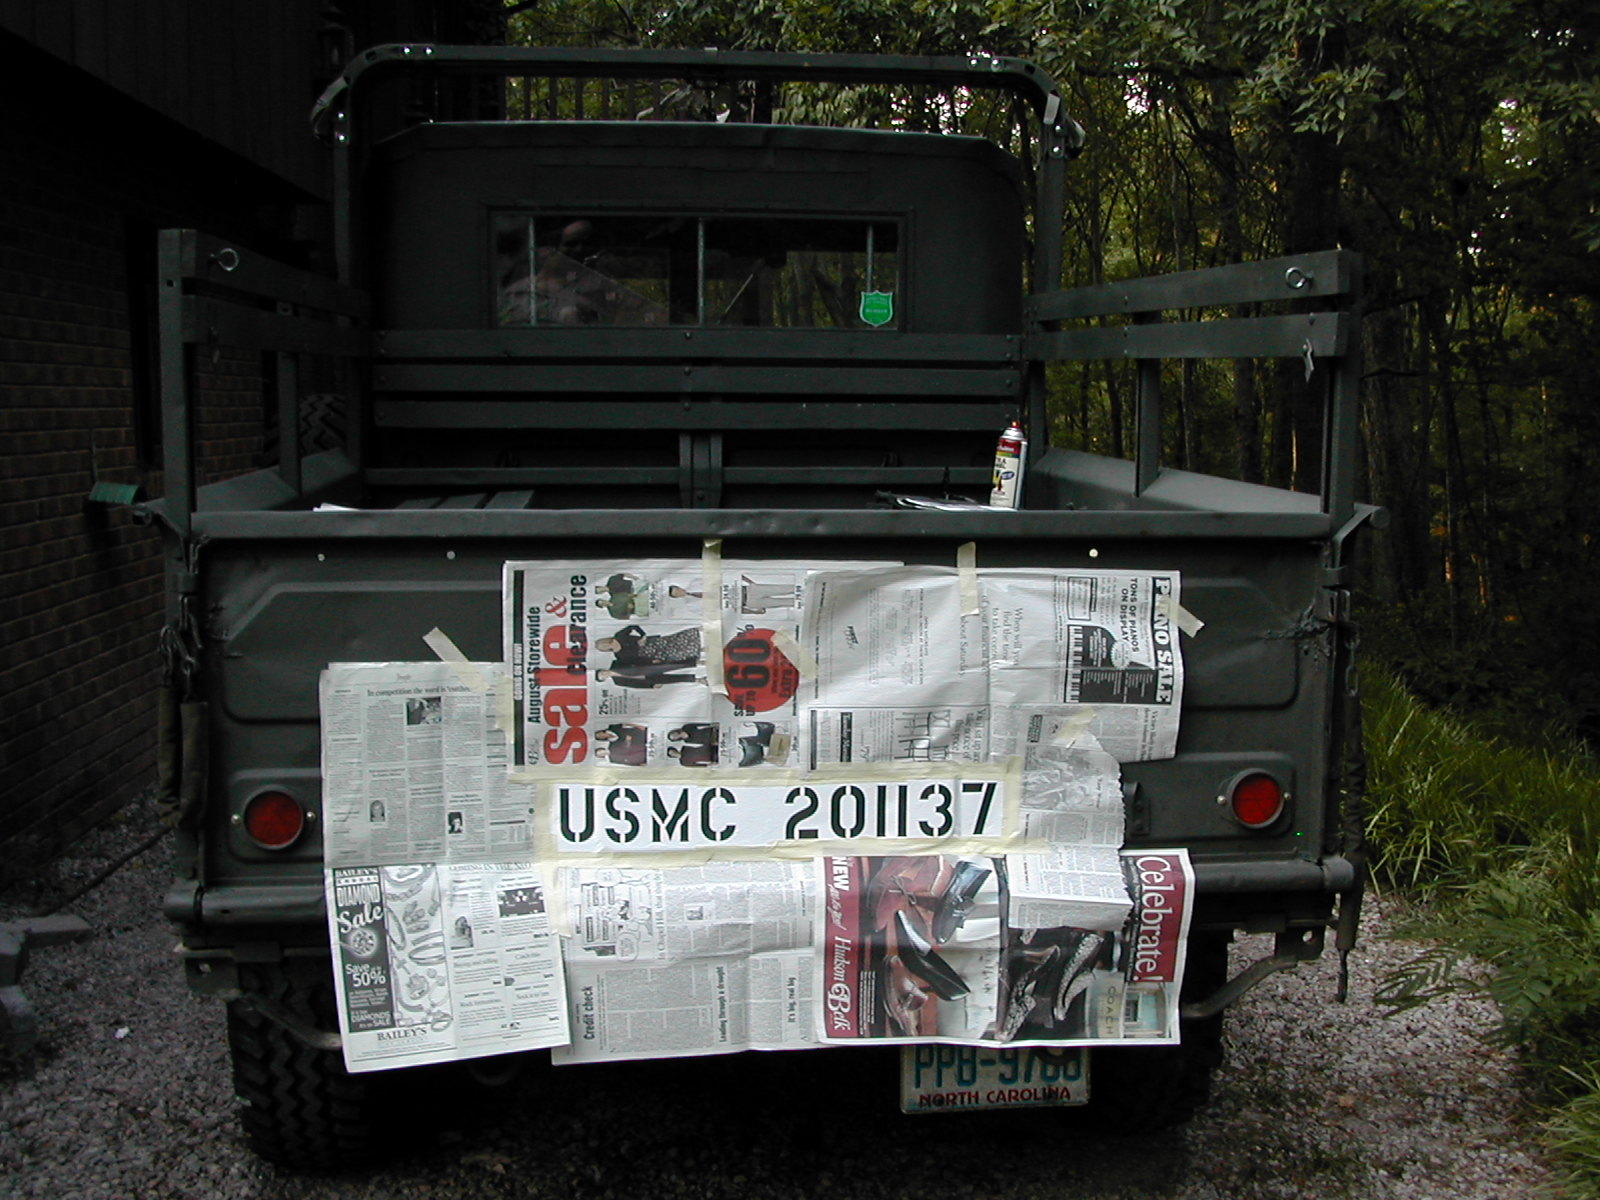 39
39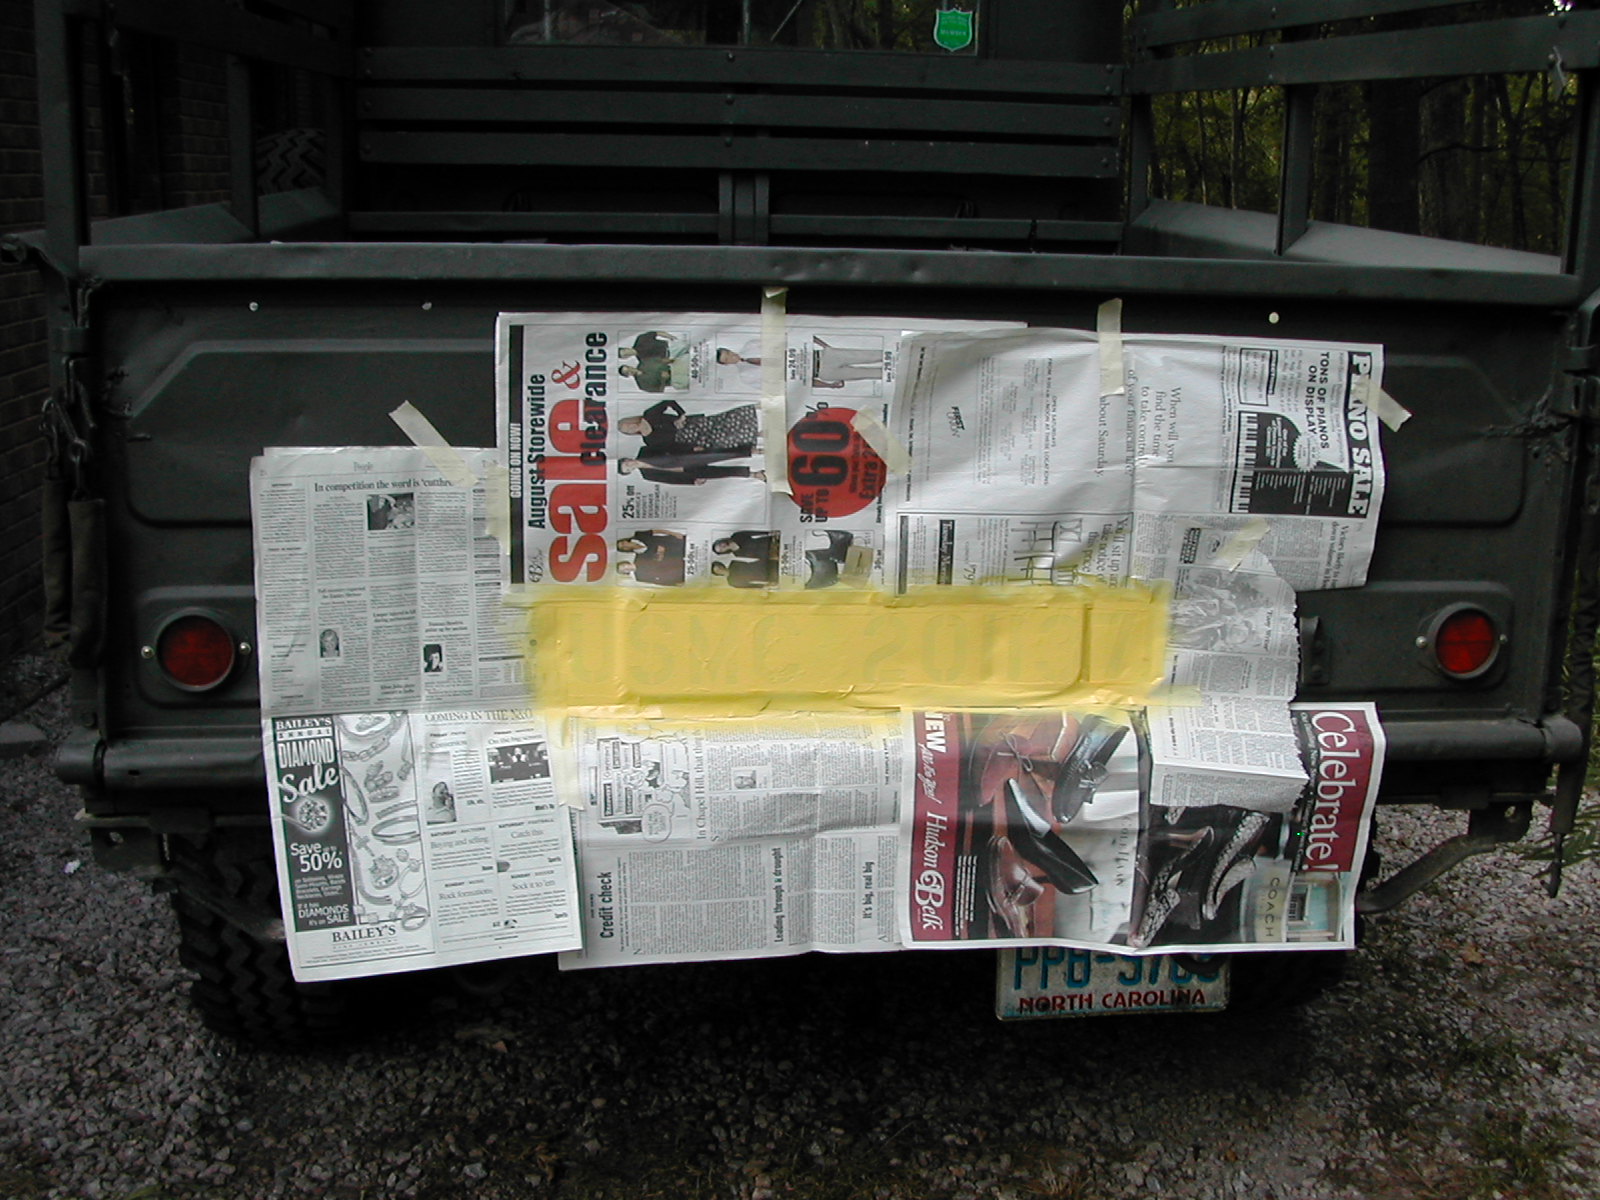 40
40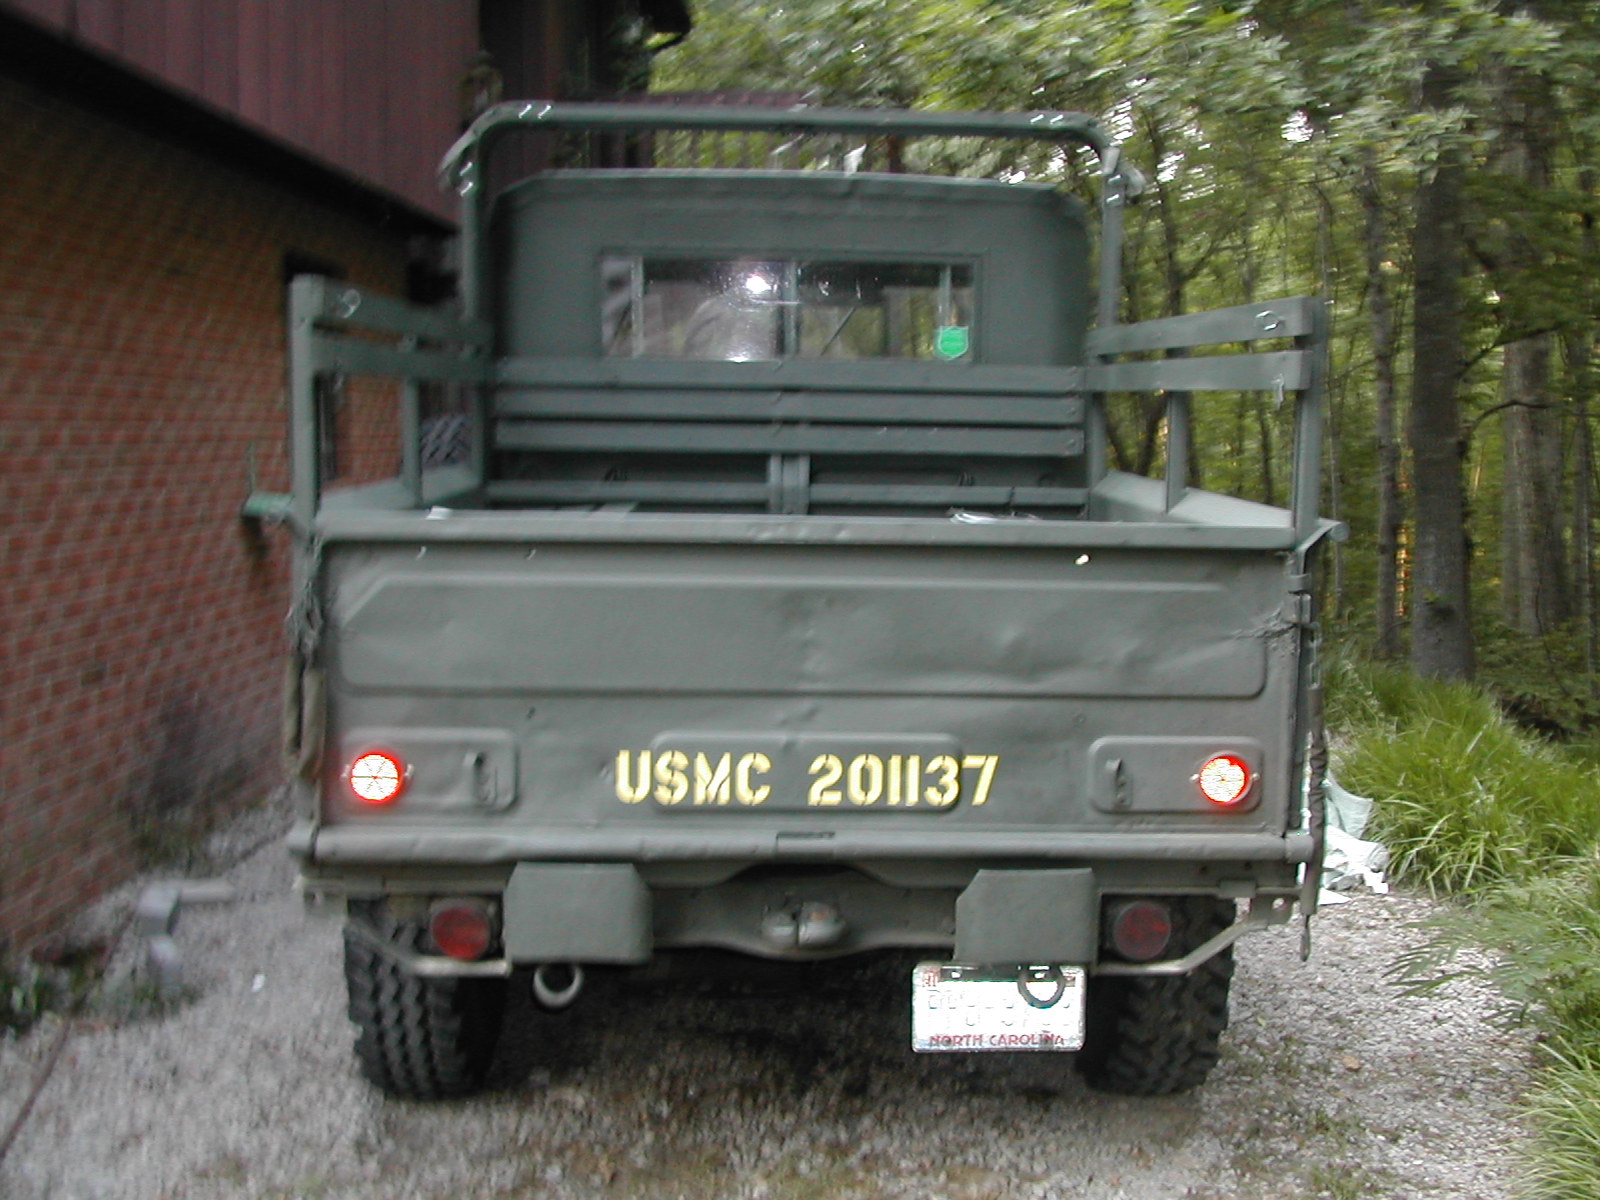 41
41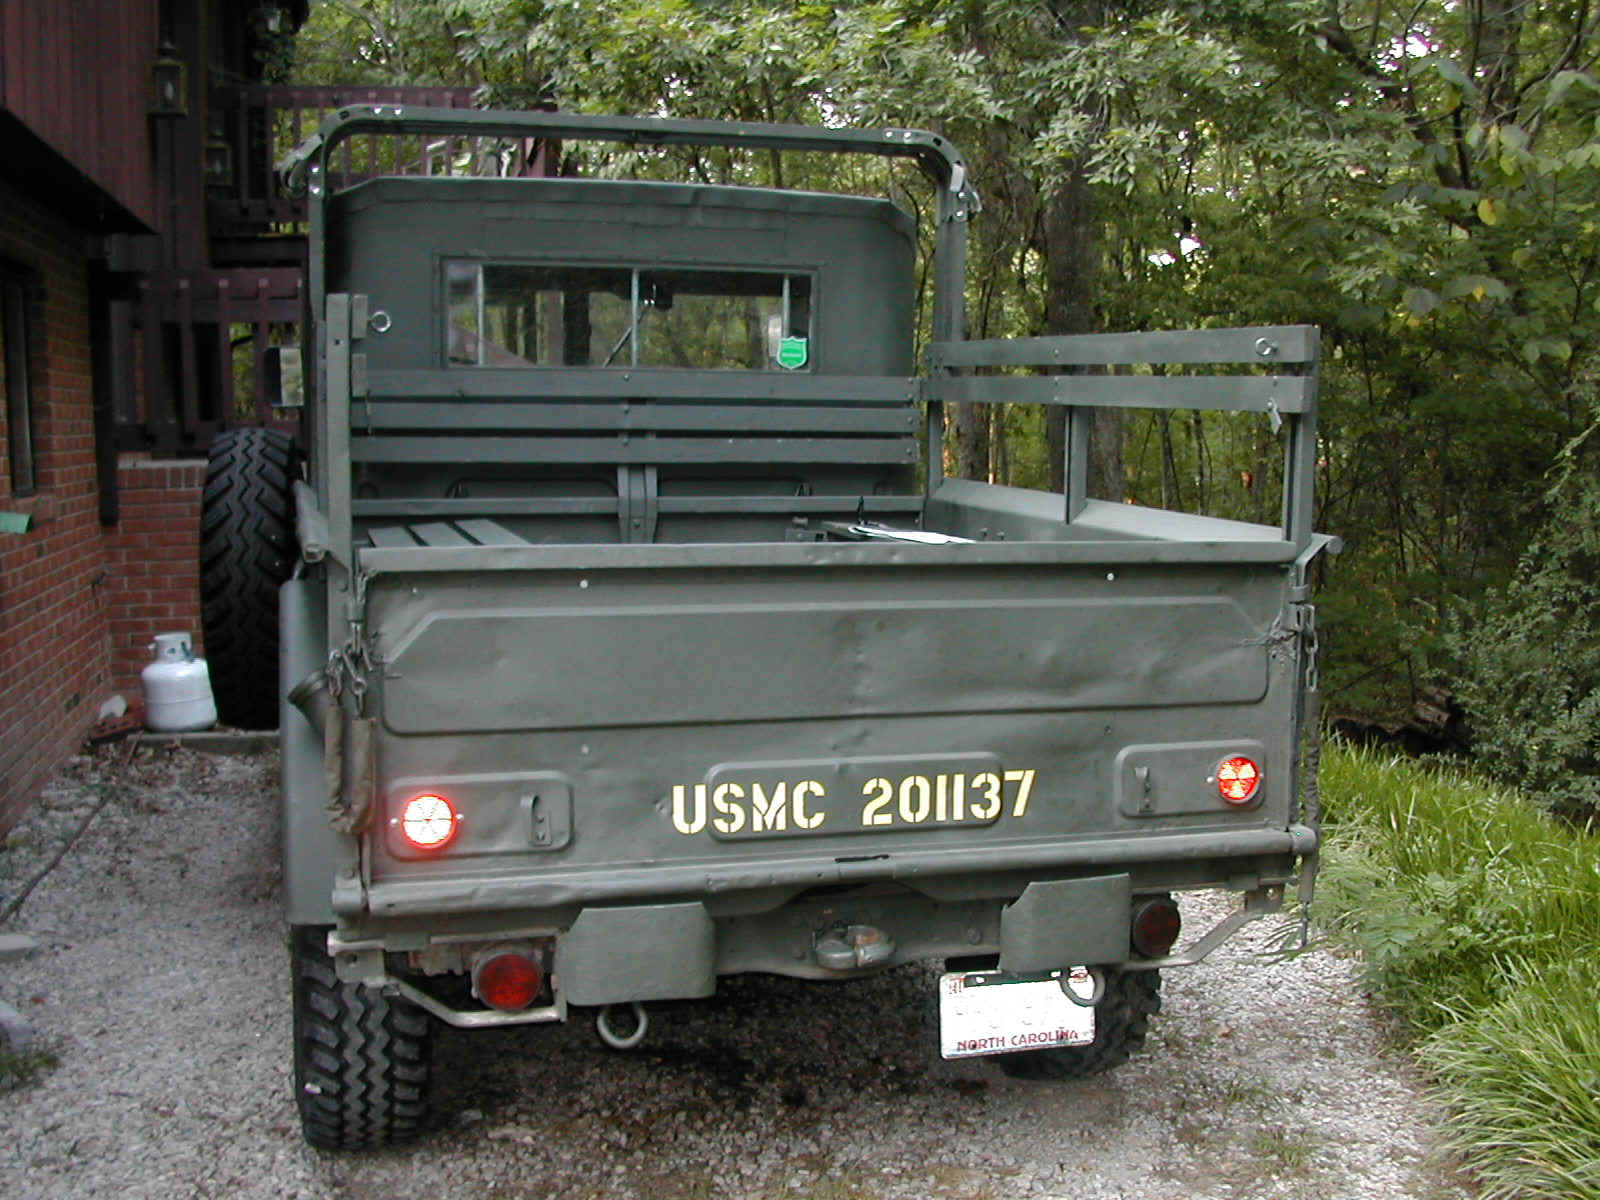 42
42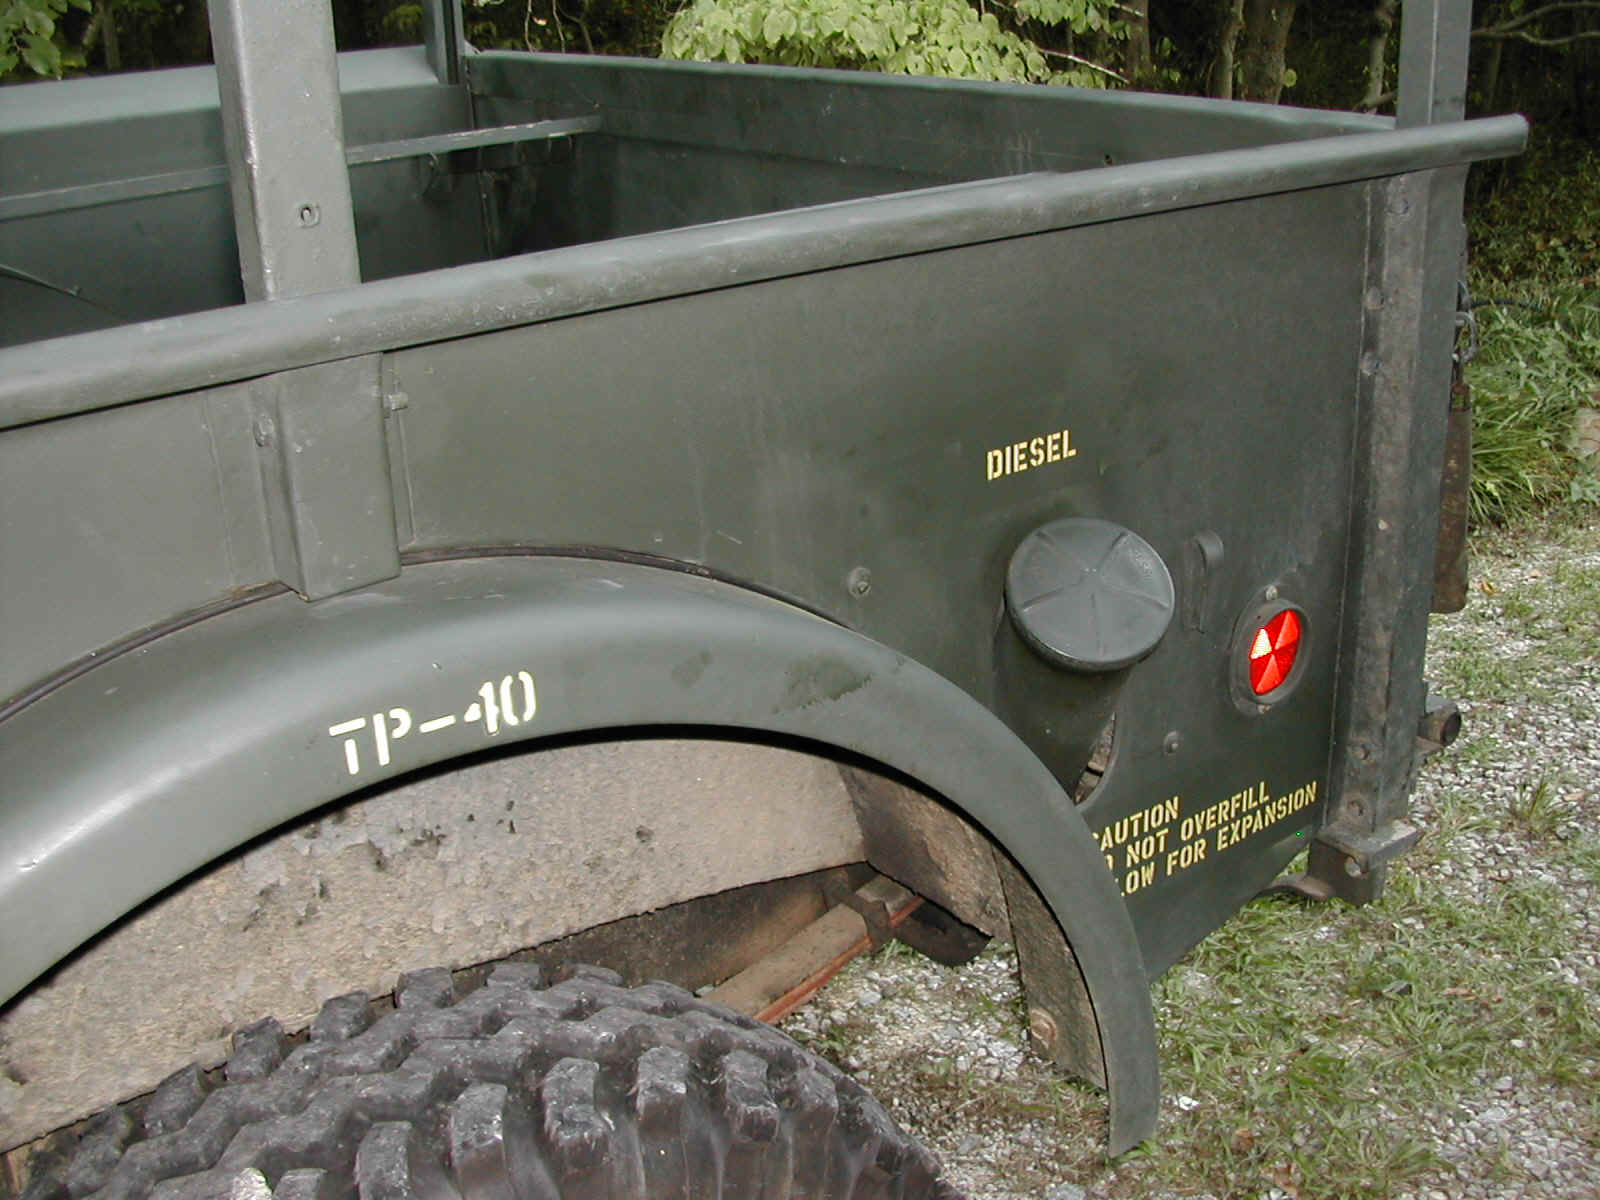 43
43 44
44 45
45 46
46 47
47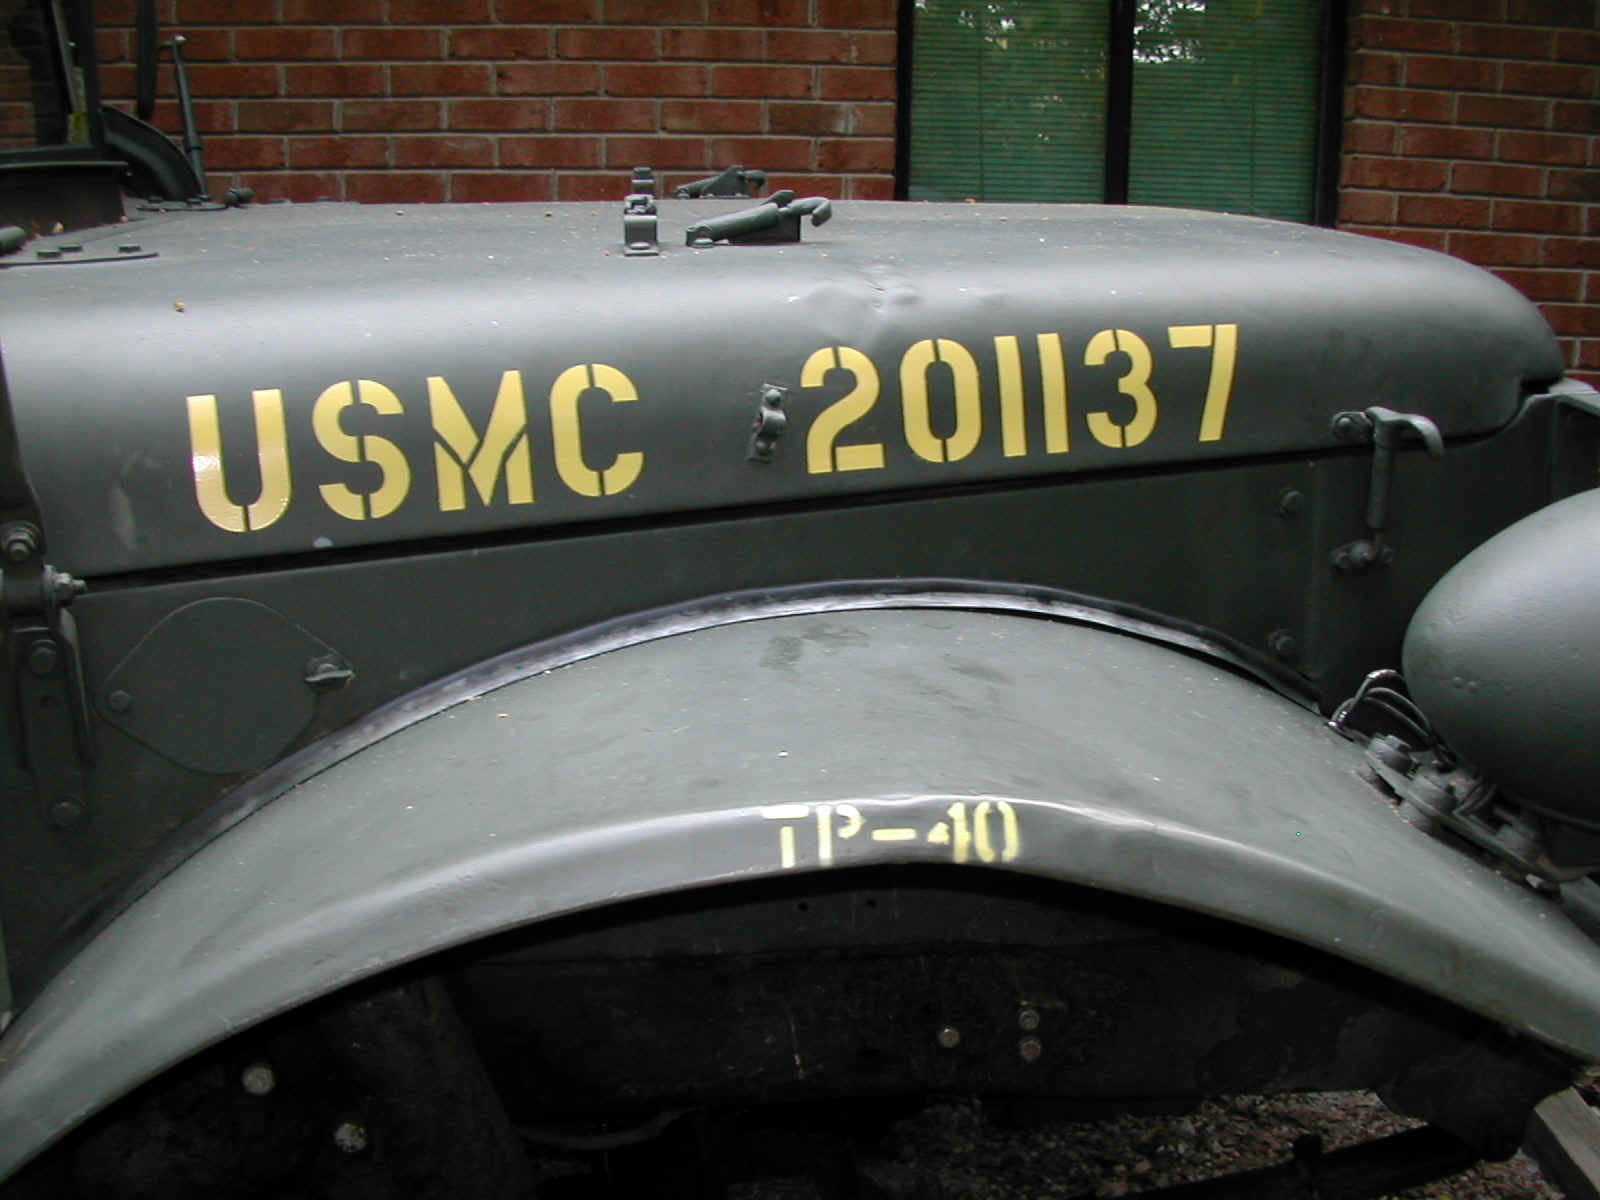 48
48 49
49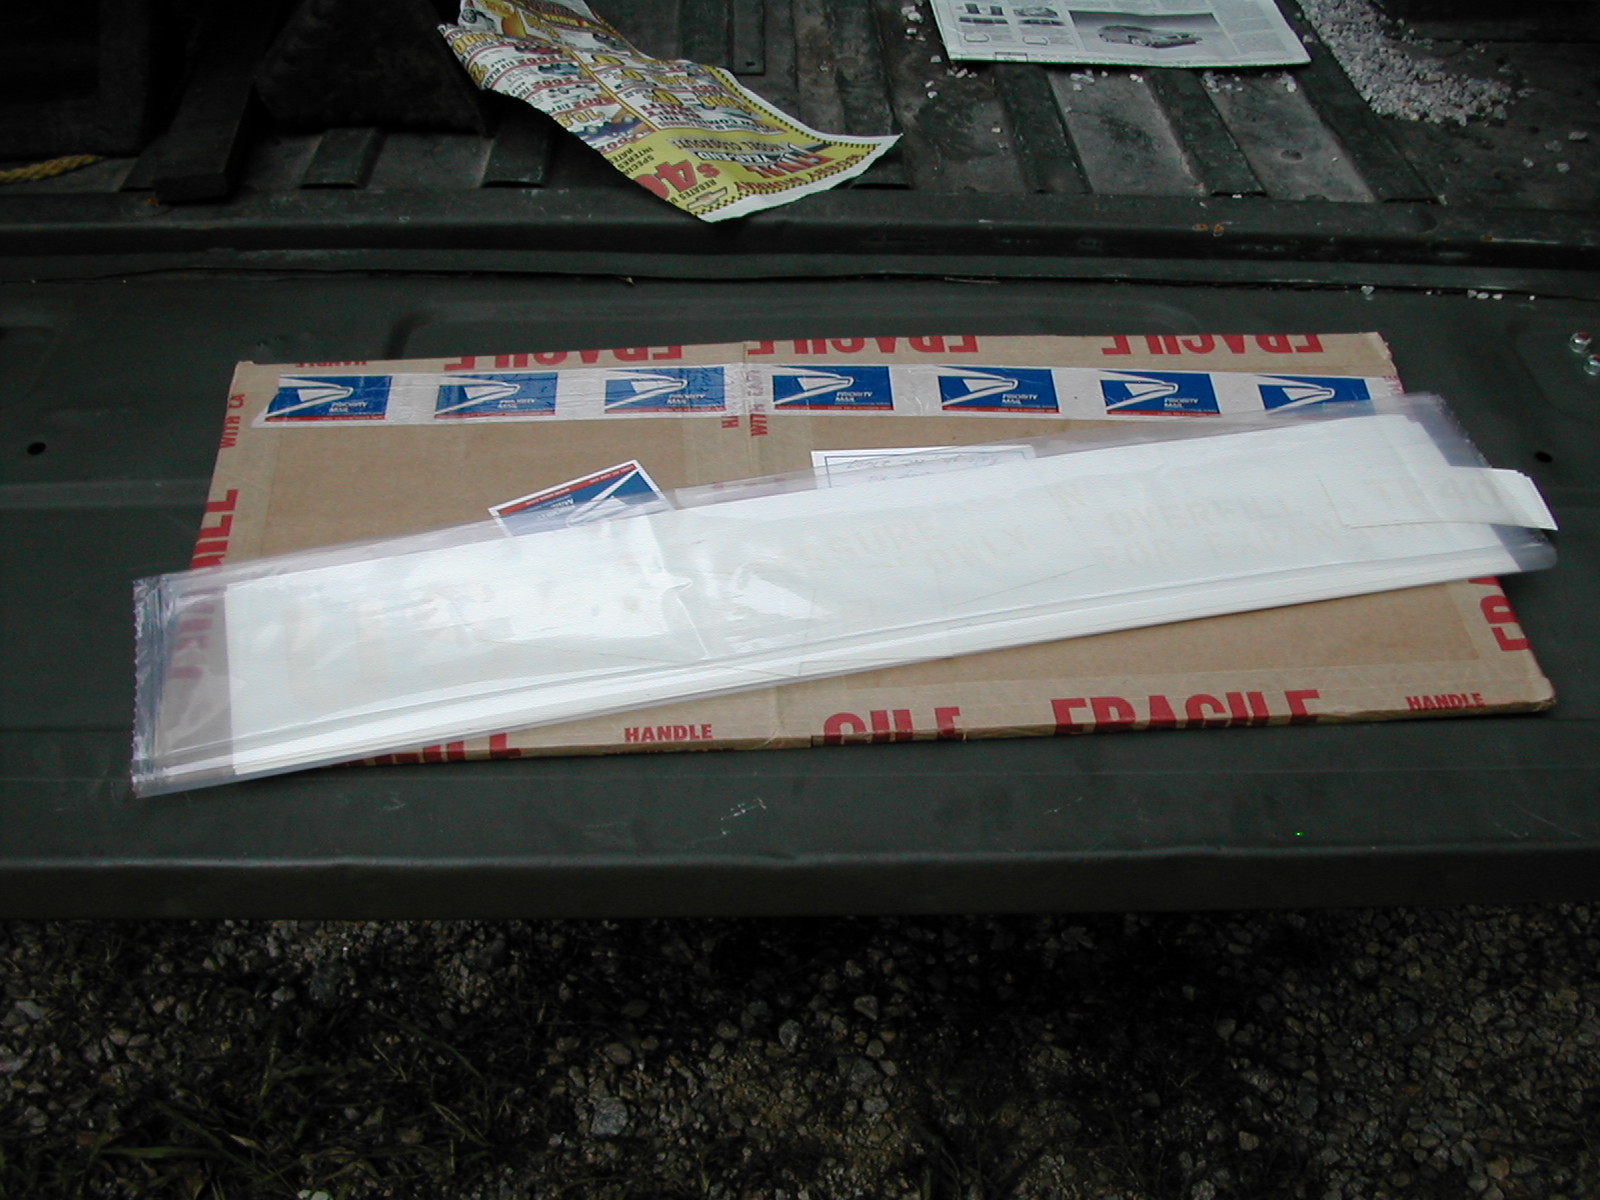 50
50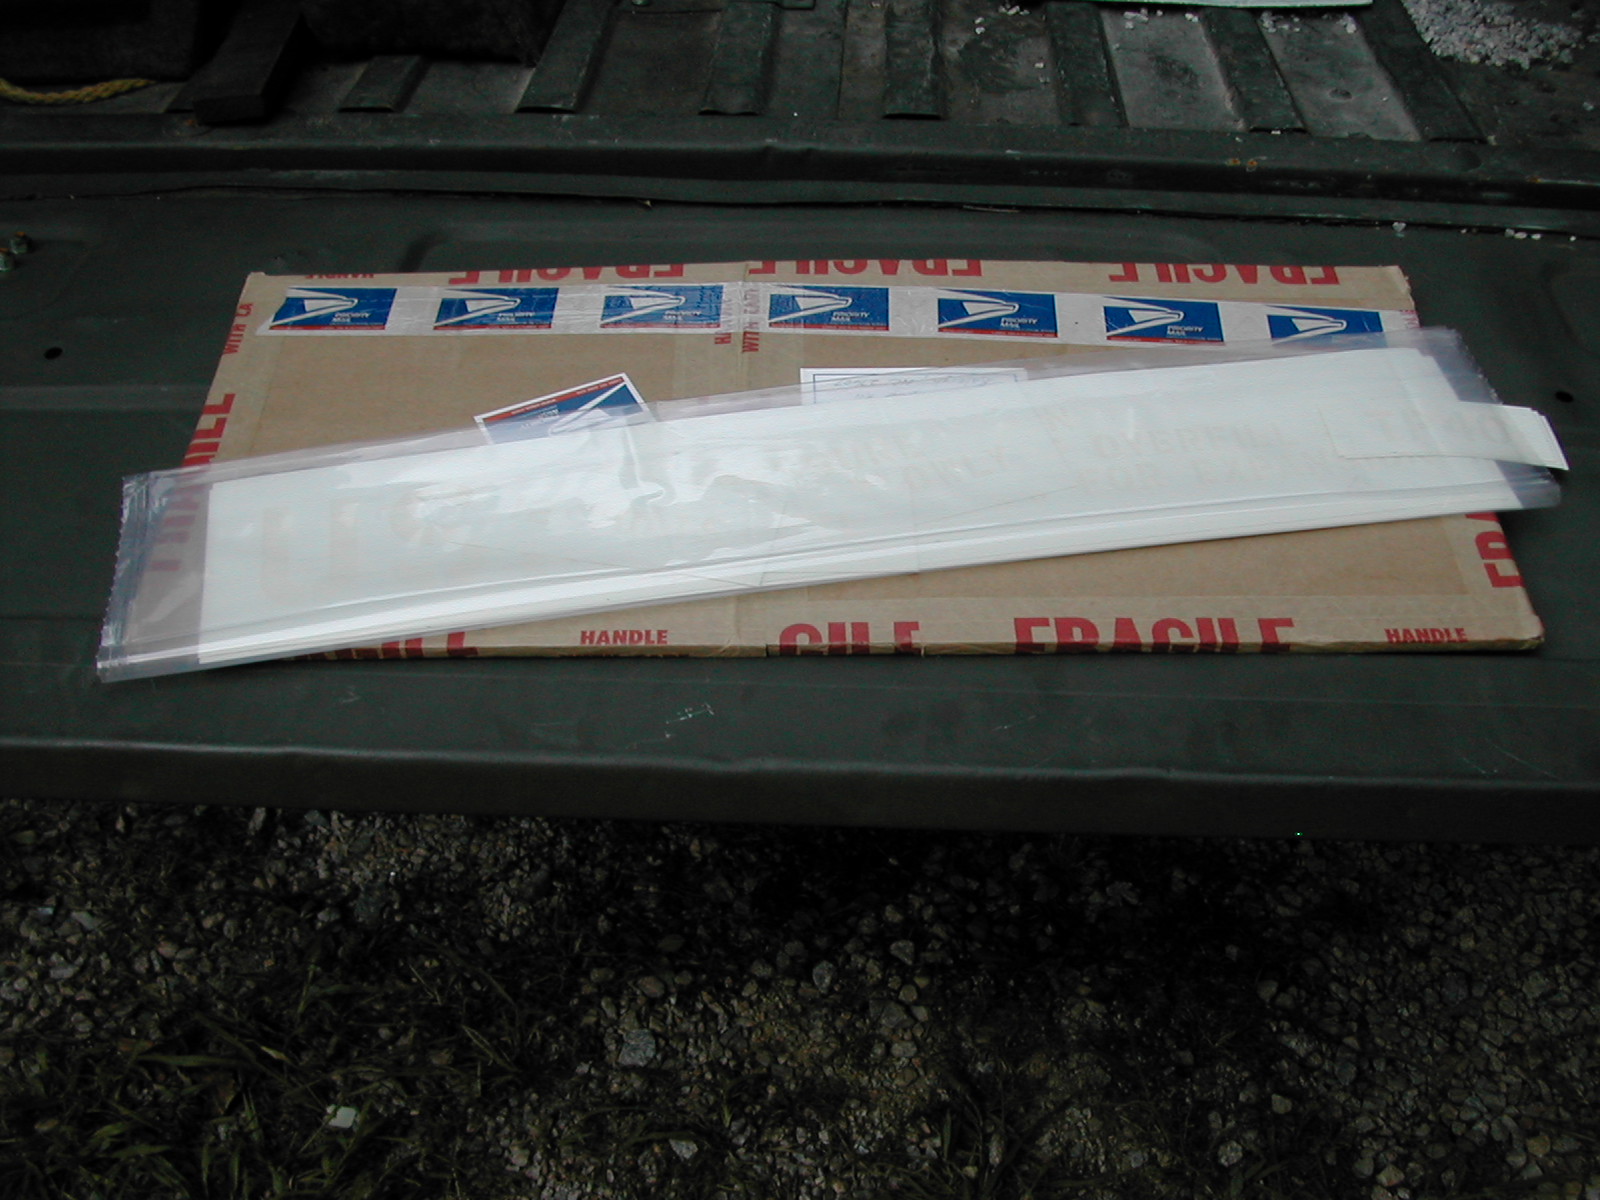 51
51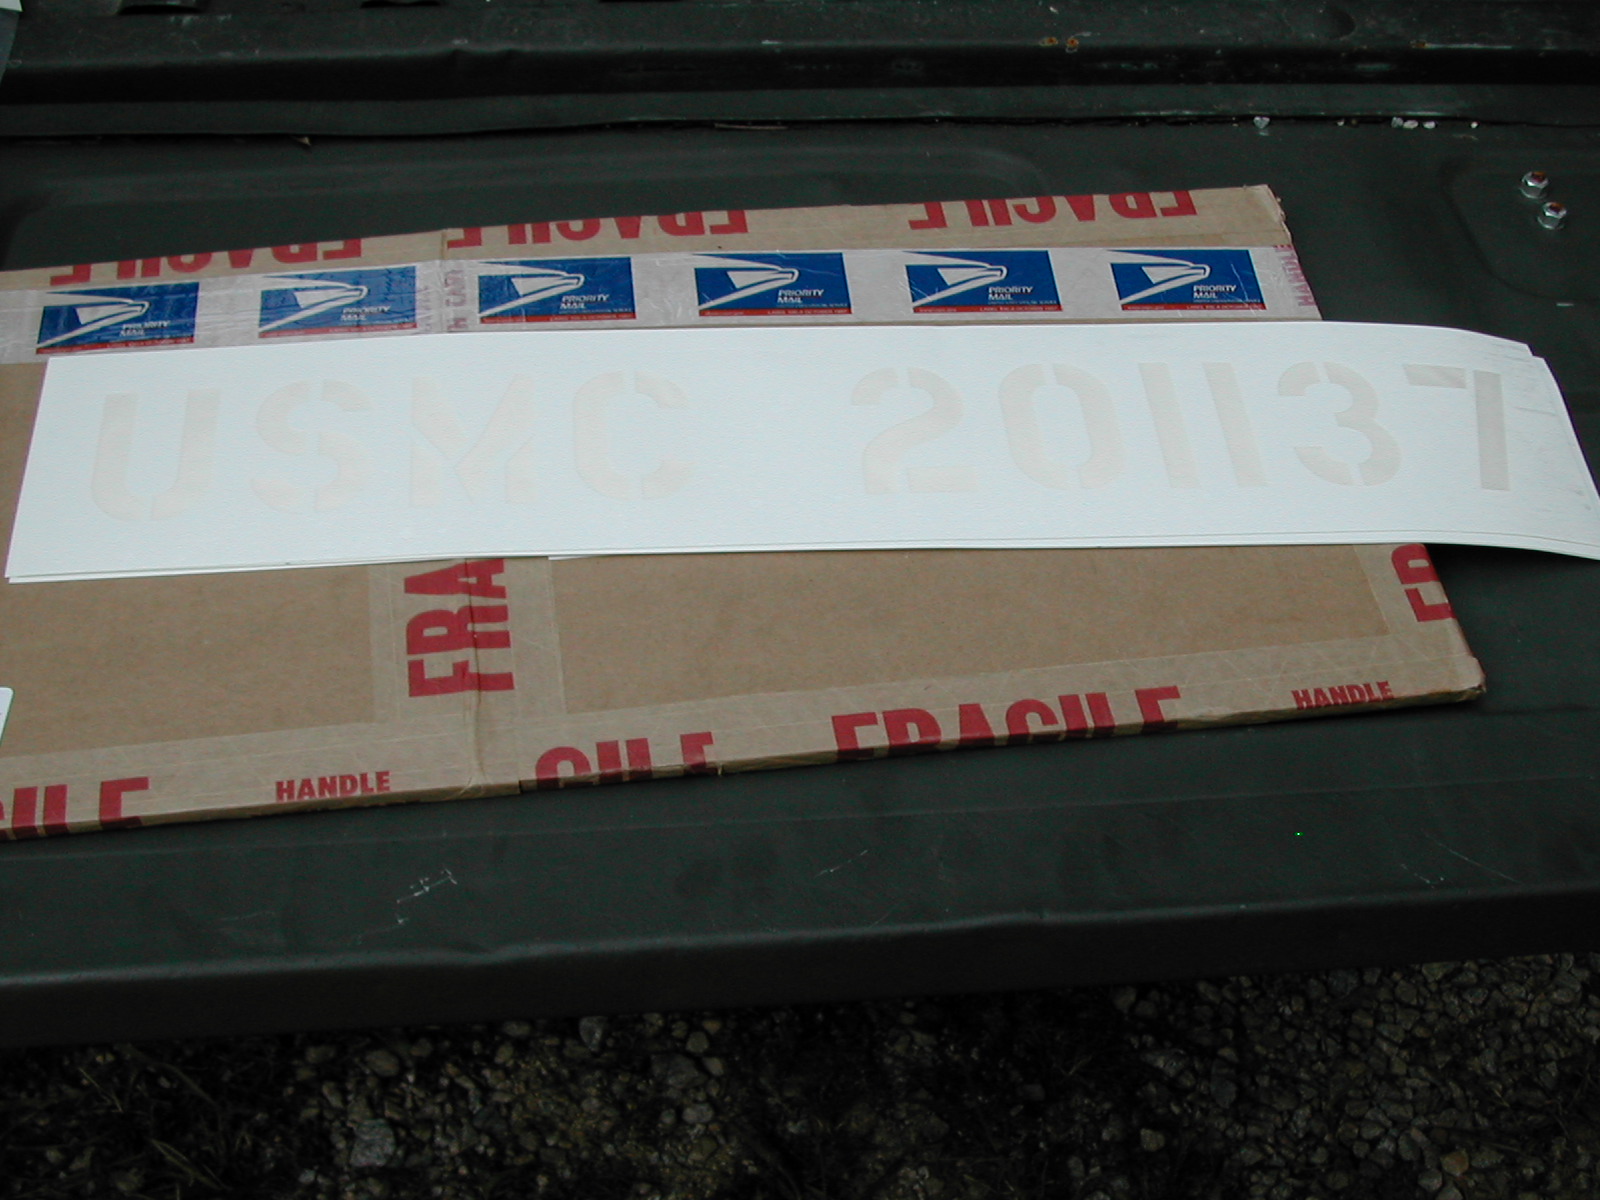 52
52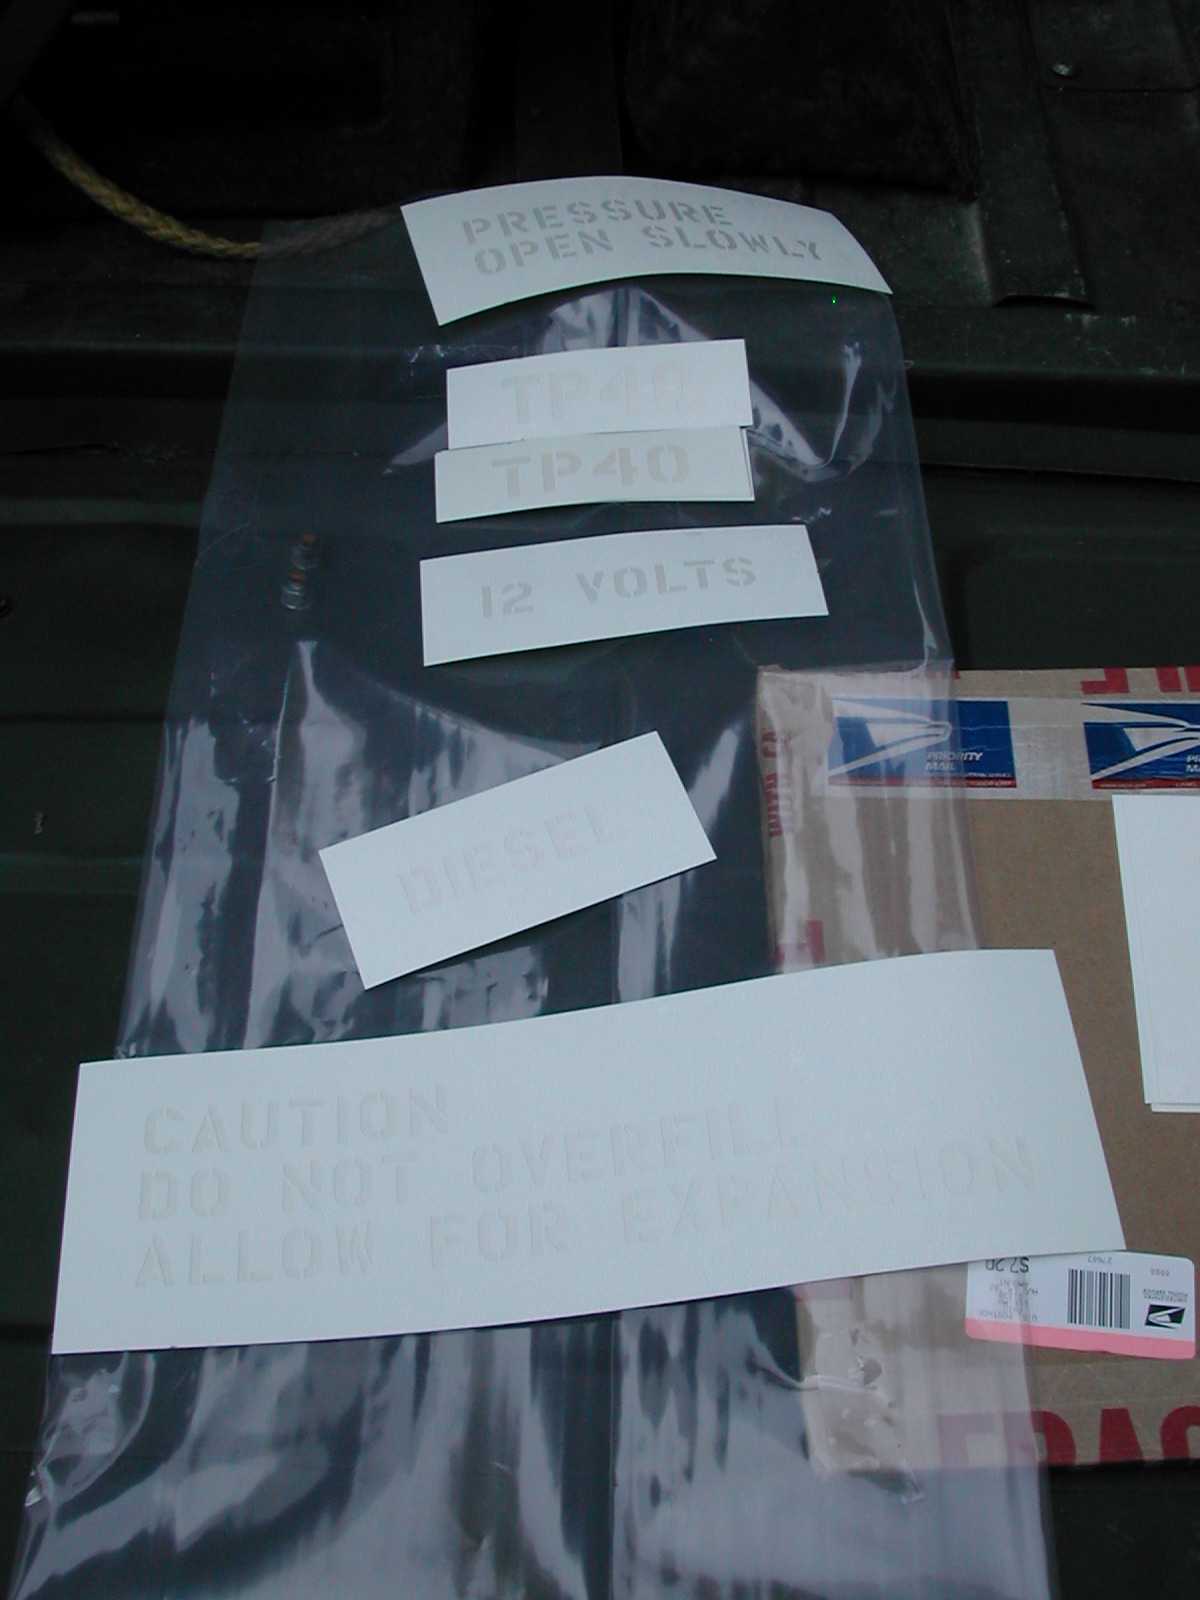 53
53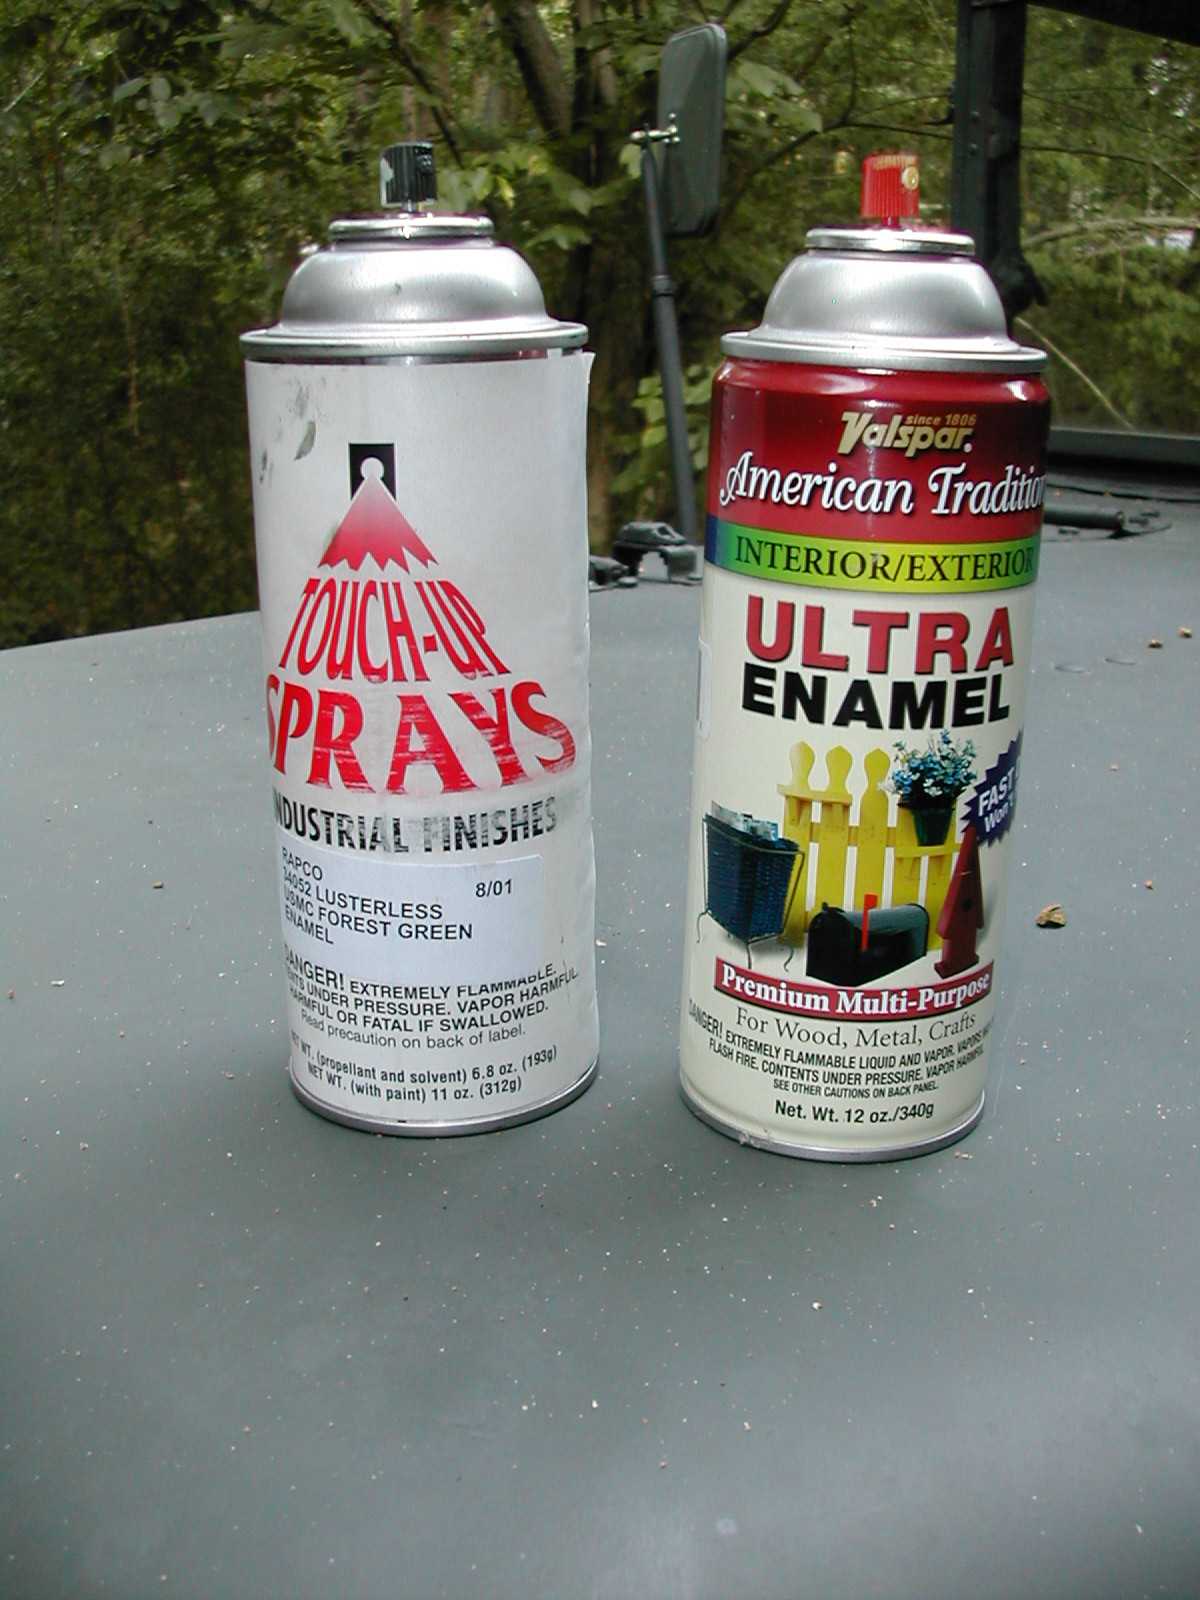 54
54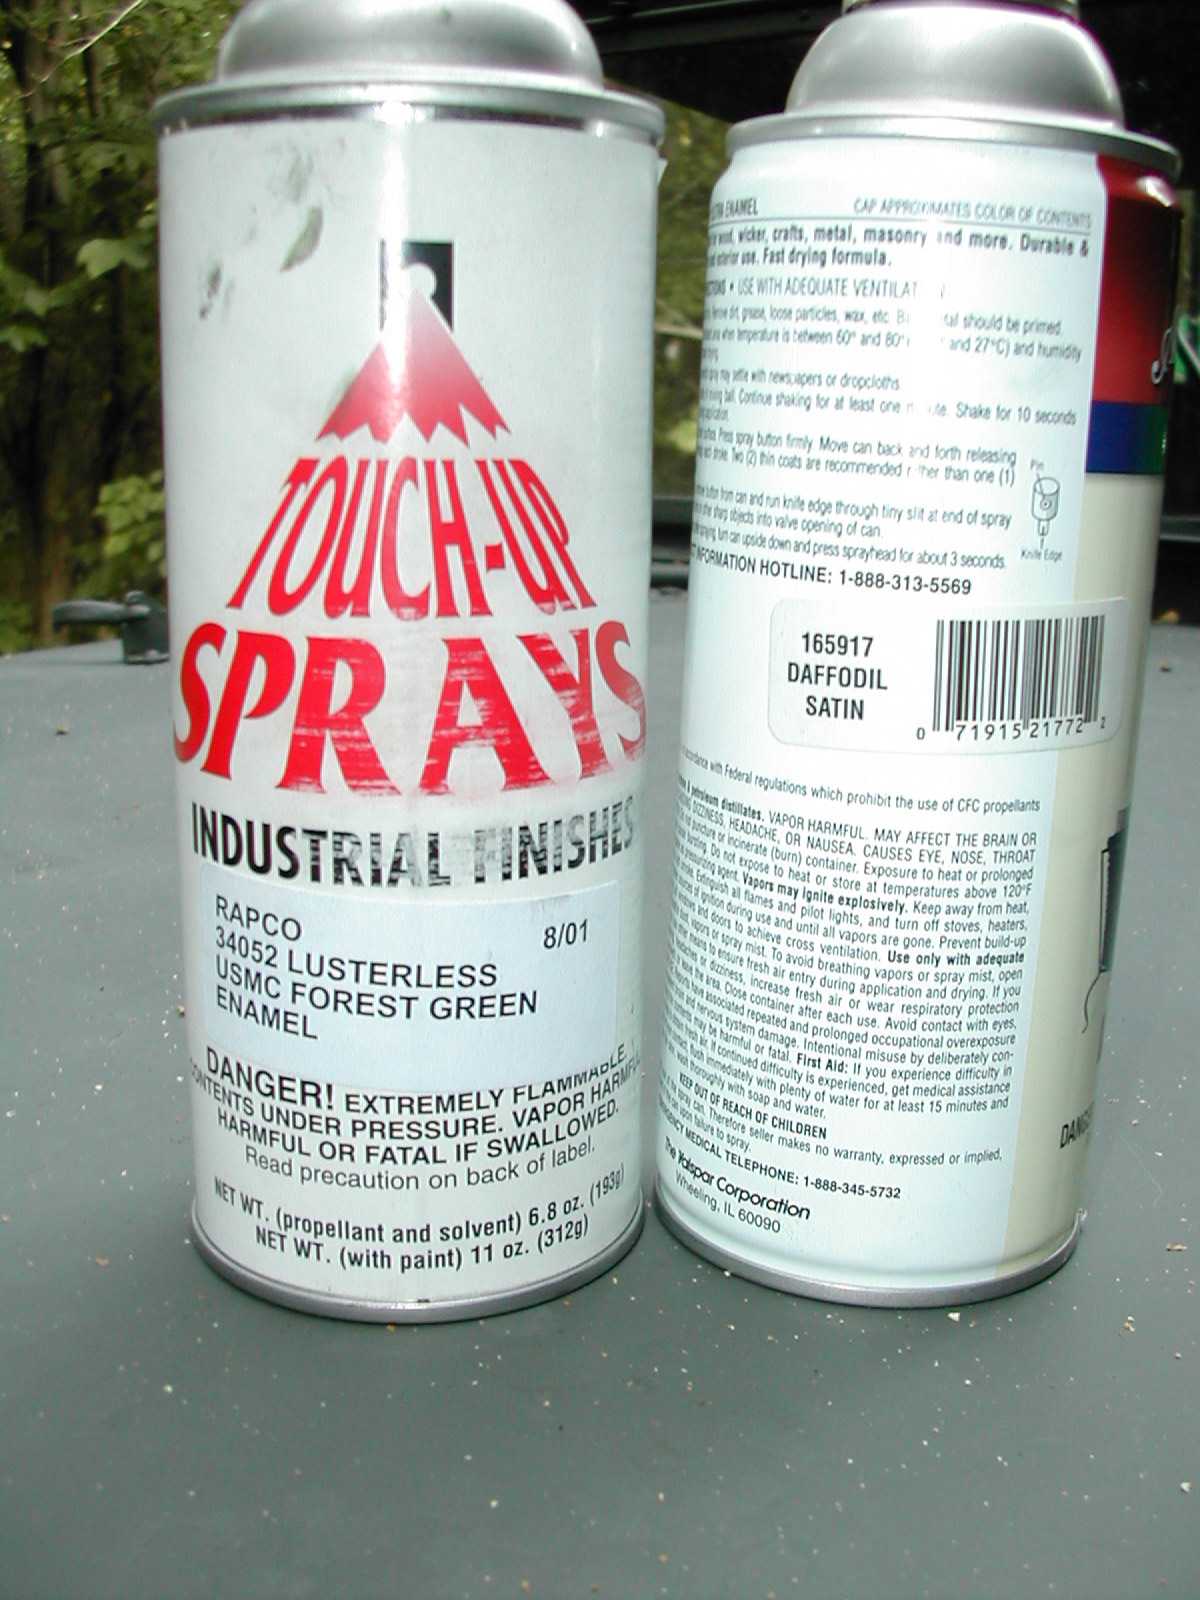 55
55Applying Stencils on my M37
This page shows the materials and method used to replace the markings on my M37. With the exception of some changes made in the marking scheme due to my installation of the Cummins 4BT, the markings are the original ones described on my USMC Markings page. Hopefully, this page can help someone in the selection, purchase, and application of materials when the need for new markings arises.
Since my truck does have the Cummins with a different bellhousing than the original truck and it has been converted to 12 volts, I modified the markings from the original by deleting the caution on the dash that instructed the operator to install the fording plug in the bellhousing before fording and to remove it afterward. I added a "diesel" just above the fuel tank fill cap and a "12 volt" just above the slave receptacle. Tire pressure, fuel tank caution ("do not overfill..."), and the hood and tailgate numbers are as originally on the truck.
I ordered the paint mask for the hood numbers, tire pressure, fuel tank caution, and fuel tank diesel and 12 volt warning from Rick Larsen at Military Stencils. I also ordered an oil board diesel stencil for my jerry can. When the materials from Rick arrived, I noticed that my tire pressures were all "TP 40" instead of the "TP-40" that I thought I had ordered. Instead of calling Rick to straighten things out, I obtained an oil board stencil from Frank USMC with the "TP-40" on it that matched the original markings on my truck. I had driven to Frank's to pick up some hardware and he offered to make me the stencil and Rick had put an extra hood/tailgate paint mask in my shipment, so everything worked out very well for me.
The instructions with Rick's paint mask product are very good and are easy to follow. Once your vehicle has a fully cured base coat of paint (You don't want to lift you paint off the vehicle when you remove the paint mask!) you lay out the location of the new markings on the vehicle (I eyeballed most of mine) with masking tape, peal the backing off the paint mask, and stick the mask on the vehicle smoothing out the air bubbles with your hands. Once the paint mask is firmly and smoothly applied to the truck, you peal off the top protective film and mask off the area around the marking with newspaper and masking tape. You give the stencil a few light dustings with a spay can of paint and carefully remove your newspaper and tape, then peal the paint mask off the truck...
I applied the oil board stencils in a similar manner to the paint mask. I taped the stencil to the truck with a couple small pieces of masking tape and then masked out the area with newspaper and tape to prevent overspray on other surfaces, lightly dusted several coats of paint on the stencil and removed the newspaper, masking tape, and the stencil. I then went on to the next spot and repeated the process.
For stenciling paint, I used Valspar's American Tradition Interior/Exterior Ultra Enamel paint from Lowes in a Statin finish. The color was "Daffodil" Valspar number 165917. For a USMC truck, the color should be a yellow with a hint of orange to it in a luster to match the base color of the truck. Since my M37 is a 1953, it is painted in the Korean era USMC Lusterless Forest Green, Gillespie number 34052 that I had purchased from Mark at RAPCO. I couldn't find any lusterless (flat) yellow that I liked at my local auto parts, farm supply, or Lowes the week I decided to stencil the truck, so I thought that the satin would be a close enough match. The stenciling was performed on August 23, 2002.
Send me an email if you have questions and I'll try to provide an answer.
This page is provided as a resource for other military and civilian power wagon owners, it should not be considered as an endorsement of any particular manufacturer, brand, or dealer. Information is believed to be accurate at the time it was added to this page, but is not guaranteed in any shape or fashion.
| 1 |
2 |
3 |
4 |
| 5 |
6 |
7 |
8 |
| 9 |
10 |
11 |
12 |
| 13 |
14 |
15 |
16 |
| 17 |
18 |
19 |
20 |
| 21 |
22 |
23 |
24 |
| 25 |
26 |
27 |
28 |
| 29 |
30 |
31 |
32 |
| 33 |
34 |
35 |
36 |
| 37 |
38 |
39 |
40 |
| 41 |
42 |
43 |
44 |
| 45 |
46 |
47 |
48 |
| 49 |
50 |
51 |
52 |
| 53 |
54 |
55 |
| Photo | Caption |
| 1-8 | The jerry can that I had obtained had been used for diesel while in service, so I just lightly sanding it, masked off the top and resprayed the yellow (easy reference that it is a "diesel" can). I then masked off the top and resprayed the bottom with forest green. I then taped the stencil to the can, masked the stencil, and reapplied the "diesel" logo on both sides. |
| 9-10 | Right rear fender just after spraying the paint and after the oil board stencil was removed. |
| 11-12 | Left front fender just after removing the stencil. |
| 13 | Right front fender just after taping the stencil in place and masking with newspaper. |
| 14 | Right front fender just after lightly dusting with the spray can two or three times (just enough to get an even coat without any runs). |
| 15 | Right front fender just after the newspaper and and stencil have been removed. |
| 16 | Right rear fender just after wiping the area where the stencil will be applied with a tack cloth. |
| 17 | Right rear fender just after lightly dusting with the spray can two or three times (just enough to get an even coat without any runs) but with just enough gap between the stencil and the fender to prevent a really crisp number even though I held the center of the stencil in place with a pencil. |
| 18 | Right rear fender just after the stencil and paper have been removed. |
| 19-21 | Fuel tank cautions just after applying the paint mask product to the body panels and removing the clear plastic protective layer prior to masking off the area around the masks. |
| 22-23 | Fuel tank cautions just after lightly dusting with the spray can two or three times (just enough to get an even coat without any runs). |
| 24 | Fuel tank cautions just after removing the paint mask material (make sure that you pull it off at a 45 degree angle and tug from near the body panel). |
| 25-27 | Applying the "12 volt" caution just above the slave receptacle with paint mask. |
| 28-31 | Applying the hood numbers to the left front. I placed some marks on the paint mask 0.5" from the bottom edge in order to help align the numbers correctly from the bottom edge of the hood. With the size letters that I used, the mask has a 1" boarder between the edge of the numbers and the top and bottom edge of the mask. |
| 32-35 | Applying the hood numbers to the right front. I did the bit with the pencil marks on the mask to help align it and I cut it in half in order to get the gap around the hood clip that is used to secure the hood open when servicing the engine. |
| 36-42 | Applying the tailgate numbers. I just used the top edge of the paint mask to align the numbers since they are 1" down from the rolled edge of the stamped area in the center bottom of the tailgate. As spaced on the paint mask, the numbers align perfectly with the "U" and the "7" on one level of steel and the rest of the number on the raised center panel. |
| 43-49 | An overview of the stencils after I finished applying them. |
| 50-53 | The paint mask product as received from Rick Larsen and spread out on the tailgate prior to starting work. |
| 54-55 | The paint that I used to touch up some scratches I found in the paint while applying the stencils and to paint the jerry can along with the paint that I used for stenciling. The M37 was painted with Gillespie that I ordered from Mark at RAPCO in gallons and I have found that the spray cans are a perfect color match. |