 1
1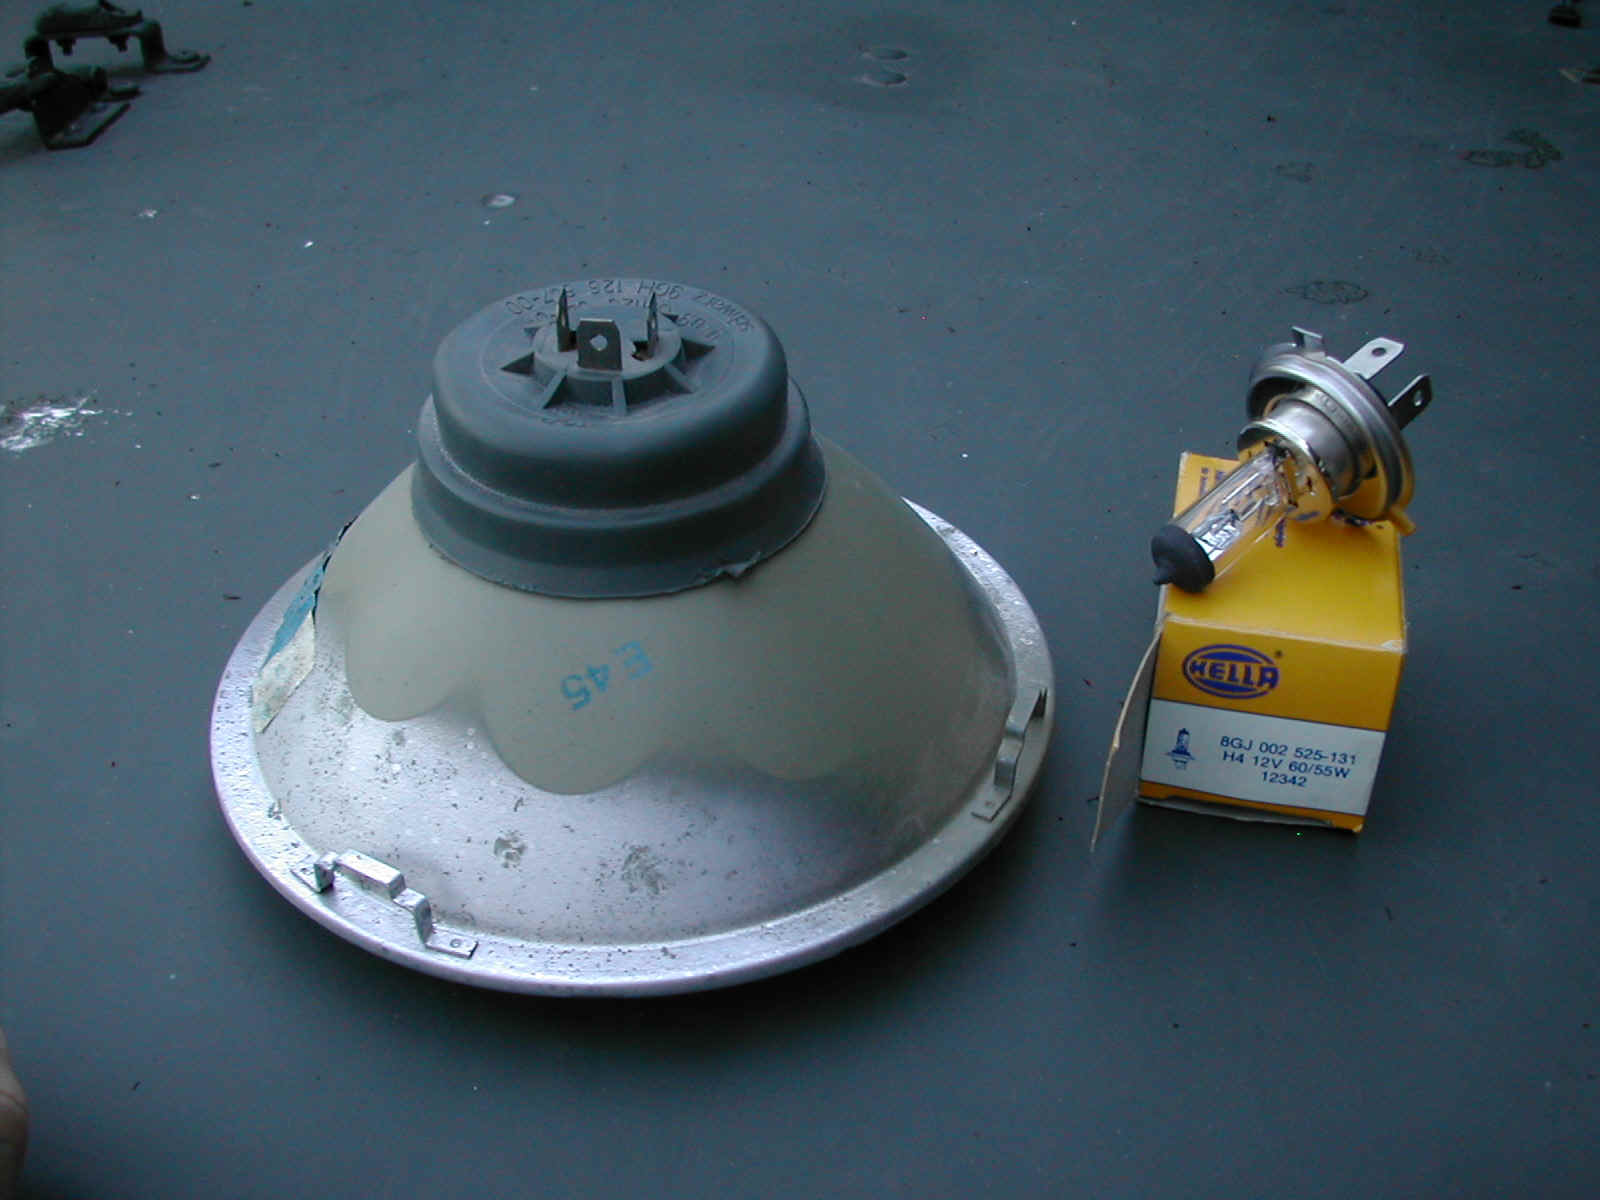 2
2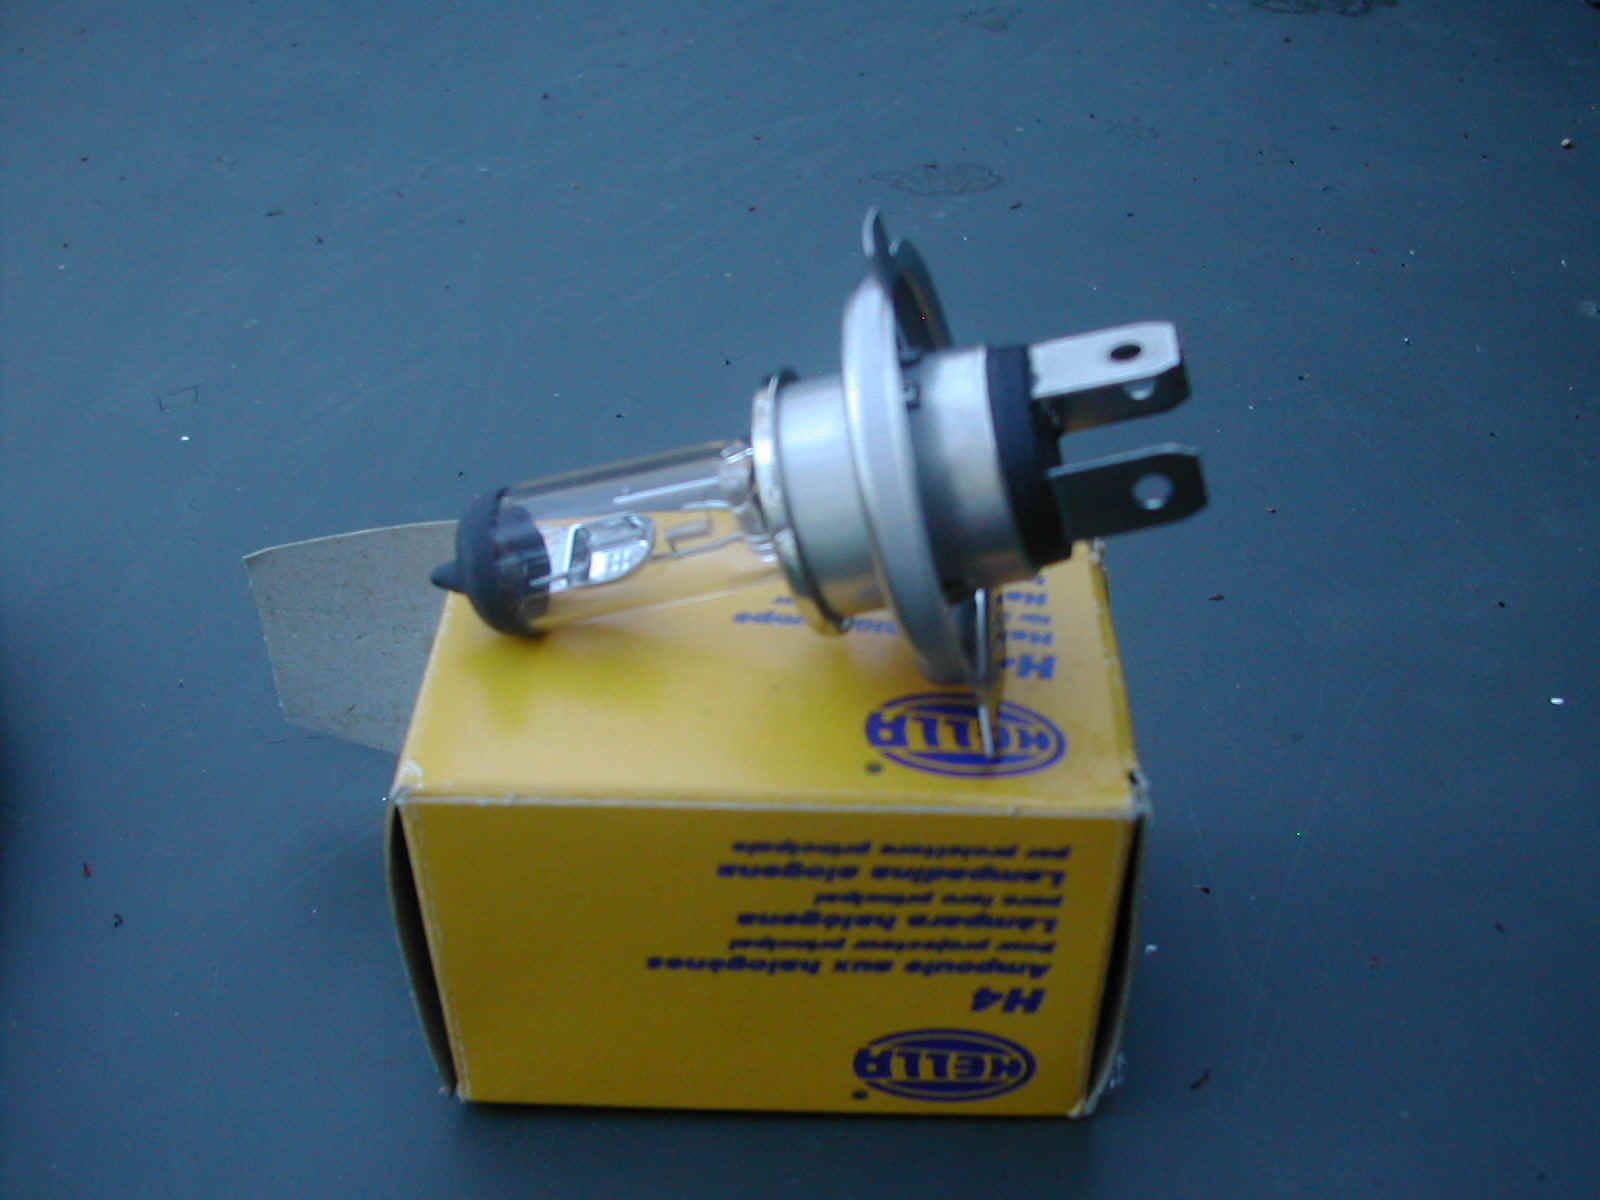 3
3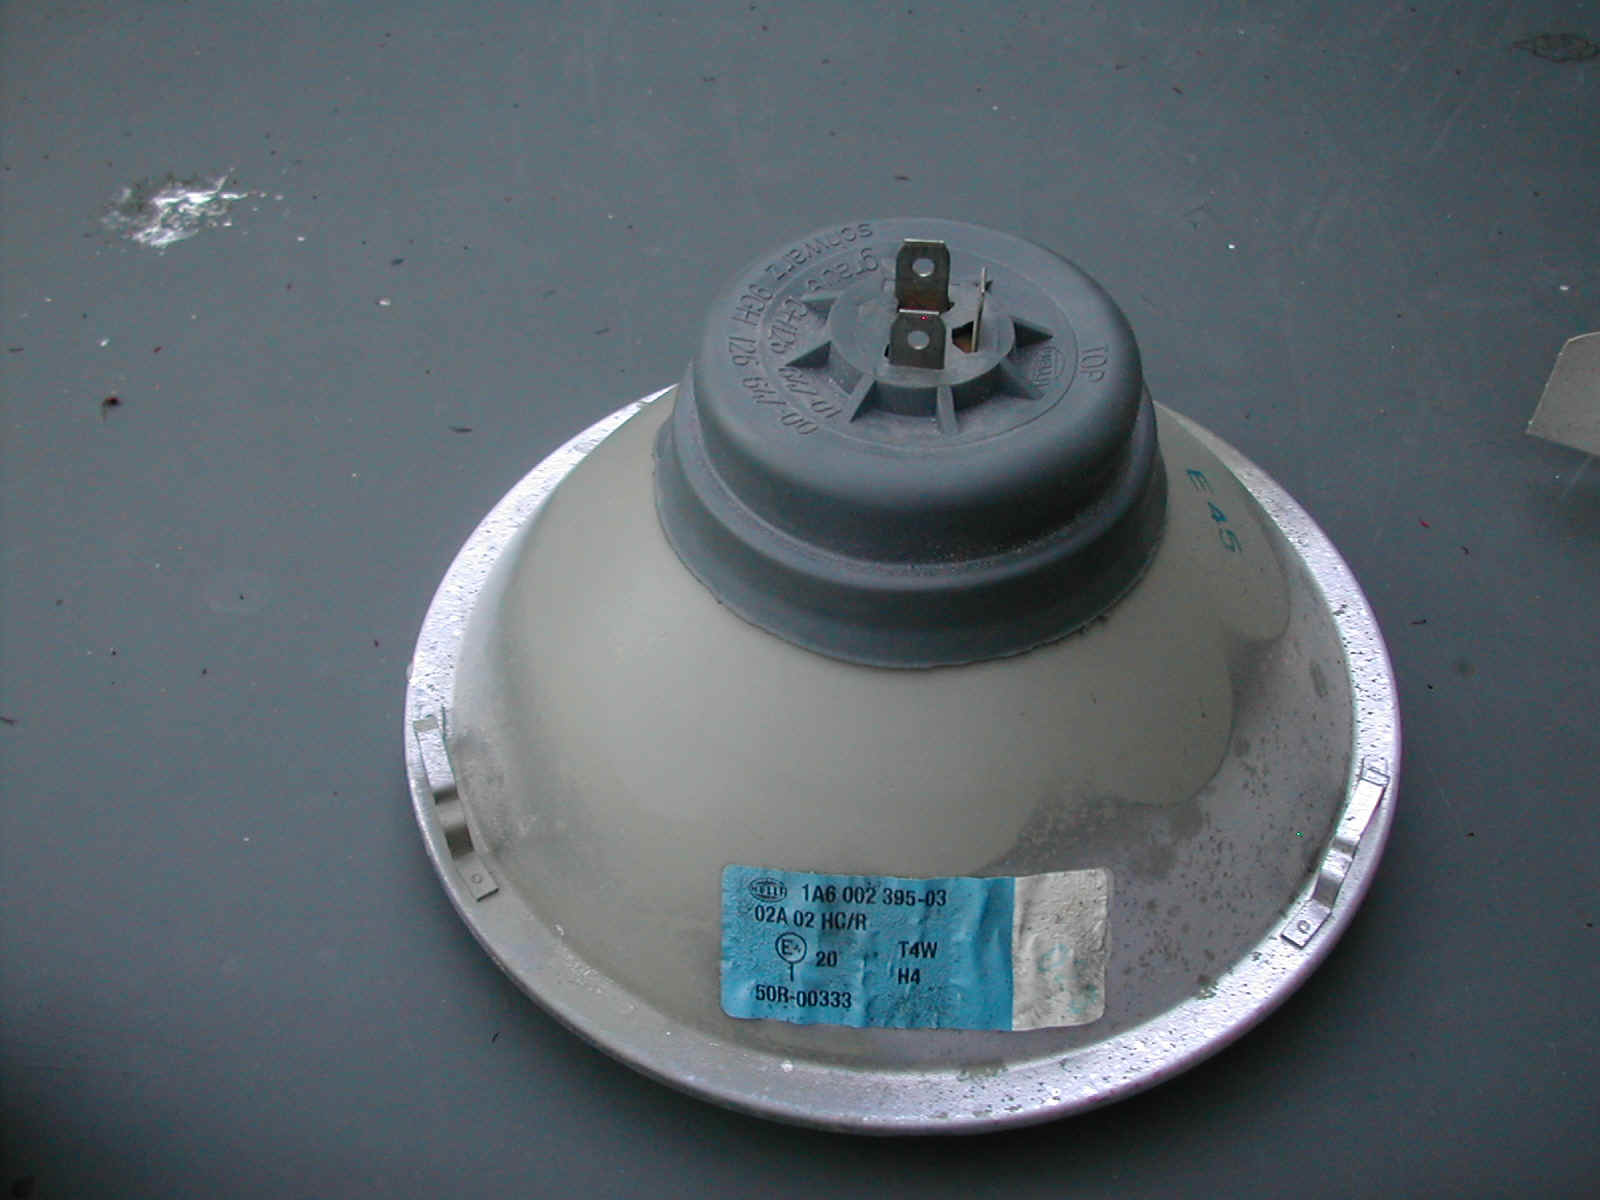 4
4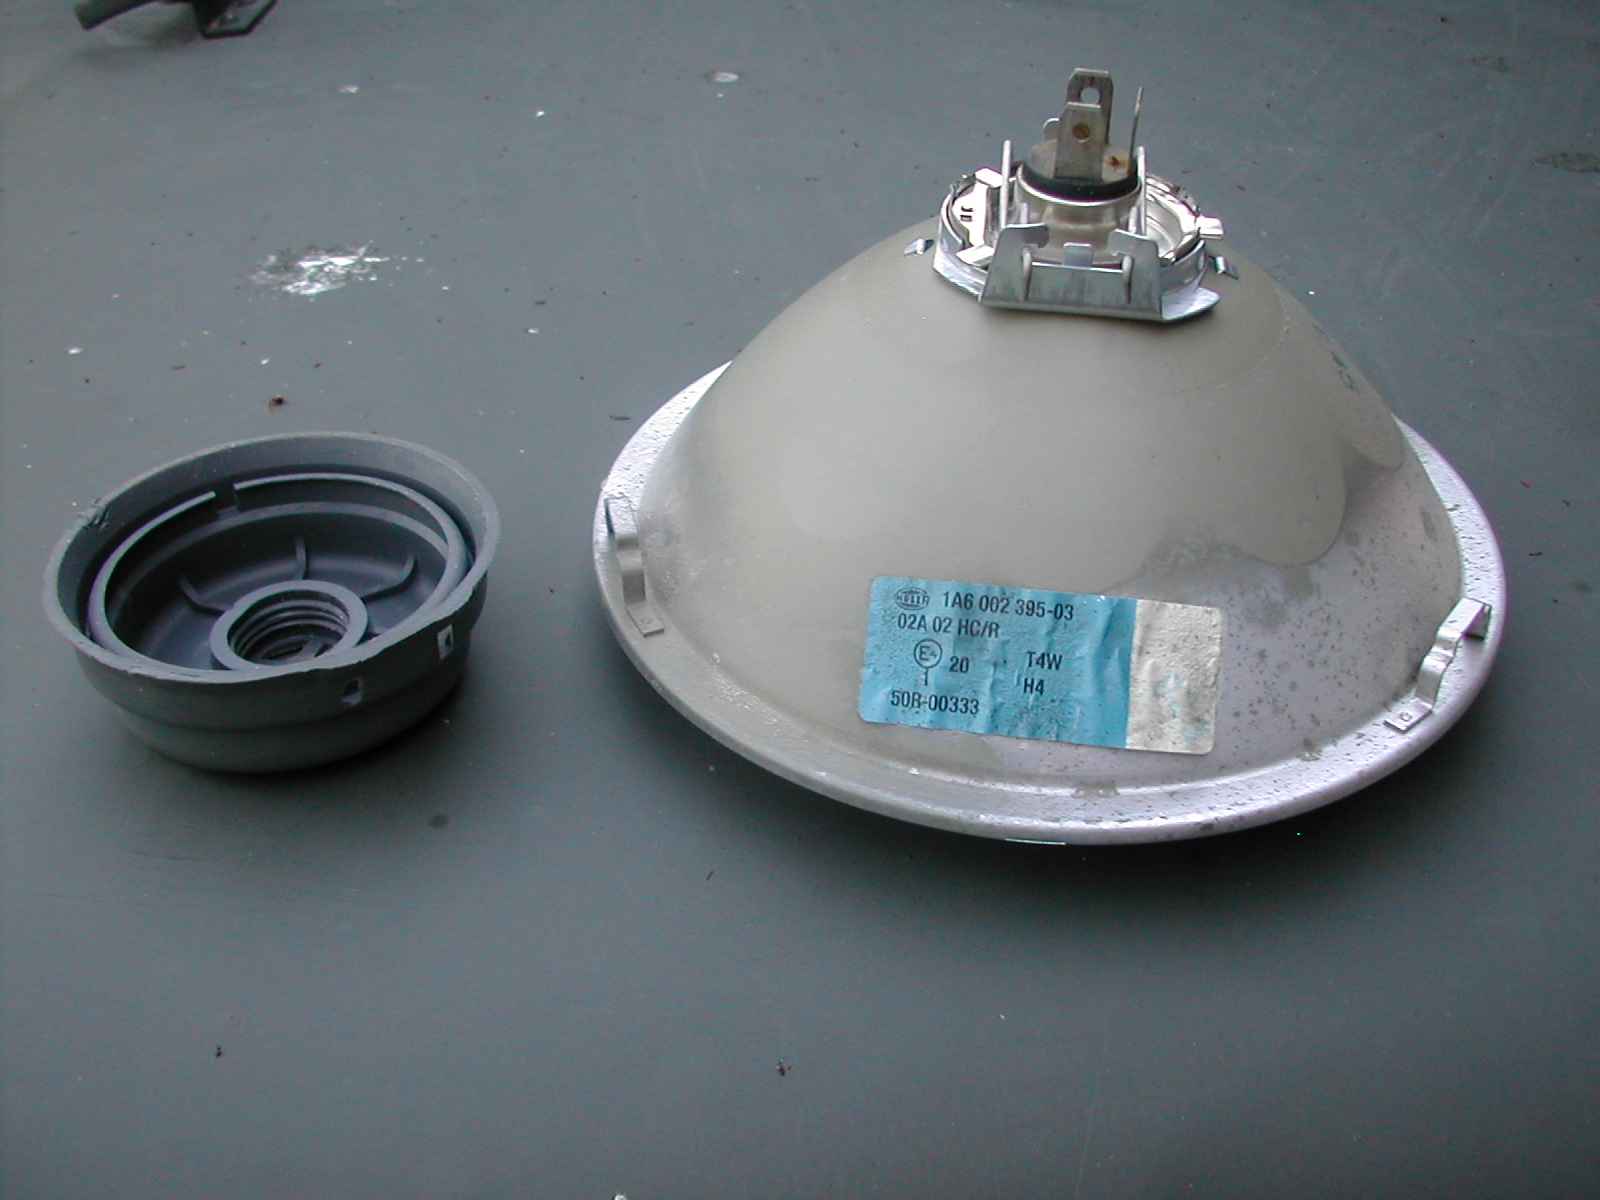 5
5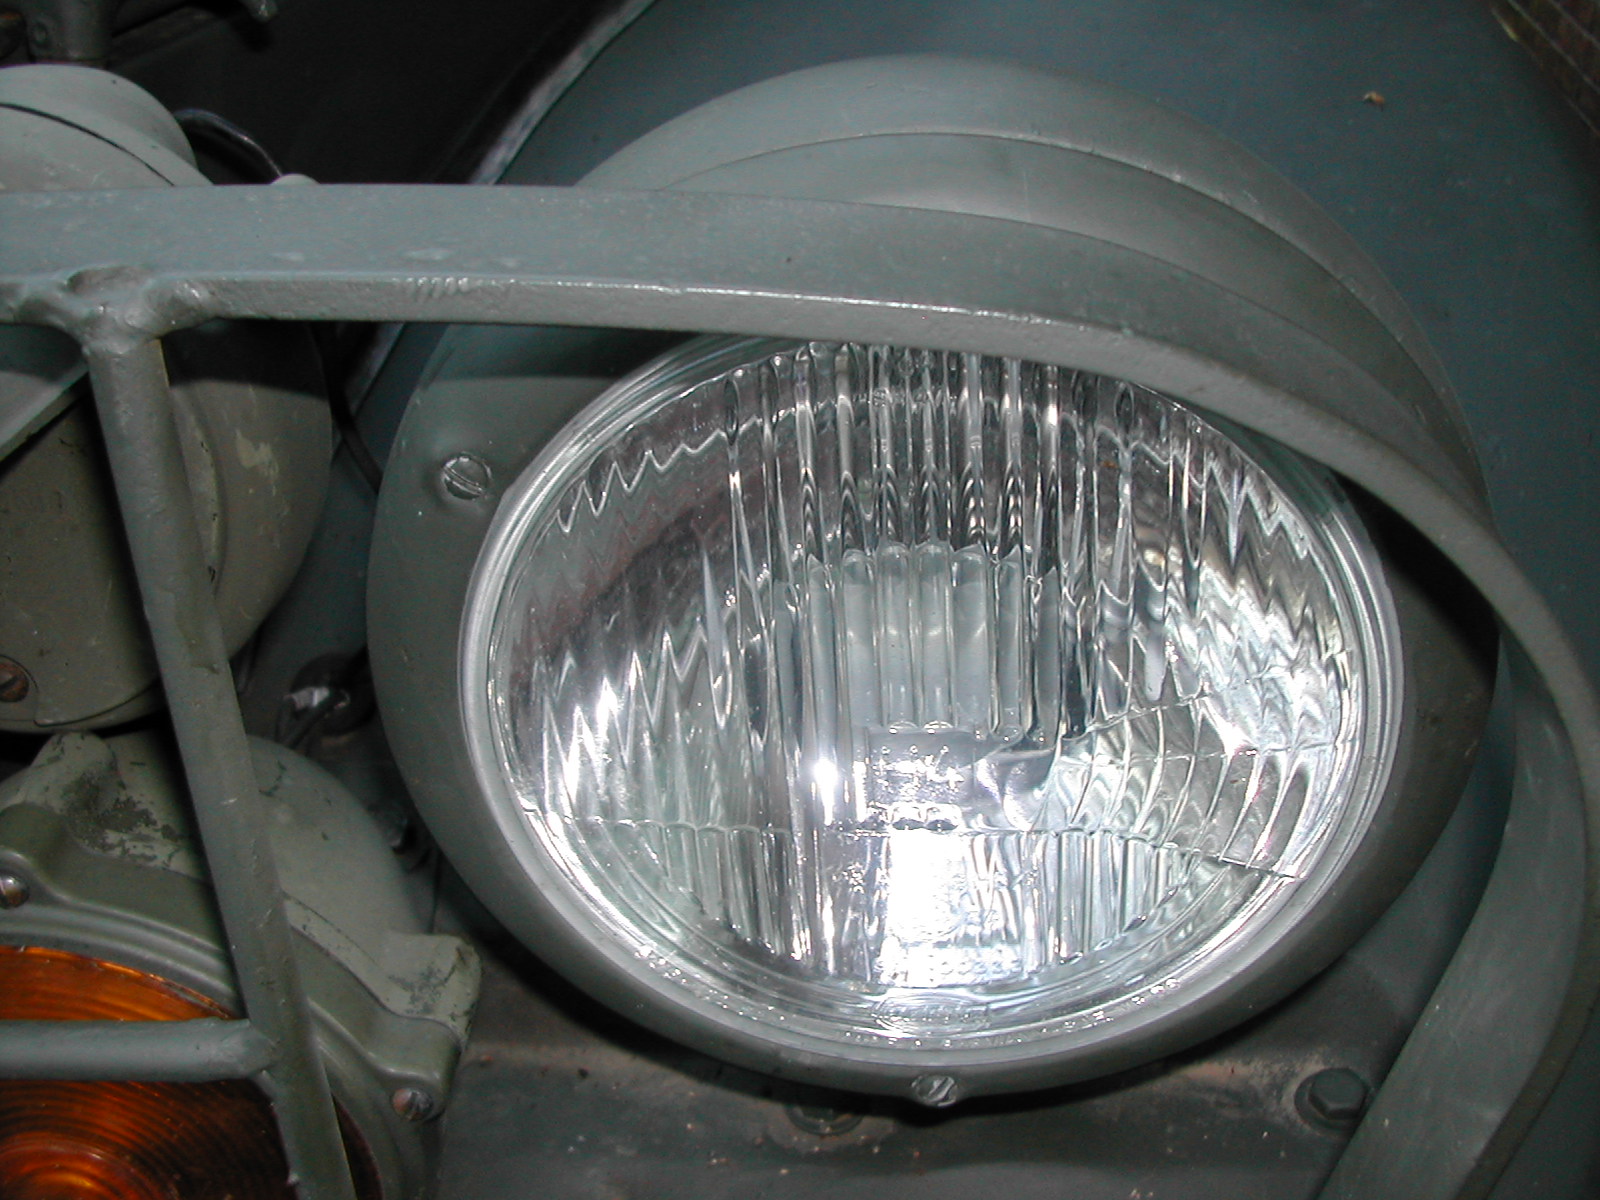 6
6Headlights
Very soon after I got my truck, I decided to upgrade the headlights to match the units that I have in my other vehicles by installing E-code Hella H4 lights.
The European H4 headlight design is a much better light than the stock sealed beam
units that came with the truck, or even the
newer design US Specification sealed beam lights. The European H4 design is basically a
two piece unit that has a burner (bulb)
that is available in a variety of wattages and voltages that is placed into the back of a
lens and reflector unit where it is
held in place with a spring clip. The benefits of this design is that you only have to
change the bulb when one burns out instead
of the whole unit, and the lenses have a much more efficient design than those found in
sealed beam lights. The European H4
lenses also are noted for having a different pattern than that which is found on the
sealed beams found in the US. The change
in lens pattern is such that in low beam the light is kept down on the road in front of
the vehicle and to the right side (to
illuminate the shoulder). The low beam pattern thus looks somewhat like this __/ In high
beam, the light is directed
primarily down the road in front of the vehicle. One nice benefit of this lens to other
traffic, especially for someone
approaching a truck that has its lights as high as the M37, is that the low beams don't
blind the other drivers as much as a
“regular” sealed beam does.
For my rig, I selected a pair of Hella 7” replacement lenses with a 70/75w 24v
burner. I really like the Hella lenses and have
been using them for years in my other vehicles. They seem to have the sharpest cutoff in
the lens compared to other lenses such as the Japanese units or even the Bosch ones, and
the bulbs seem to last forever. The 7” lenses are drop in replacements for US
standard sealed beams. Although “hotter” H4 burners are available, a 70/75 watt
light will illuminate the road way beyond the distance needed to easily stop my rig, and
the power draw is low enough that I'm not worried about stressing the stock wiring. To
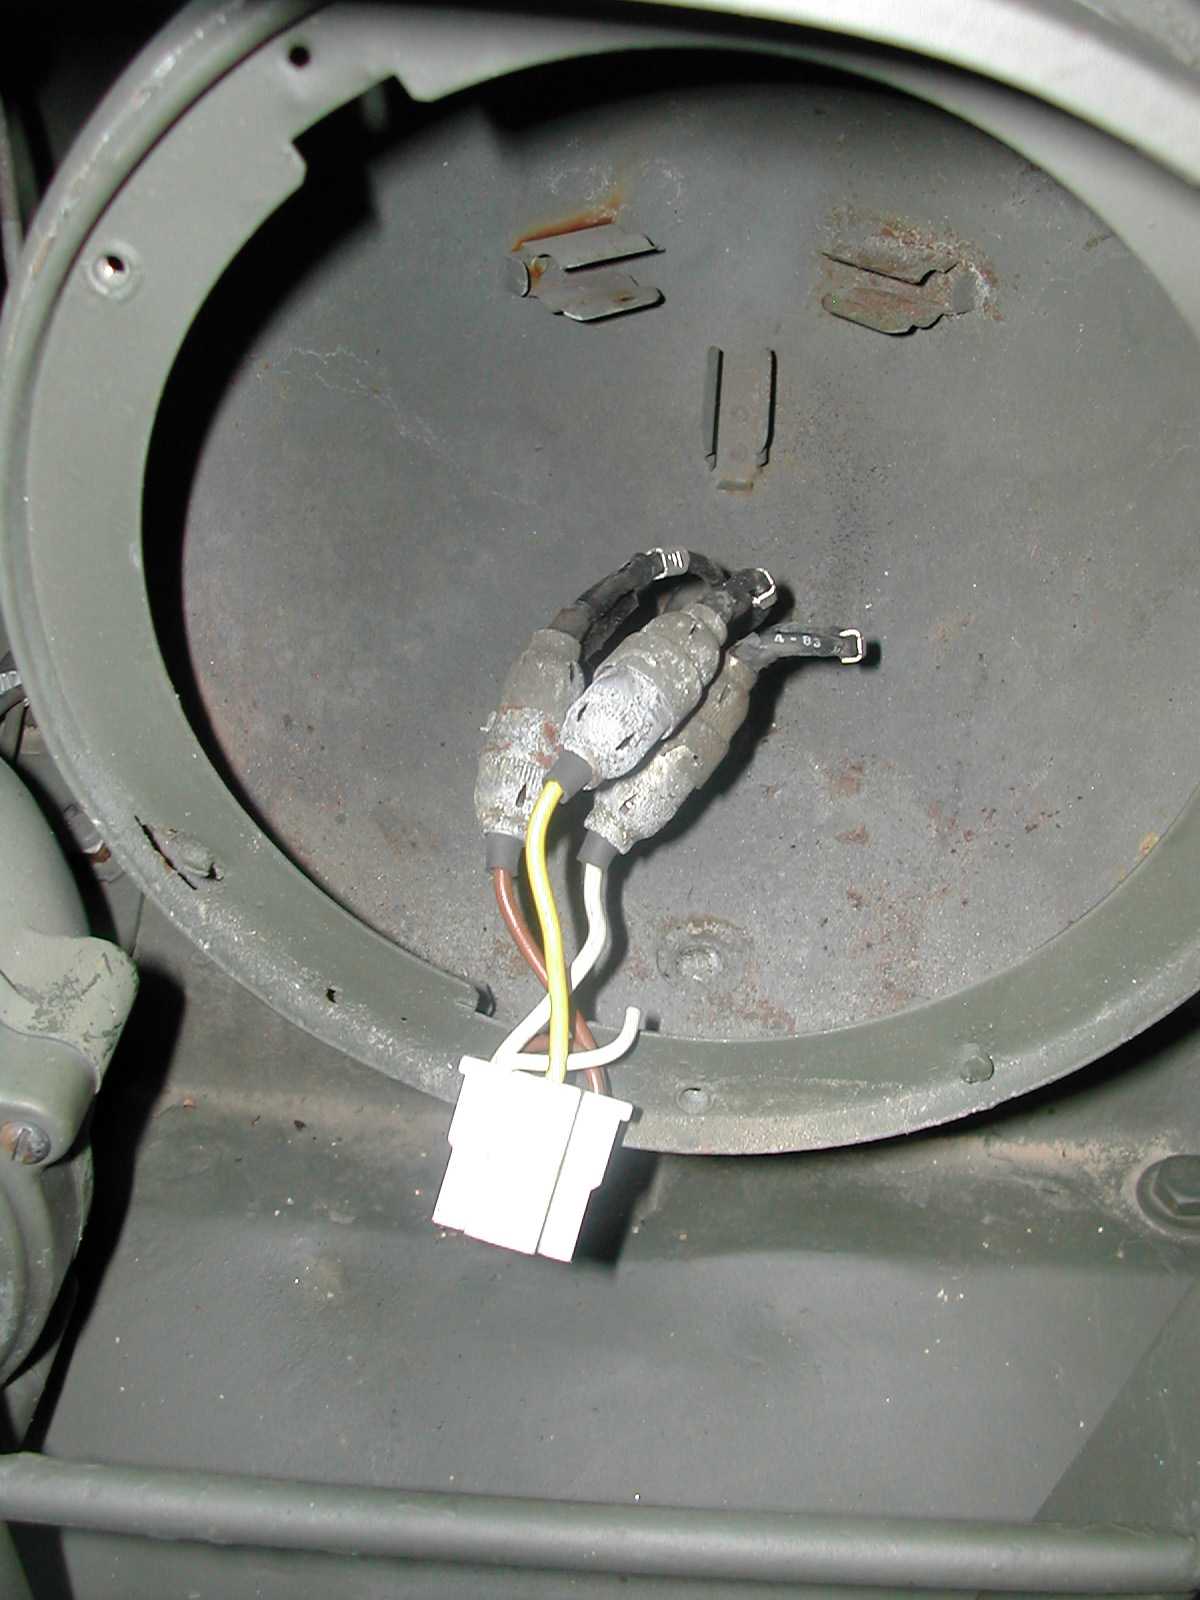
wire up the lights, I just took the harness adapter plug that came with the lenses and
attached a set of Douglas connectors to the wires so that I could plug them into my
existing wire harness. If I ever need to switch back to the military sealed beams, I
can just unplug these and plug the old style lights back in. The only way to tell from
looking at the lights that they are not original is that the lens is flatter and they do
not have the knobs molded into the glass face for use with automatic headlight aiming
equipment (which you can't use with a M37 anyway…).
Installation took about a half-hour, and the only tools needed were my flat blade
screwdriver, a wire stripper, and my crimping
tool.
If you look at the back of the light or at the harness plug that will come with the
light, the three flat terminal lugs will make a triangle with one terminal up, and two on
the bottom. The top terminal should be connected to wire #18 (low beam), the bottom right
to wire #17 (high beam), and the bottom left to wire #91 (headlight to ground).
I purchased my lights from a local shop, but I found that Susquehanna Motorsports has a
web page with competitive prices and a nice write up about the lights. Their web page
address is: http://catalog.com/susq/
A pair of 7” round Hella H4 lenses is part 70476 (comes with 12 volt burners and
wiring plug with pigtails), the 70/75 watt 24v burner is part 78160, you need two.
Although the initial price of the lights looks high, the improvement in lighting makes
this a really good investment in my
opinion.
BTW: There is a version of these lights with an extra bulb in them that is connected in
Europe to the "parking light" circuit to provide low level light for inner city
driving. They are called "city lights." I have them on my cars, but they don't
add anything but extra cost on an M37, plus, you'd have to run an extra wire to the lamps.
But be aware if someone asks when you order.
The number above is for lights without the extra "city light" bulbs.
July 2004 Update:
I've been getting my Hello E-Code lights from Susquehanna Motorsports for a while now
as they have better prices then my local parts store... The URL for their website is
http://www.rallylights.com/
You need to either order one conversion kit and two 24volt H4 burners (kit comes with two
12v burners) or get two individual 7" round lights and order two 24volt burners. I'll
let you do the math to figure out which is less expensive...
Kit with 12volt bulbs is part number H6024A (Two Lamps with 60/55w H4 Bulbs) at $71.26.
Also need two part number HL78143 (H4 Bulb, Heavy Duty 24V, 75/70W) at $12.00 each (one
dollar more than than the standard duty burner).
Individual lamp (need two) is part number HL79562 (7" Round ECE H4 Headlamps w/o
bulb) $31.97 each. Also need two part number HL78143 (H4 Bulb, Heavy Duty 24V, 75/70W) at
$12.00 each (one dollar more than than the standard duty burner).
You will also have to go to your local parts store to get the connector for the back of
the bulbs and create an adapter to go to your existing wiring harness. This should be
pretty obvious and the part is pretty easy to spot in the electrical section in my local
AutoZone, Advance Auto, and PepBoys.
| 1 |
2 |
3 |
4 |
| 5 |
6 |
| Photo | Caption |
| 1 | Headlight bucket with H4 adapter installed using original style wire connectors. Note cut white wire from headlight plug used when extra bulb is installed in light fixture for European "city" lights (parking light). |
| 2 | Headlight assembly and H4 bulb (burner). Note that bulb is 12 volt version, 24 volt version is also available. |
| 3 | H4 bulb (burner) assembly showing the locating tabs (so that you always get it right side up) and the electrical connectors on the back end. Never handle the burner by the glass end... |
| 4 | Headlight assembly showing the rubber waterproofing boot installed and the tabs on the outside ring of the light that locate and position the fixture in the headlight buckets (discard your existing inner headlight ring). |
| 5 | Headlight assembly with the rubber boot removed showing the locking tabs holding the burner in place. |
| 6 | Headlight installed on the truck. Only noticable difference from stock is the flat profile to the light and the different diffraction pattern in the glass. |