Electric Wipers
One of the items that was very high on the priority list when I got my truck was to fix the windshield wipers. The truck only had a wiper on the driver's side since the passenger side wiper had been removed when the window was replaced with a flat sheet of lexan (another story...). The wiper on the driver's side didn't work to well and needed a rebuild of the vacuum motor and a new blade.
When I decided to put in a diesel, I decided to replace the wipers with a set of electric units. After searching around some, I found out that a fellow North Carolinian had installed a really nice set in his Hercules powered M37 and had written an article on how he did it for Military Vehicles Magazine.
I emailed Dan and got him to send me a copy of his article and his parts list.
Mounting the wiper motors required making a spacer to hold the motor body away from the
window frame and a bit of drilling and grinding on the window hinge.
I started by removing the windows from the truck. I then removed the window hinge
half from the outer windshield frame.
I then drilled the hole for the shaft in the window frame. I just enlarged the existing hole from the vacuum wiper in mine. Dan Pinkham shifted his hole closer to the glass. It was easier for me to drill the hole using the existing hole as a guide since I was using a hand held drill. I didn't worry to much about cracking the glass since the hole is a bit further away from the glass than the instructions I received would have had me drill it, but I did have to cut a relief notch in the window hinge half that is screwed to the outer window frame. I can no longer slide the inner glass out of the outer frame without removing the wiper motor, but it seemed like a good trade... One of my inner window frames had the offset wiper motor shaft hole, the other one came from a 2.5 ton truck with the center mounted wiper motors, so I just measured over from the edge of the window and made a hole in my second frame in the same location as the first.
I then ran the nut on the big shaft of the wiper motor out a quarter of an inch and set
the motor into place on the window frame. I then went in search of something to make
a quarter inch thick spacer out of for the wiper motor mounting bracket. The motor is
supported on the window frame by a pair of nuts on the motor shaft that sandwich the
window frame and a screw through the window to a tab on the opposite end of the motor.
I used a chunk of steel bar that I had in the scrap pile to make a inch square
block. This allowed me to mount the motor a quarter inch back from the inside of the
window frame allowing just enough room to attach the wires to the terminals on the motor
and to provide enough shaft stick out the outside of the frame to give a good angle for
the wiper arms.
I put the motor on the window and place the spacer block under the end of the bracket with
the top edge aligned with the top of the bracket and just a little bit below the top of
the window frame (yes, the motor is not exactly level, not a problem) and drilled a
mounting screw hole through the spacer block and the window frame. I did everything
in one operation one one window, and I marked the pieces and drilled them separately on
the other.
I then took the motor off the frame and slid the hinge back onto it. I then
marked and area an inch long on the hinge centered on the wiper motor shaft hole. I
removed the hinge from the window and cut out the front face of the hinge using a hacksaw
and my bench grinder. I then reinstalled the hinge on the window and set the wiper
motor back onto the frame and checked the hinge operation while holding everything
together by hand.
I put the felt washer and the metal washer on the shaft on the outside of the window
frame, I had to grind a bit off the metal washer to give it a flat side (making it no
longer round) so that it would sit flat against the surface of the window frame. The shaft
is just a tad too close to the top of the frame for it to clear (Dan's does, but his hole
is lower, and he notched his glass according to his instructions.). I put the second
big nut that came with the motor on the shaft. I then put a screw and nut through
the mounting bracket, the spacer, and the frame and tightened everything up.
I repeated the performance on the other
windshield and bolted them back into the truck.
I ran three power wires to the motors using the existing holes in the outer window frame
where the vacuum line had run. I had to open up the hole in the hinge bolt a bit since it
had rusted some and I was using 12 gauge wire. I just put a bit in my drill a tad larger
than the existing hole and ran it through. A bunch of wire ties keeps the wires
bundled together and from flopping
about. I couldn't get a good enough ground for the motors through window frame, so I ran a
ground wire from each motor down through a pair of holes drilled on the right side of the
outer window frame through a left side hinge bolt from a parts truck (so I'd have one with
a hole in it) to a ground under the dash. Basically, the ground wire routing looks the
same as the power feeds on the left... The motors are wired in parallel. The push on
terminals that I used serve to splice the wires running between the motors to the feed
from the switch or the ground. I mounted my switch in the hole vacated by the fording
cables that I had removed earlier from the truck.
I had to to play with the wiper arm adjustment to get them to just hit the edge of the
window frame at full arc and to adjust the amount that the motor shaft protrudes from the
front of the window. The motors park with the blades angled to the left side.
It didn't take long to get used to the arms being just outside my direct line of vision,
and the presence of the larger wiper motors hanging down on the frame doesn't bother me as
much as I thought it might when I first started putting everything together.
They don't detract from your vision as much as you would think.
I ordered my parts from Sylvia at Diesel
Equipment Company in Greensboro, NC (phone 336-373-8331).
WWF12C18-720 wiper motor 12 volts, need two
LE5810221S medium adjustable arm, need two
BD72101112S blade, dull, 12” heavy duty, need two
SW721025S switch, two speed, need one
|
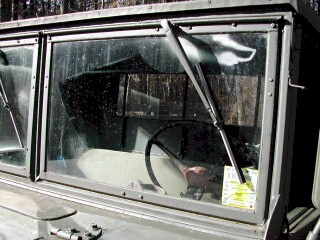
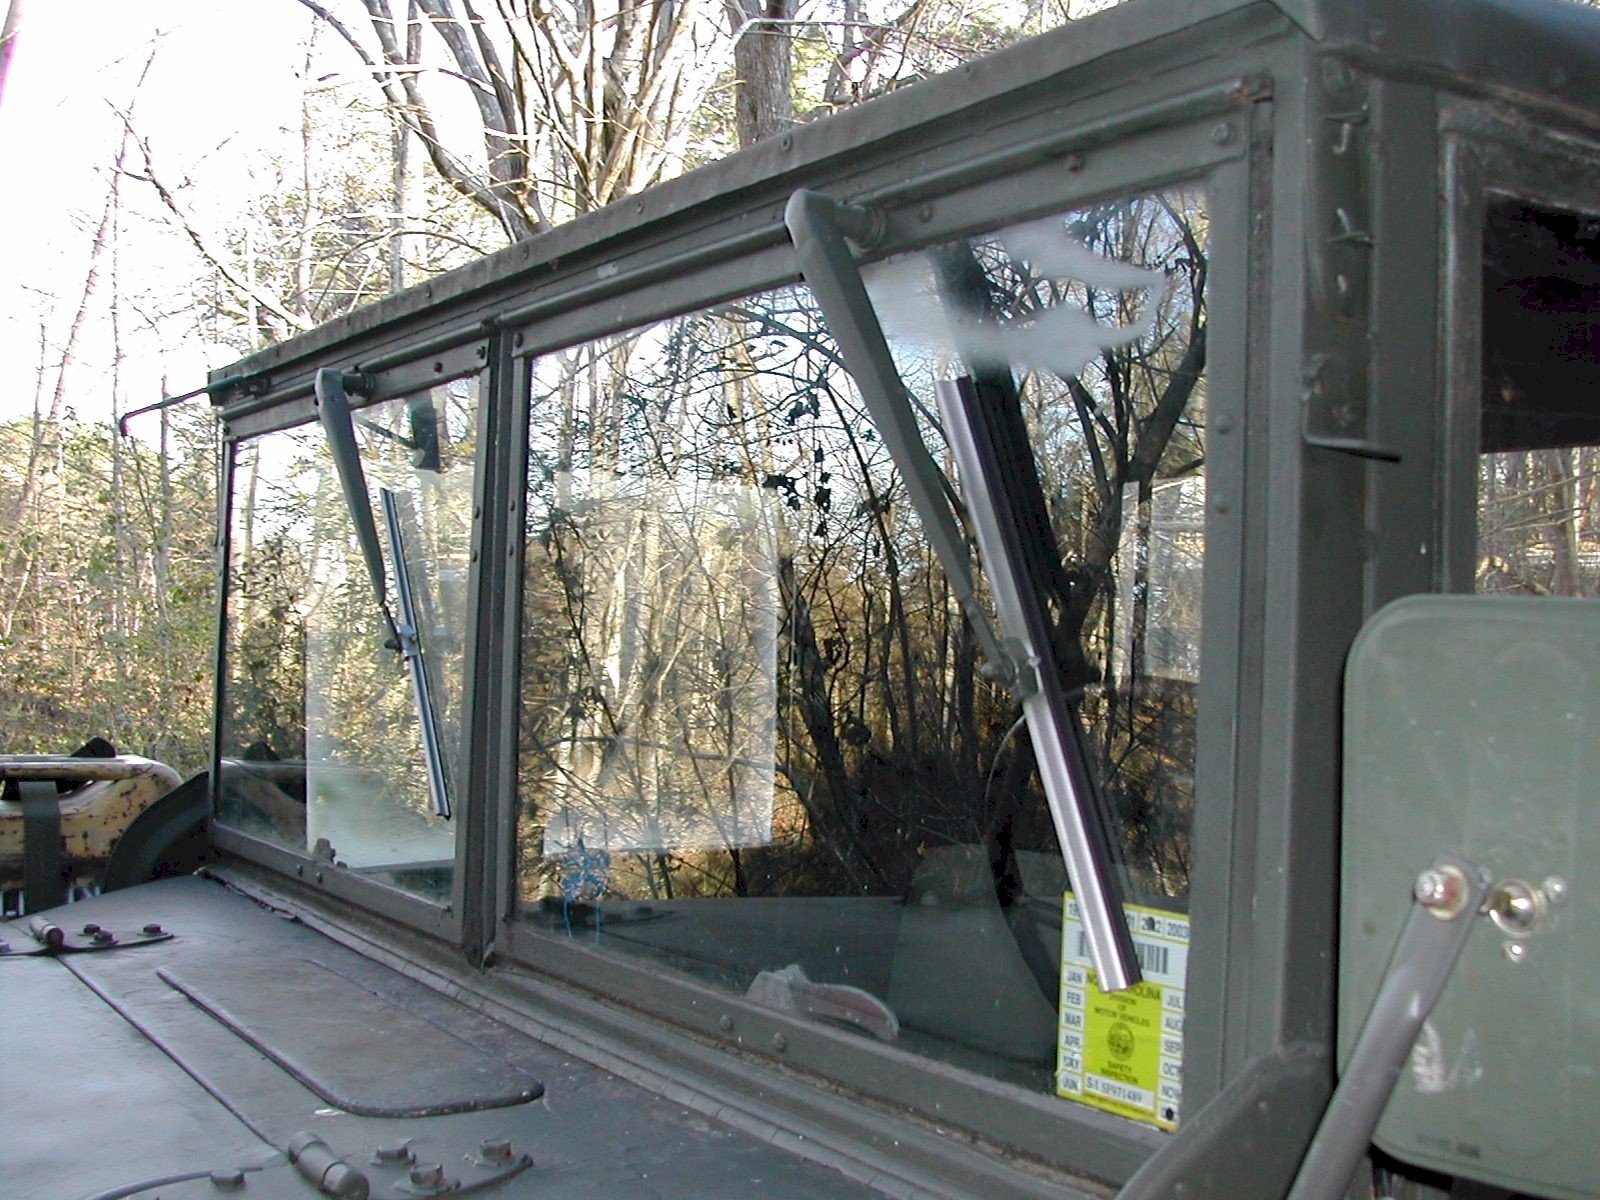
Photo showing the wiper assembly from the outside. Notice that I got a little careless with the sandblaster one day... Nothing like a little home done etched glass. The wiper (and the etched glass) are actually not in my line a vision when driving. |
|
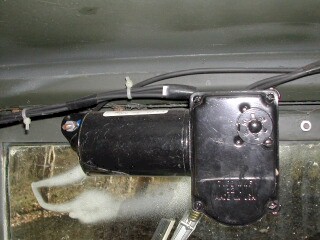
The backside of the wiper on the driver's side window. |
|
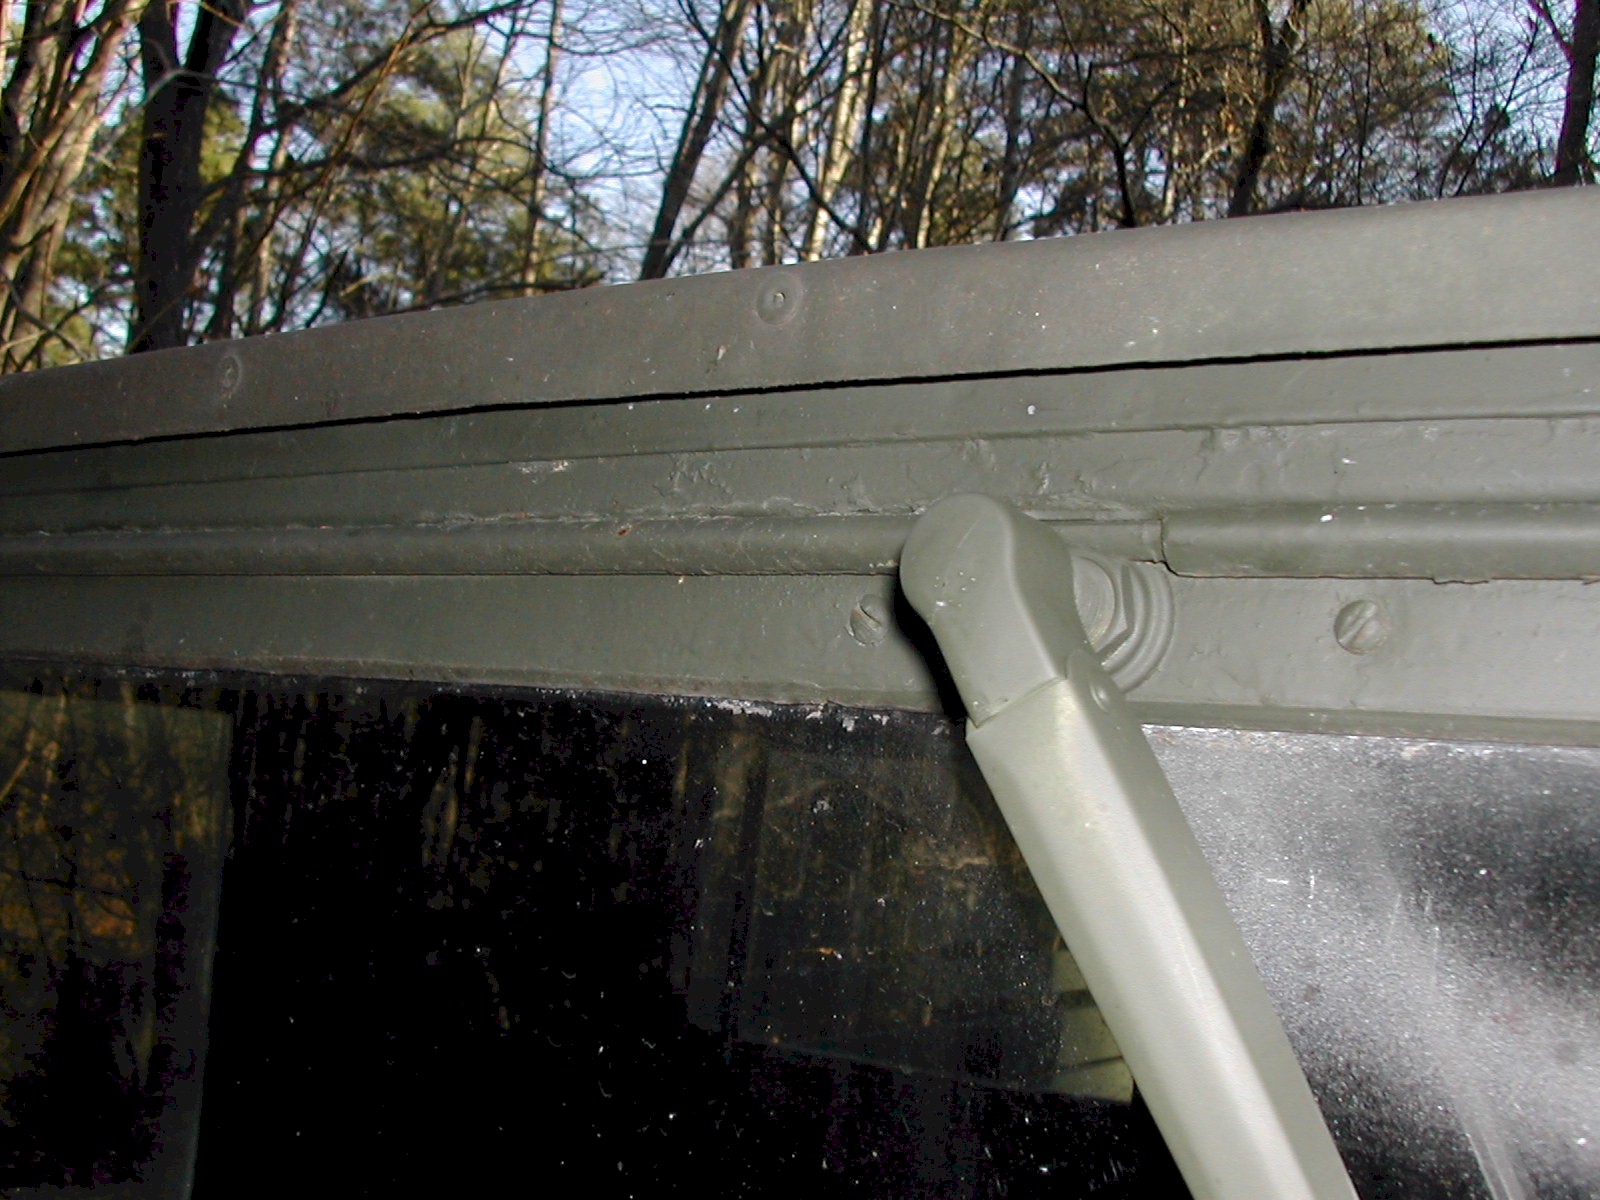
Detail of the notch cut out of the hinge to clear the wiper motor shaft. I also ground a flat spot in the beveled washer that goes between the window frame and the nut on the motor shaft. |
|
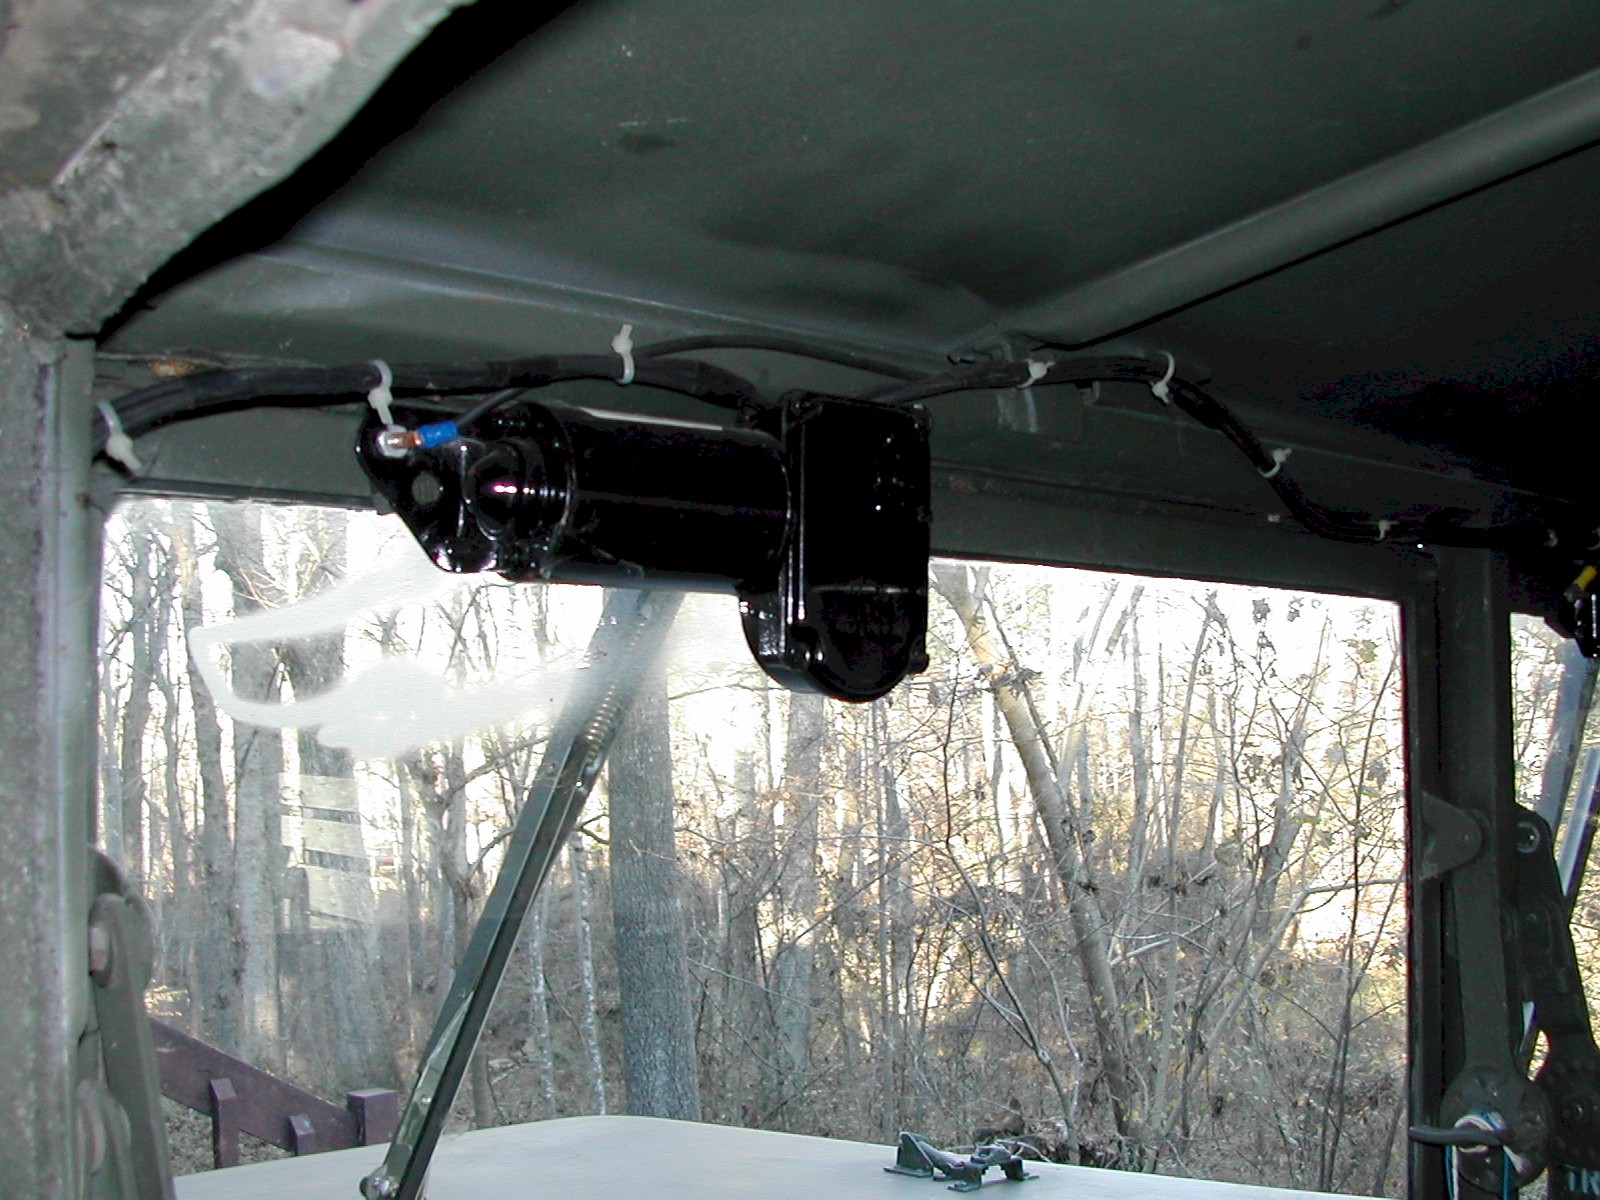
View of the wiper assembly from the inside. Once again, the wiper and motor are not that noticeable when driving... |
|
View of the window assembly from the outside. |
Pin nomenclature for the wiper switch used.
Note that the paper that came in the box
that the SW721025S switch was in stated and "old" and a "new" switch
with numbers of letters describing the pin connections. Apparently, the manufacturer
changed the nomenclature on the back of the switch body at some point in production.
| old switch | new switch | description |
| P | 1 | Park |
| H | 2 | High |
| L | 3 | Low |
| W | W | Washer pump |
| B | B | Battery (12 volt supply) |
Ed sent me a copy of a pdf of the wiper motor technical drawing that the fellow from Diesel Equipment Company emailed to him for the wiper motors described above. He said that it was helpful in identifying the control terminals and mounting dimension info when he installed the units in his USAF M37. PDF is the technical sheet from United Technologies and has dimension, wiring, and performance data. He also told me that the part number for the switch that I have above is different from the one that that he purchased. They gave him a different number (4864040) which is a 2-speed switch with "park". So, here it is for an additional # to refer to if needed when ordering (it seems like switch suppliers change every now and then...). Ed also says that he found it helpful to also get a 5/8" drill bit to make the hole for the shaft and ordered one from McMaster-Carr (www.mcmaster.com using McMaster part #2931A52).